Configuring Apigee for PingAuthorize integration
Install the PingAuth shared flow bundle in Apigee and configure it to integrate with PingAuthorize.
Before you begin
Ensure you have:
-
A supported Apigee environment. The Ping Identity shared flow for Apigee supports Apigee Edge, Apigee Private Cloud, and Apigee X.
-
The PingAuth shared flow bundle
.ziparchive. Download the integration kit for Apigee from the Ping Identity Integration Directory.
Adding the PingAuthorize shared flow to Apigee
Steps
-
Upload the shared flow bundle:
-
In Apigee, go to Develop > Shared Flows and do one of the following:
-
In Apigee X, click Upload Bundle.
-
In Apigee Edge or Apigee Private Cloud, click +Shared Flow, and then click Upload Bundle.
-
-
For the shared flow name, enter
PingAuth. -
In File Picker, select the PingAuth shared flow bundle
.ziparchive. -
Click Create.
-
-
In Apigee X, configure the connection to PingAuthorize.
Skip this step if you’re using Apigee Edge or Apigee Private Cloud.
Apigee X doesn’t support managing the configuration values stored in key-value maps through the Apigee UI. You must add these configuration values to the key-value map policy. The key-value map is created and the configuration values are added the first time the PingAuth shared flow executes at runtime.
-
To access the PingAuth shared flow, go to Develop > Shared Flows > PingAuth.
-
Click the Develop tab and examine Revisions to make sure you’re on the latest revision.
-
In the Policies panel on the left, click the Load KVM Config policy.
-
In the Code panel, remove the comment lines above and below the
InitialEntrieselement. -
Edit the value for
service_host_portto match the host name of your PingAuthorize server instance and the port of the HTTPS connection handler.For example,
pingauthorize:8443.You can find the HTTPS connection handler port from the Configuration page of the PingAuthorize administrative console by going to System > Connection Handlers.
-
Edit the value of
shared_secretto match the shared secret that you created in PingAuthorize. -
Click Save.
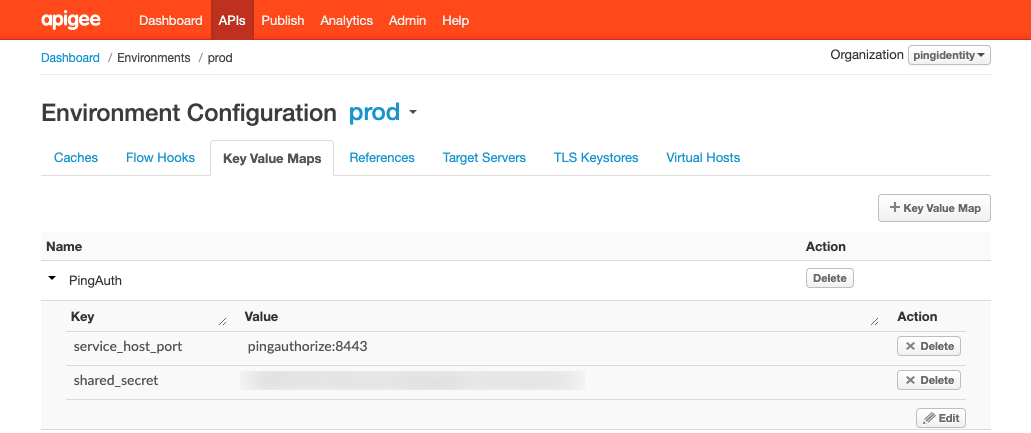
Your flow configuration should look like this:

-
-
In Apigee Edge or Apigee Private Cloud, configure the connection to PingAuthorize.
Apigee Edge stores environment-specific configuration values in key-value maps so that the same policies can be used across multiple deployment environments without any changes to the policies.
-
Go to Environment > Key Value Maps and click +Key Value Map.
-
Edit the key-value map and click Add Entry.
-
Add a
service_host_portkey and set the value to the host name of your PingAuthorize Server instance and the port of the HTTPS connection handler.For example,
pingauthorize:8443. -
Add a
shared_secretkey and set the value to the shared secret that you created in PingAuthorize. -
Click Save.
Your key-value map configuration should look like this:
-
-
(Optional) Configure HTTPS trust for PingAuthorize.
By default, the PingAuth shared flow only trusts the PingAuthorize HTTPS connection handler certificate if the certificate is issued from a well-known certificate authority. To enable Apigee to trust specific HTTPS certificates from PingAuthorize Server:
-
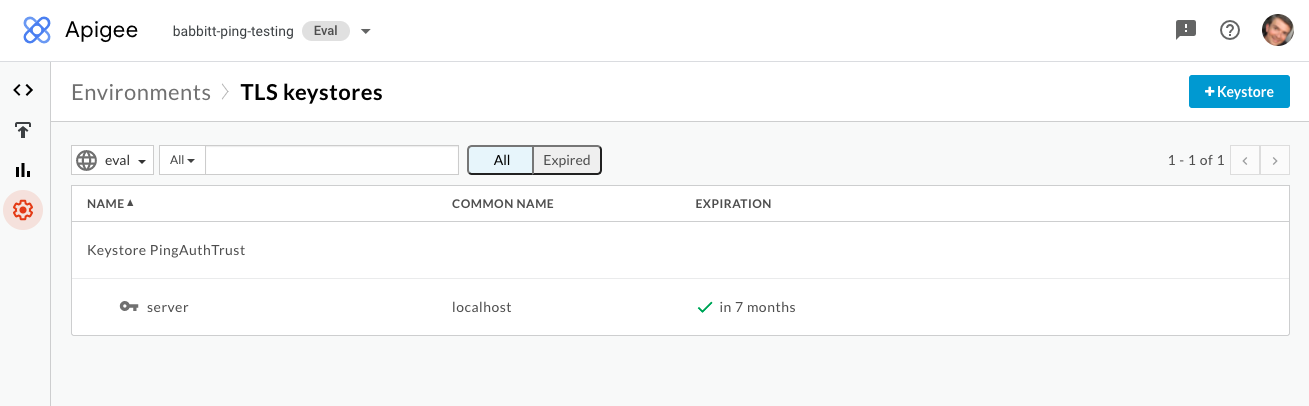
Go to Environment > TLS Keystores and click +Keystore.
-
Give the key store a name that helps you identify your PingAuthorize environment.
For example,
PingAuthorize-dev-truststore. -
Click the button to add a certificate.
-
Enter a certificate alias and upload the certificate configured for the HTTPS connection handler in PingAuthorize.
-
Click Save.
-
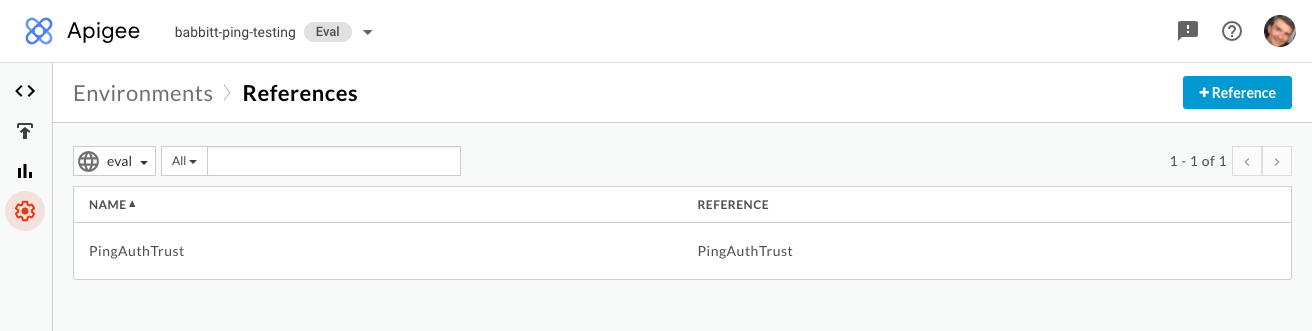
Go to Environment > References and click +Reference.
-
Name the new reference
PingAuthTrust. -
Select the key store that you created previously and click Save.
-
Go to Develop > Shared Flows > PingAuth.
-
On the Develop tab, examine Revisions to make sure you’re on the latest revision.
-
In the Policies panel on the left, click the Sideband Call policy.
-
In the Code panel, remove the comment characters surrounding the
TrustStoreelement.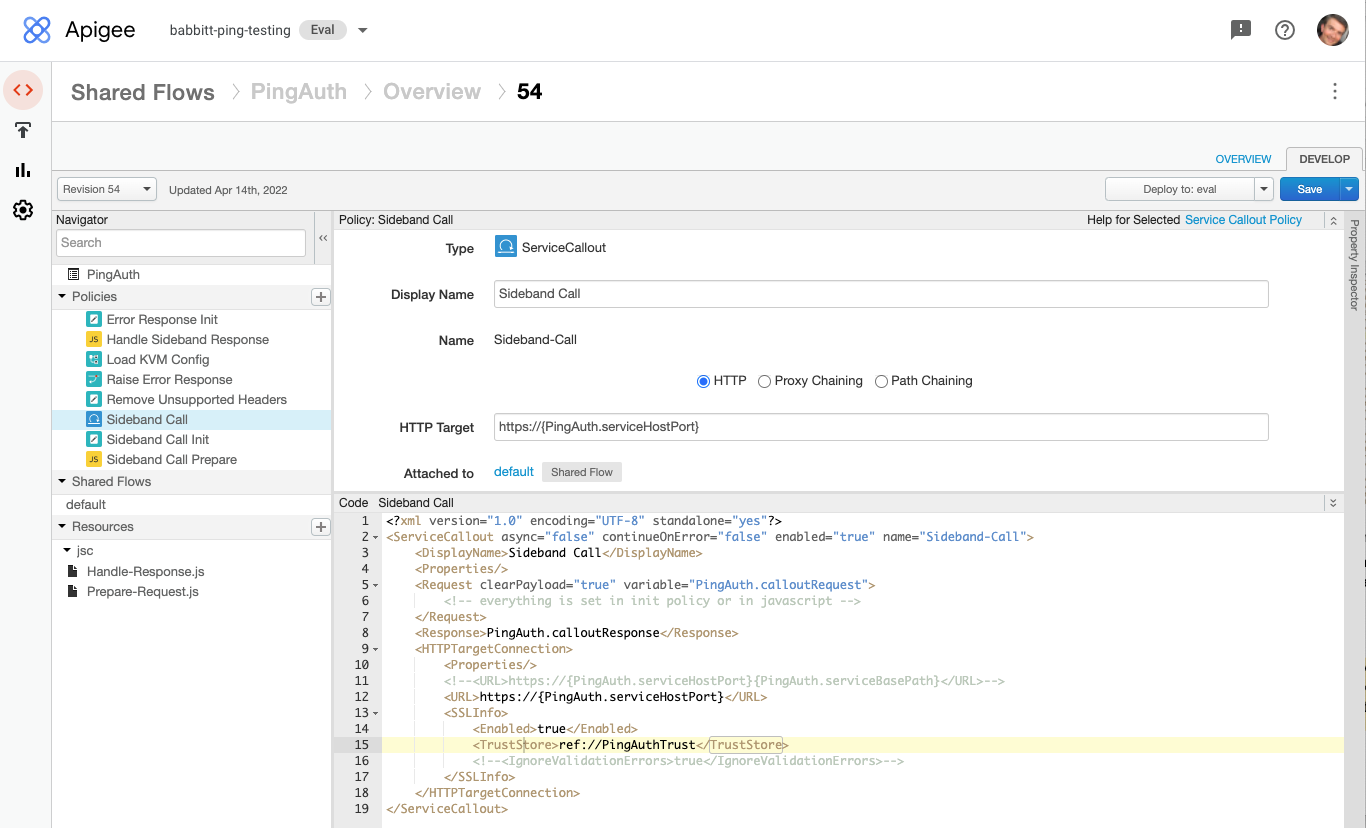
-
Click Save.
-
-
Go to Develop > Shared Flows > PingAuth and deploy the most recent revision to your environment.
Adding an API proxy in Apigee
Configure the API proxy in Apigee to point to the target endpoint that you want to reach.
Steps
-
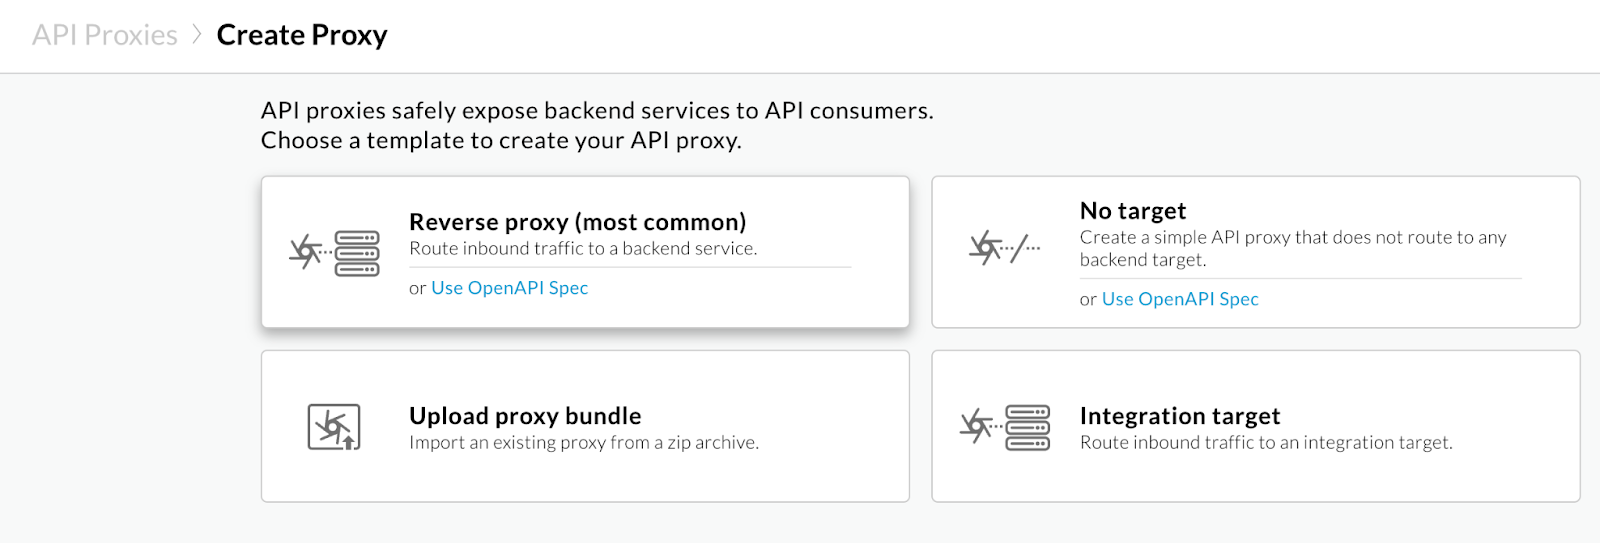
Go to API Proxies > Create Proxy and click the Reverse proxy tile.
-
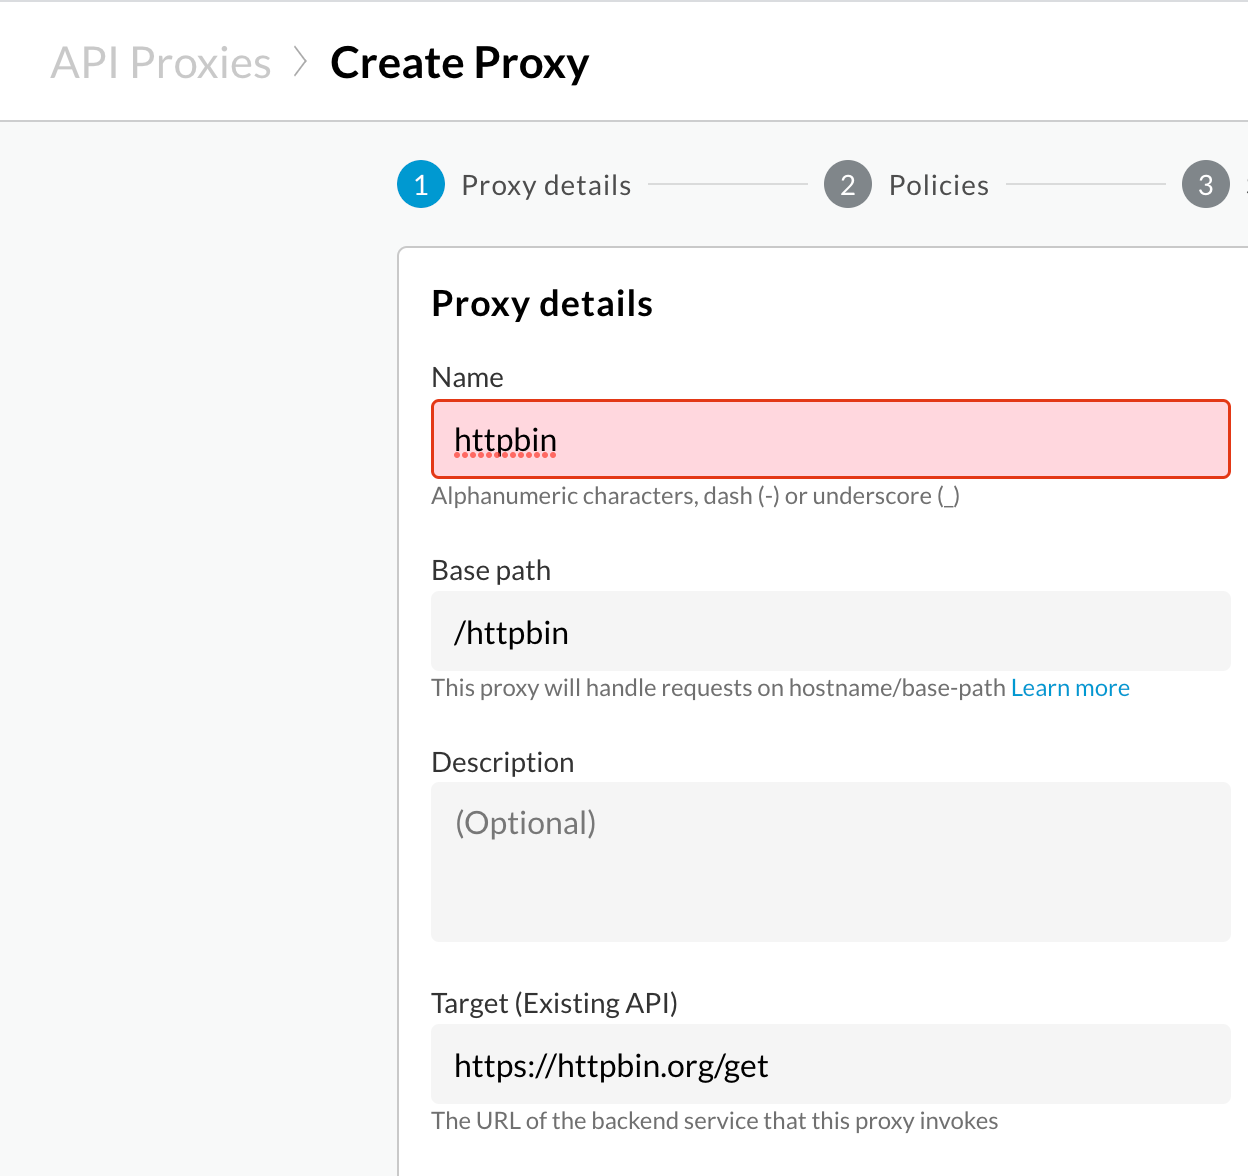
On the Proxy details page, enter the Name, Base path, and Target (Existing API).
-
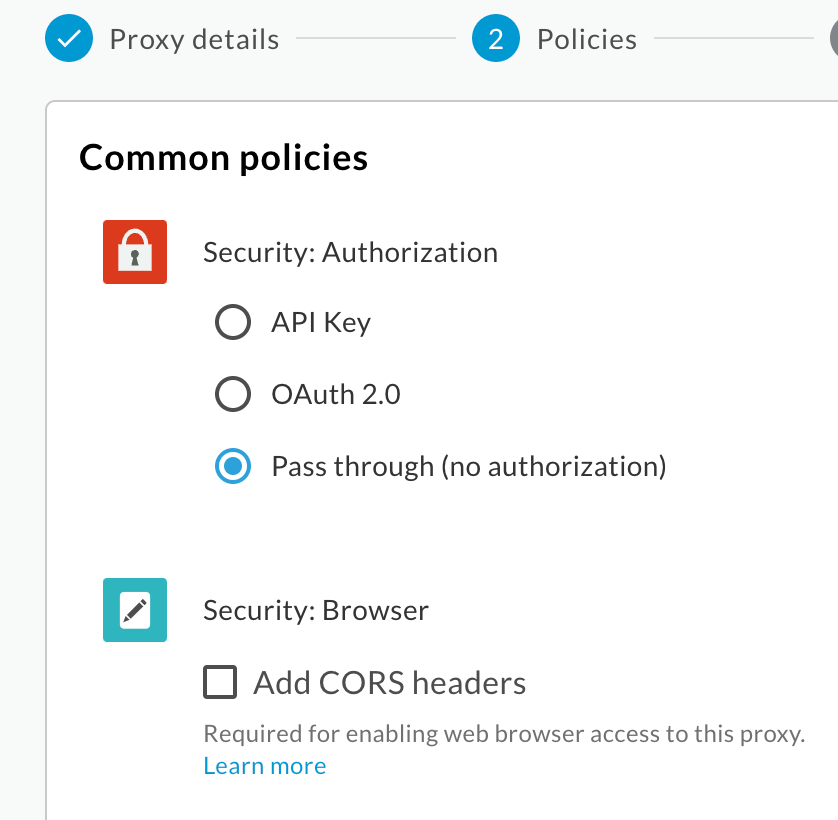
On the Common policies page, click Pass through (no authorization).
-
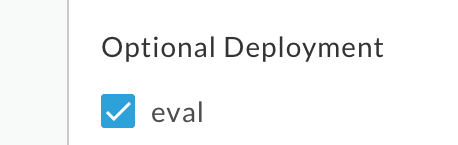
Select the checkbox for your deployment environment.
-
Click Create and Deploy.
Attaching the PingAuthorize shared flow to API proxies
Attach the PingAuth shared flow to the API proxies where you want to use PingAuthorize as the external authorization policy runtime service.
Steps
-
Add a Flow Callout policy:
-
Go to one of your APIs in Develop > API Proxies and click the Develop tab.
Ensure you are on the latest revision of the proxy.
-
In the Policies panel on the left, click the icon.
-
In the Add Policy modal, in the Extension panel on the left, click Flow Callout.
-
Enter a Name for the policy.
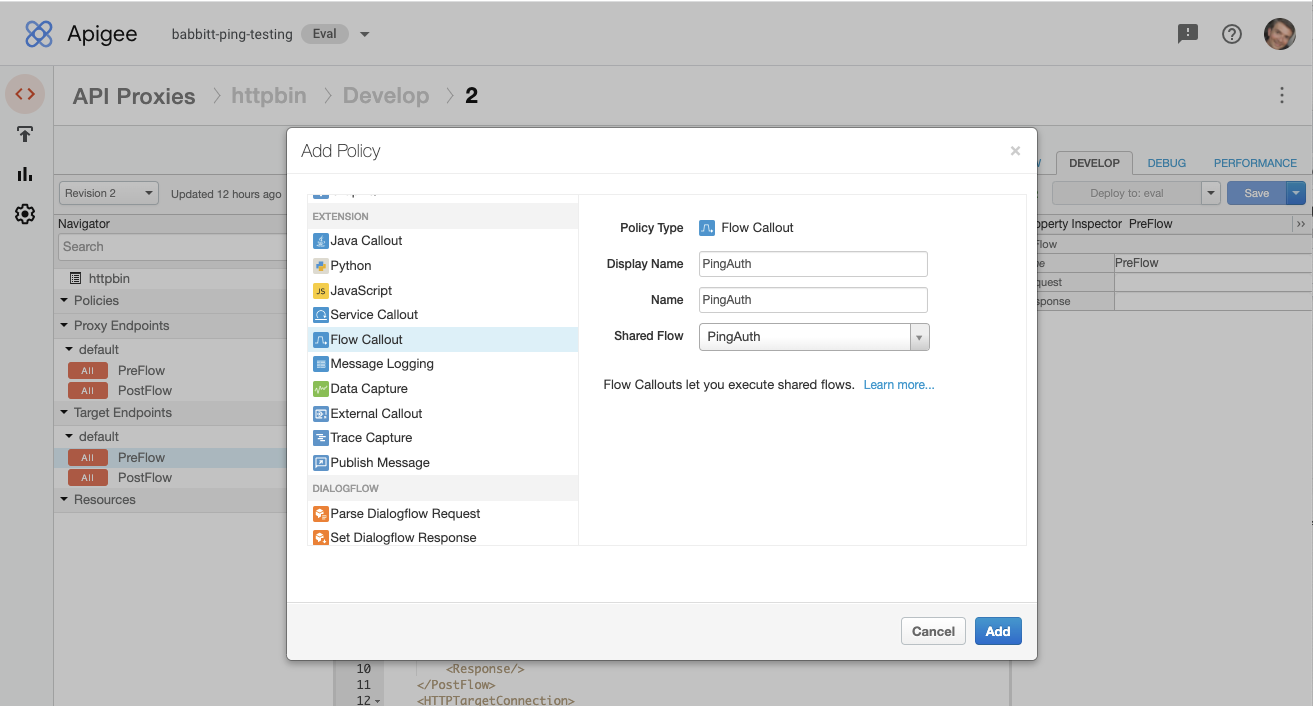
-
In the Shared Flow list, select PingAuth, and then click Add.
-
-
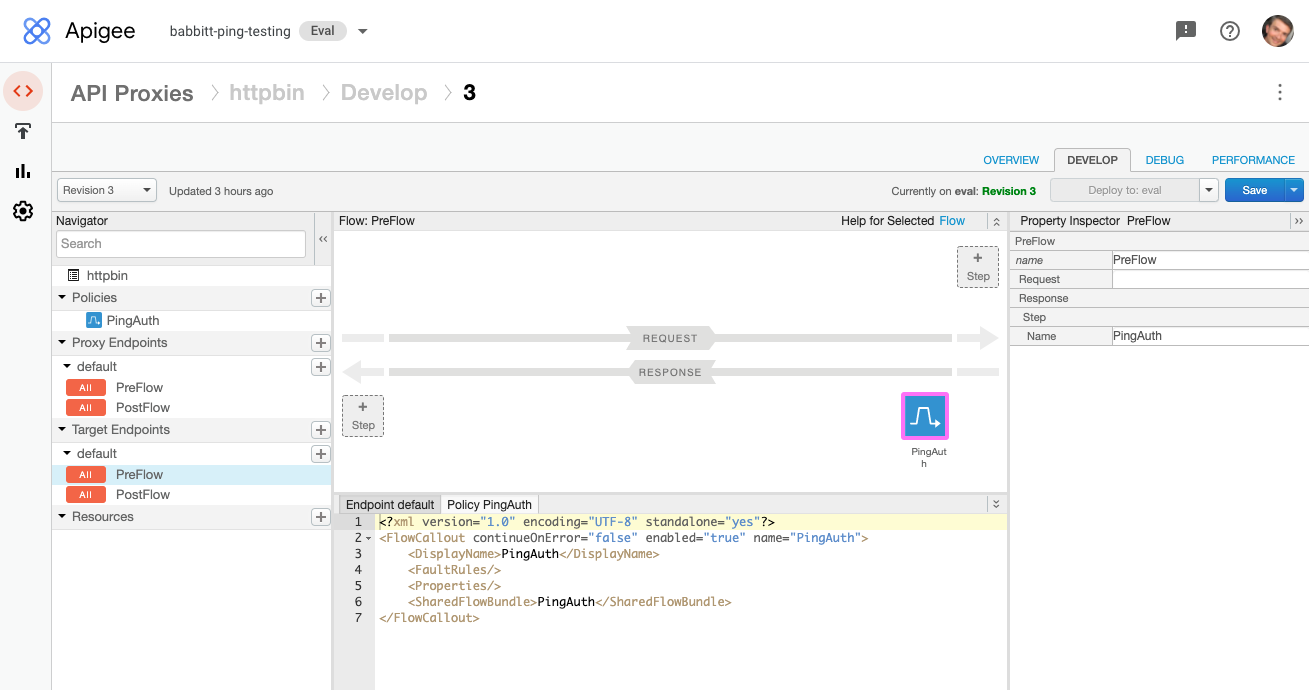
Attach the Flow Callout policy to flows.
Because PingAuthorize provides fine-grained authorization, you should integrate PingAuthorize late in the PreFlow of the request to the proxy endpoint, after coarse-grained authentication and authorization functions. Learn more about other ways to integrate PingAuthorize in Controlling API proxies with flows in the Apigee documentation.
-
In the Proxy Endpoints panel on the left, click PreFlow.
-
In the Request section, click +Step to add a flow step to the request.
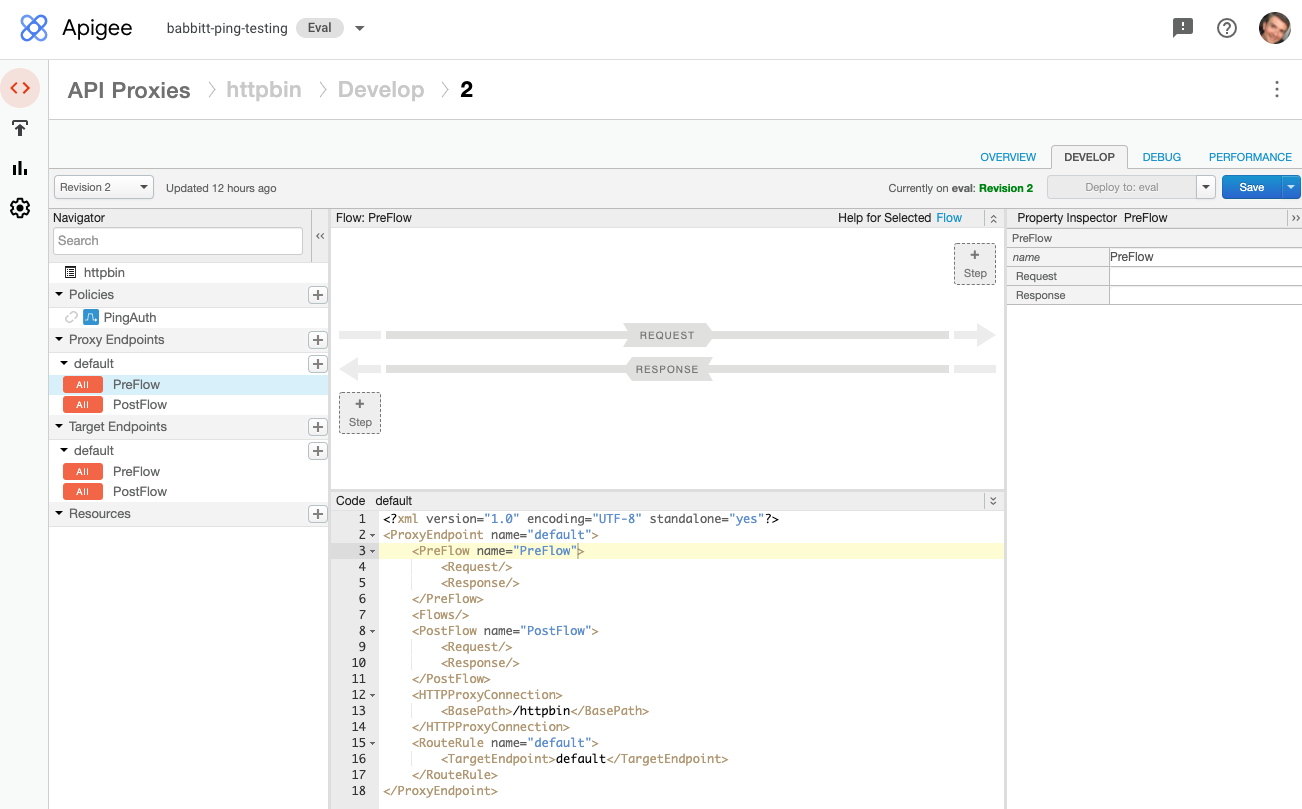
-
In the Add Step modal, click the Existing tab, and then select the Flow Callout policy you created previously.

-
Click Add.
-
In the Target Endpoints panel on the left, select PreFlow.
-
In the Response section, click +Step to add a flow step to the response.
This allows PingAuthorize to process the API response from the target API before it’s processed by Apigee.
-
In the Add Step modal, click the Existing tab, and then select the Flow Callout policy you created previously.
-
-
Save and deploy the updated proxy.
Next steps
Configure fine-grained authorization policies in the PingAuthorize Policy Editor. You can find information on how to target specific API requests and extract other HTTP metadata to use in your policies in Sideband API policy requests.