Setting up Kerberos authentication in PingFederate
Set up a Kerberos authentication adapter in PingFederate for a seamless user authentication experience from a Windows machine to your applications.
This allows your user to access connected applications in PingFederate seamlessly from a domain-joined Windows machine without being prompted for additional authentication credentials. Learn more on PingFederate in Introduction to PingFederate.
Configuring the Active Directory domain/Kerberos realm
Configure an Active Directory (AD) domain/Kerberos realm in PingFederate.
Steps
-
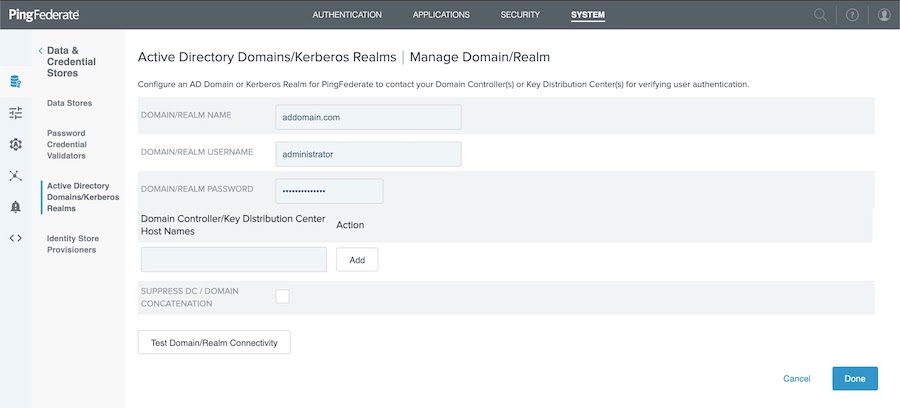
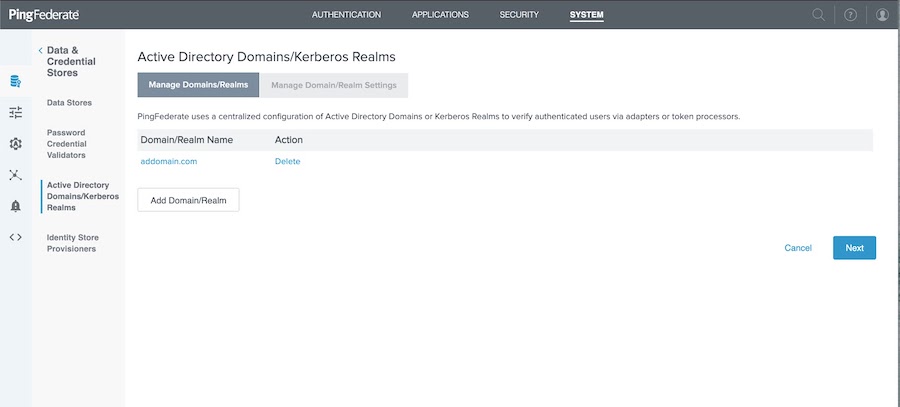
In the PingFederate administrative console, go to System > Data & Credential Stores > Active Directory Domains/Kerberos Realms.
-
Click Add Domain/Realm.
-
In the Domain/Realm Name, Domain/Realm Username, and Domain/Realm Password fields, enter the appropriate information.

-
Click Test Domain/Realm Connectivity to ensure you can establish a connection, and then click Done.
-
On the Manage Domain/Realms tab, click Next.

Configuring the IdP adapter
Configure a new Kerberos adapter instance in PingFederate.
Before you begin
-
Ensure you have an AD domain configured as a datastore in PingFederate that can be used to validate Kerberos tickets.
-
Create a user in Active Directory (AD) who can read from the directory.
Steps
-
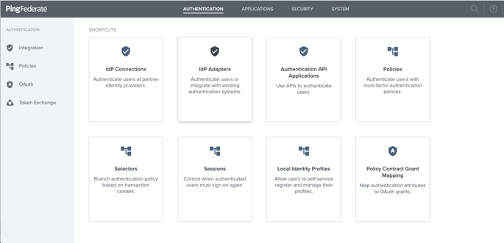
In the PingFederate administrative console, go to Authentication > IdP Adapters.

-
Click Create New Instance.
-
On the Type tab, in the Instance Name and Instance ID fields, enter a name and ID.
-
In the Type list, select Kerberos Adapter, and then click Next.

-
On the IdP Adapter tab, select the Domain/Realm Name you used when adding AD as a datastore.
-
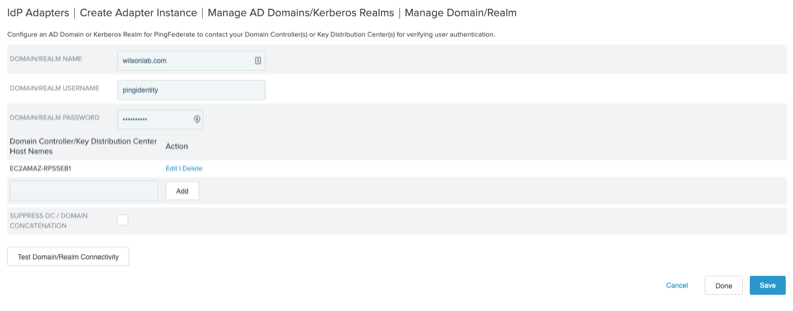
Click Manage Active Directory Domains/Kerberos Realms

-
In the Manage Domain/Realm window, in the Domain/Realm Name, Domain/Realm Username, and Domain/Realm Password fields, enter the information from your AD environment.

-
Click Test Domain/Realm Connectivity to test your connection, then click Done.
-
On the IdP Adapter tab, click Next.
-
On the Extended Contract tab, click Next.
-
On the Adapter Attributes tab, select the Username Pseudonym checkbox. Click Next.

-
On the Adapter Contact Mapping tab, click Next.
-
On the Summary tab, review your entries. Click Save.