Ping SDKs for OIDC login
Introducing the Ping SDKs for OIDC login
The Ping SDKs can help you to login to your authorization server using an OpenID Connect flow, and leveraging the server’s own UI to authenticate your users in your apps.
We call this OIDC login, but it was previously known as centralized login.
With this option, you reuse the same, centralized UI for login requests in multiple apps and sites.
When a user attempts to log in to your app they are redirected to your server’s central login UI. After the user authenticates, they are redirected back to your app.
Changes to authentication journeys or DaVinci flows are immediately reflected in all apps that use OIDC login without the need to rebuild or update the client app.
Likewise, any features your server’s UI supports are also available for use in your web or mobile apps.
Configure the Ping SDKs for OIDC login
The Ping SDKs are designed to be flexible and can be customized to suit many different situations.
Learn more about configuring and customizing the Ping SDKs in the sections below:
Configure OIDC login
You can configure your apps to use your authorization server’s UI or your own web application for login requests.
When a user attempts to log in to your app it redirects them to the central login UI. After the user authenticates, the authorization server redirects them back to your application or site.
Changes to authentication journeys or flows on your authorization server are available to all your apps that use the OIDC login method. Your app does not need to access user credentials directly, just the result of the authentication from the server - usually an access token.
Select your platform below to learn how to configure your app to use OIDC login:
Configure Android apps for OIDC login
This section describes how to configure your Ping SDK for Android application to use centralized login by leveraging the AppAuth library:
-
Add the build dependency to the
build.gradlefile:implementation 'net.openid:appauth:0.11.1' -
Associate your application with the scheme your redirect URIs use.
To ensure that only your app is able to obtain authorization tokens during centralized login we recommend you configure it to use Android App Links.
If you do not want to implement Android App Links, you can instead use a custom scheme for your redirect URIs.
-
Android App Links
-
Custom Scheme
Complete the following steps to configure App Links:
-
In your application, configure the AppAuth library to use the HTTP scheme for capturing redirect URIs, by adding an
<intent-filter>forAppAuth.RedirectUriReceiverActivityto yourAndroidManifest.xml:AndroidManifest.xml<activity android:name="net.openid.appauth.RedirectUriReceiverActivity" android:exported="true" tools:node="replace"> <intent-filter android:autoVerify="true"> <action android:name="android.intent.action.VIEW" /> <category android:name="android.intent.category.DEFAULT" /> <category android:name="android.intent.category.BROWSABLE" /> <data android:scheme="https" /> <data android:host="android.example.com" /> <data android:path="/oauth2redirect" /> </intent-filter> </activity>-
You must set
android:autoVerifytotrue. This instructs Android to verify the against theassetlinks.jsonfile you update in the next step. -
Specify the
scheme,hosts, andpathparameters that will be used in your redirect URIs. The host value must match the domain where you upload theassetlinks.jsonfile.
To learn more about intents, refer to Add intent filters in the Android Developer documentation.
To learn more about redirects and the AppAuth library, refer to Capturing the authorization redirect.
-
-
For Android 11 or higher, add the following to the
AndroidManfest.xmlfile:<queries> <intent> <action android:name="android.intent.action.VIEW" /> <category android:name="android.intent.category.BROWSABLE" /> <data android:scheme="https" /> </intent> </queries> -
Create or update a Digital Asset Links (
assetlinks.json) file that associates your app with the domain.You must host the file in a
.well-knownfolder on the same host that you entered in the intent filter earlier.The file will resemble the following:
https://android.example.com/.well-known/assetlinks.json[ { "relation": [ "delegate_permission/common.handle_all_urls", ], "target": { "namespace": "android_app", "package_name": "com.example.app", "sha256_cert_fingerprints": [ "c4:15:c8:f1:...:fe:ce:d7:37" ] } } ]-
To learn more, refer to Associate your app with your website in the Android Developer documentation.
-
-
Upload the completed file to the domain that matches the host value you configured in the earlier step.
For information on uploading an
assetLinks.jsonfile to an Advanced PingOne Advanced Identity Cloud instance, refer to Upload an Android assetlinks.json file. -
Add the following to the
strings.xmlfile:<string name="forgerock_oauth_redirect_uri" translatable="false">https://android.example.com/oauth2redirect</string> -
Add the App Link to the Redirection URIs property of your OAuth 2.0 client. For example,
https://android.example.com/oauth2redirect
Complete the following steps to configure a custom scheme:
-
Configure the AppAuth library to use the custom scheme for capturing redirect URIs by using either of these two methods:
-
Add the custom scheme your app will use to your
build.gradlefile:android.defaultConfig.manifestPlaceholders = [ 'appAuthRedirectScheme': 'com.forgerock.android' ]
Or:
-
Add an
<intent-filter>forAppAuth.RedirectUriReceiverActivityto yourAndroidManifest.xml:<activity android:name="net.openid.appauth.RedirectUriReceiverActivity" tools:node="replace"> <intent-filter> <action android:name="android.intent.action.VIEW"/> <category android:name="android.intent.category.DEFAULT"/> <category android:name="android.intent.category.BROWSABLE"/> <data android:scheme="com.forgerock.android"/> </intent-filter> </activity>
For more information, refer to Capturing the authorization redirect.
-
-
For Android 11 or higher, add the following to the
AndroidManfest.xmlfile:<queries> <intent> <action android:name="android.intent.action.VIEW" /> <category android:name="android.intent.category.BROWSABLE" /> <data android:scheme="com.forgerock.android" /> </intent> </queries> -
Configure your application to use the redirect URI, either in the
strings.xmlfile, or by usingFROptions:- strings.xml:
-
<string name="forgerock_oauth_redirect_uri" translatable="false">org.forgerock.demo://oauth2redirect</string>
- FROptions:
-
let options = FROptions(
    ...,
    oauthRedirectUri: "org.forgerock.demo://oauth2redirect",
    ...,
)
-
Add the custom scheme to the Redirection URIs property of your OAuth 2.0 client. For example,
org.forgerock.demo://oauth2redirect
-
-
Configure your application to use browser mode:
// Use FRUser.browser() to enable browser mode:
FRUser.browser().login(context, new FRListener<FRUser>());

// Use standard SDK interface to retrieve an AccessToken:
FRUser.getCurrentUser().getAccessToken()

// Use standard SDK interface to logout a user:
FRUser.getCurrentUser().logout()
The SDK uses the OAuth 2.0 parameters you configured in your application.
You can amend the example code above to customize the integration with AppAuth; for example, adding OAuth 2.0 or OpenID Connect parameters, and browser colors:
 FRUser.browser().appAuthConfigurer()
     .authorizationRequest(r -> {
         // Add a login hint parameter about the user:
         r.setLoginHint("demo@example.com");
         // Request that the user re-authenticates:
         r.setPrompt("login");
     })
     .customTabsIntent(t -> {
         // Customize the browser:
         t.setShowTitle(true);
         t.setToolbarColor(getResources().getColor(R.color.colorAccent));
     }).done()
     .login(this, new FRListener<FRUser>() {
         @Override
         public void onSuccess(FRUser result) {
             //success
         }

         @Override
         public void onException(Exception e) {
             //fail
         }
     });
Configure iOS apps for OIDC login
This section describes how to configure your Ping SDK for iOS application to use centralized login:
-
Associate your application with the scheme your redirect URIs use.
To ensure that only your app is able to obtain authorization tokens during centralized login we recommend you configure it to use Universal Links.
If you do not want to implement Universal Links, you can instead use a custom scheme for your redirect URIs.
-
Apple Universal Links
-
Custom scheme
Complete the following steps to configure Universal Links:
-
In Xcode, in the Project Navigator, double-click your application to open the Project pane.
-
On the Signing & Capabilities tab, click Capability, type
Associated Domains, and then double click the result to add the capability. -
In Domains, click the Add () button, and enter
applinks:, followed by the hostname that will be used in your redirect URIs.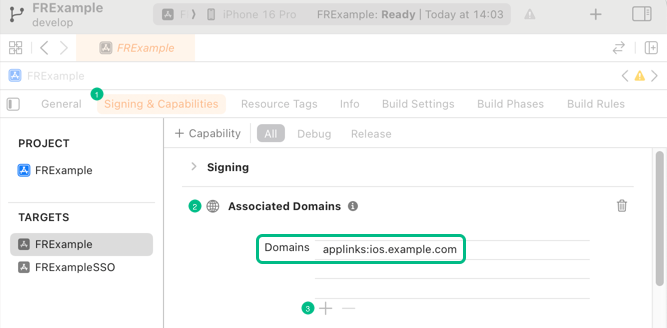
The host value must match the domain where you upload the
apple-app-site-associationfile. -
Create or update an
apple-app-site-associationfile that associates your app with the domain.You must host the file in a
.well-knownfolder on the same host that you entered in the intent filter earlier.The file will resemble the following:
https://ios.example.com/.well-known/apple-app-site-association{ "applinks": { "details": [ { "appIDs": [ "XXXXXXXXXX.com.example.AppName" ], "components": [ { "/": "/oauth2redirect", "comment": "Associate my app with the OAuth 2.0 redirect URI." } ] } ] } } -
Upload the completed file to the domain that matches the host value you configured in the earlier step.
For information on uploading an
apple-app-site-associationfile to an Advanced PingOne Advanced Identity Cloud instance, refer to Upload an iOS apple-app-site-association file.For learn more information about Universal Links and associating domains, refer to the following in the Apple Developer documentation:
-
Add the Universal Link to the Redirection URIs property of your OAuth 2.0 client. For example,
https://ios.example.com/oauth2redirect
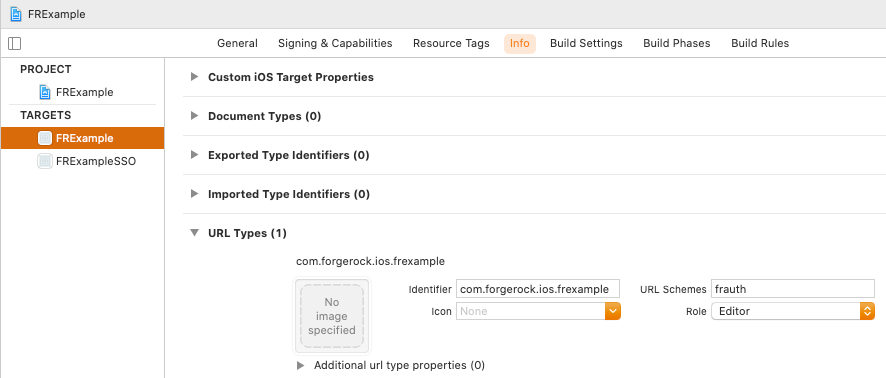
Configure a custom URL type, for example
frauth, so that users are redirected to your application:-
In Xcode, in the Project Navigator, double-click your application to open the Project pane.
-
On the Info tab, in the URL Types panel, configure your custom URL scheme:
-
Add the custom URL scheme to the Redirection URIs property of your OAuth 2.0 client:

-
-
Update your application to call the
validateBrowserLogin()function:-
In your
AppDelegate.swiftfile, call thevalidateBrowserLogin()function:AppDelegate.swiftclass AppDelegate: UIResponder, UIApplicationDelegate { func application(_ app: UIApplication, open url: URL, options: [UIApplication.OpenURLOptionsKey: Any] = [:]) -> Bool { // Parse and validate URL, extract authorization code, and continue the flow: Browser.validateBrowserLogin(url) } } -
If you are using Universal Links, also add code similar to the following to set the URL:
AppDelegate.swiftfunc application( _ application: UIApplication, continue userActivity: NSUserActivity, restorationHandler: @escaping ([UIUserActivityRestoring]?) -> Void) -> Bool { // Get URL components from the incoming user activity. guard userActivity.activityType == NSUserActivityTypeBrowsingWeb, let incomingURL = userActivity.webpageURL else { return false } Browser.validateBrowserLogin(url) } ) -
If your application is using
SceneDelegate, in yourSceneDelegate.swiftfile call thevalidateBrowserLogin()function:SceneDelegate.swiftclass SceneDelegate: UIResponder, UIWindowSceneDelegate { func scene(_ scene: UIScene, openURLContexts URLContexts: Set<UIOpenURLContext>) { if let url = URLContexts.first?.url { Browser.validateBrowserLogin(url) } } }
-
-
To enable centralized login, add code similar to the following to your app:
//  BrowserBuilder
let browserBuilder = FRUser.browser()
browserBuilder.set(presentingViewController: self)
browserBuilder.set(browserType: .authSession)
browserBuilder.setCustomParam(key: "custom_key", value: "custom_val")

//  Browser
let browser = browserBuilder.build()

// Login
browser.login{ (user, error) in
  if let error = error {
    // Handle error
  }
  else if let user = user {
    // Handle authenticated status
  }
}
You can specify what type of browser the client iOS device opens to handle centralized login.
Each browser has slightly different characteristics, which make them suitable to different scenarios, as outlined in this table:
Browser type Characteristics .authSessionOpens a web authentication session browser.
Designed specifically for authentication sessions, however it prompts the user before opening the browser with a modal that asks them to confirm the domain is allowed to authenticate them.
This is the default option in the Ping SDK for iOS.
.ephemeralAuthSessionOpens a web authentication session browser, but enables the
prefersEphemeralWebBrowserSessionparameter.This browser type does not prompt the user before opening the browser with a modal.
The difference between this and
.authSessionis that the browser does not include any existing data such as cookies in the request, and also discards any data obtained during the browser session, including any session tokens.When is
ephemeralAuthSessionsuitable:-
ephemeralAuthSessionis not suitable when you require single sign-on (SSO) between your iOS apps, as the browser will not maintain session tokens. -
ephemeralAuthSessionis not suitable when you require a session token to log a user out of the server, for example for logging out of PingOne, as the browser will not maintain session tokens. -
Use
ephemeralAuthSessionwhen you do not want the user’s existing sessions to affect the authentication.
.nativeBrowserAppOpens the installed browser that is marked as the default by the user. Often Safari.
The browser opens without any interaction from the user. However, the browser does display a modal when returning to your application.
.sfViewControllerOpens a Safari view controller browser.
Your client app is not able to interact with the pages in the
sfViewControlleror access the data or browsing history.The view controller opens within your app without any interaction from the user. As the user does not leave your app, the view controller does not need to display a warning modal when authentication is complete and control returns to your application.
-
Configure JavaScript apps for OIDC login
This section describes how to configure your Ping SDK for JavaScript application with centralized login:
-
To initiate authentication by redirecting to the centralized login UI, add a
loginproperty that specifies how authentication happens in your app:const tokens = TokenManager.getTokens({ forceRenew: false, // Immediately return stored tokens, if they exist login: 'redirect' // Redirect to {am_name} or the web app that handles authentication });Supported values are as follows:
Setting Description redirectYour app uses a redirect to PingAM, or another web application, to handle authentication.
embeddedYour app handles authentication natively, using SDK functionality.
If you do not specify a value,
embeddedis assumed, for backwards-compatibility. -
When the user is returned to your app, complete the OAuth 2.0 flow by passing in the
codeandstatevalues that were returned.Use the
queryproperty to complete the flow:const tokens = TokenManager.getTokens({ query: { code: 'lFJQYdoQG1u7nUm8 ... ', // Authorization code from redirect URL state: 'MTY2NDkxNTQ2Nde3D ... ', // State from redirect URL }, });
Specifying authentication journeys using ACR values
The Ping SDKs for Android, iOS, and JavaScript leverage the standards-based authorization code flow with PKCE.
When using OIDC login the client app can request which flow the authorization server uses by adding an Authentication Context Class Reference (ACR) parameter during the process.
In the OpenID Connect specification the ACR parameter identifies a set of criteria that the user must satisfy when authenticating to the OpenID provider. For example, which authentication journey or DaVinci flow the user should complete.
Adding ACR parameters
Select your platform below to learn how to add an ACR parameter to your applications.
-
Android
-
iOS
-
JavaScript
In the FRUser.browser() method, use the setAdditionalParameters function to add an acr_values parameter, and one or more ACR values:
FRUser.browser().appAuthConfigurer()
 .authorizationRequest(r → {
     Map<String, String> additionalParameters = new HashMap<>();
     additionalParameters.put("acr_values", "RegistrationJourney");
     r.setAdditionalParameters(additionalParameters)
 })
 .done()
 .login(this, new FRListener<FRUser>() {
     @Override
     public void onSuccess(FRUser result) {
         userinfo();
     }

     @Override
     public void onException(Exception e) {
         System.out.println(e);
     }
 });
Replace RegistrationJourney with the ACR key that your authorization server requires.
- PingOne
-
Enter a single DaVinci policy, by using its flow policy ID, or one or more PingOne policies by specifying the policy names, separated by spaces or the encoded space character
%20.Examples:
- DaVinci flow policy ID
-
"d1210a6b0b2665dbaa5b652221badba2" - PingOne policy names
-
"Single_Factor%20Multi_Factor"
- PingOne Advanced Identity Cloud or PingAM
-
Enter one or more of the ACR mapping keys as configured in the OAuth 2.0 provider service.
To learn more, refer to Configure acr claims.
You can list the available keys by inspecting the acr_values_supportedproperty in the output of your OAuth 2.0 client’s/oauth2/.well-known/openid-configurationendpoint.
In the FRUser.browser() method, use the setCustomParam function to add an acr_values key parameter, and one or more ACR values:
func performCentralizedLogin() {
     FRUser.browser()?
         .set(presentingViewController: self)
         .set(
            browserType: .authSession)
         #.setCustomParam(
            key: "acr_values",
            value: "RegistrationJourney")
         .build().login { (user, error) in
             self.displayLog("User: \(String(describing: user)) || Error: \(String(describing: error))")
     }
     return
 }
Replace RegistrationJourney with the ACR key that your authorization server requires.
- PingOne
-
Enter a single DaVinci policy, by using its flow policy ID, or one or more PingOne policies by specifying the policy names, separated by spaces or the encoded space character
%20.Examples:
- DaVinci flow policy ID
-
"d1210a6b0b2665dbaa5b652221badba2" - PingOne policy names
-
"Single_Factor%20Multi_Factor"
- PingOne Advanced Identity Cloud or PingAM
-
Enter one or more of the ACR mapping keys as configured in the OAuth 2.0 provider service.
To learn more, refer to Configure acr claims.
You can list the available keys by inspecting the acr_values_supportedproperty in the output of your OAuth 2.0 client’s/oauth2/.well-known/openid-configurationendpoint.
In the TokenManager.getTokens() method, add an acr_values query parameter, and one or more ACR values:
await TokenManager.getTokens({
  login: 'redirect',
  query: {
    acr_values: "RegistrationJourney"
  }
});
Replace RegistrationJourney with the ACR key that your authorization server requires.
- PingOne
-
Enter a single DaVinci policy, by using its flow policy ID, or one or more PingOne policies by specifying the policy names, separated by spaces or the encoded space character
%20.Examples:
- DaVinci flow policy ID
-
"d1210a6b0b2665dbaa5b652221badba2" - PingOne policy names
-
"Single_Factor%20Multi_Factor"
- PingOne Advanced Identity Cloud or PingAM
-
Enter one or more of the ACR mapping keys as configured in the OAuth 2.0 provider service.
To learn more, refer to Configure acr claims.
You can list the available keys by inspecting the acr_values_supportedproperty in the output of your OAuth 2.0 client’s/oauth2/.well-known/openid-configurationendpoint.
Ping SDK OIDC login tutorials
Learn how your apps can authenticate users with an OpenID Connect flow.
The tutorials show how your apps can leverage the user interface each server provides, centralizing the experience across your apps.
To start, choose the platform to host your app:
Android OIDC login tutorials
Follow these Android tutorials to integrate your apps using OpenID Connect login to the following servers:


OIDC login to PingOne tutorial for Android
In this tutorial you update a sample app that uses OIDC-based login to obtain tokens by redirecting to the PingOne UI for authentication.
The sample connects to the .well-known endpoint of your PingOne server to obtain the correct URIs to authenticate the user, and redirects to your PingOne server’s login UI.
After authentication, PingOne redirects the browser back to your application, which then obtains an OAuth 2.0 access token and displays the related user information.
Before you begin
To successfully complete this tutorial refer to the prerequisites in this section.
The tutorial also requires a configured PingOne instance.
Compatibility
- Android
-
This sample requires at least Android API 23 (Android 6.0)
- Java
-
This sample requires at least Java 8 (v1.8).
Prerequisites
- Android Studio
-
Download and install Android Studio, which is available for many popular operating systems.
- An Android emulator or physical device
-
To try the quick start application as you develop it, you need an Android device. To add a virtual, emulated Android device to Android Studio, refer to Create and manage virtual devices, on the Android Developers website.
Server configuration
This tutorial requires you to configure your PingOne server as follows:
Task 1. Create a demo user
The samples and tutorials in this documentation often require that you have an identity set up so that you can test authentication.
To create a demo user in PingOne, follow these steps:
-
Log in to your PingOne administration console.
-
In the left panel, navigate to Directory > Users.
-
Next to the Users label, click the plus icon ().
PingOne displays the Add User panel.
-
Enter the following details:
-
Given Name =
Demo -
Family Name =
User -
Username =
demo -
Email =
demo.user@example.com -
Population =
Default -
Password =
Ch4ng3it!
-
-
Click Save.
Task 2. Register a public OAuth 2.0 client
To register a public OAuth 2.0 client application in PingOne for use with the Ping SDKs for Android and iOS, follow these steps:
-
Log in to your PingOne administration console.
-
In the left panel, navigate to Applications > Applications.
-
Next to the Applications label, click the plus icon ().
PingOne displays the Add Application panel.
-
In Application Name, enter a name for the profile, for example
sdkNativeClient -
Select Native as the Application Type, and then click Save.
-
On the Configuration tab, click the pencil icon ().
-
In Grant Type, select the following values:
Authorization CodeRefresh Token -
In Redirect URIs, enter the following value:
org.forgerock.demo://oauth2redirect -
In Token Endpoint Authentication Method, select
None. -
In the Advanced Settings section, enable Terminate User Session by ID Token.
-
Click Save.
-
-
On the Resources tab, next to Allowed Scopes, click the pencil icon ().
-
In Scopes, select the following values:
emailphoneprofileThe openidscope is selected by default.The result resembles the following:
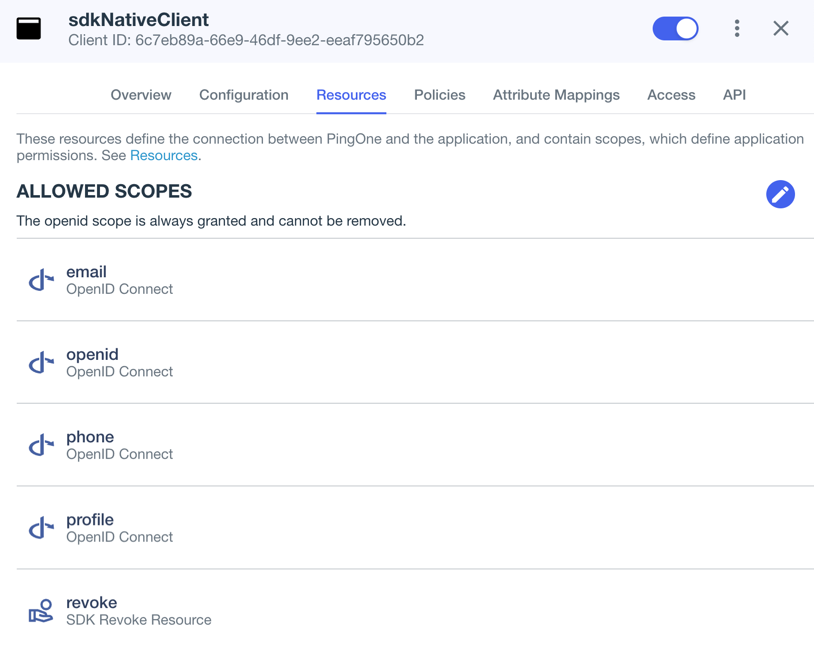 Figure 2. Adding scopes to an application.
-
-
Optionally, on the Policies tab, click the pencil icon () to select the authentication policies for the application.
Applications that have no authentication policy assignments use the environment’s default authentication policy to authenticate users.
If you have a DaVinci license, you can select PingOne policies or DaVinci Flow policies, but not both. If you do not have a DaVinci license, the page only displays PingOne policies.
To use a PingOne policy:
-
Click Add policies and then select the policies that you want to apply to the application.
-
Click Save.
PingOne applies the policies in the order in which they appear in the list. PingOne evaluates the first policy in the list first. If the requirements are not met, PingOne moves to the next one.
For more information, see Authentication policies for applications.
To use a DaVinci Flow policy:
-
You must clear all PingOne policies. Click Deselect all PingOne Policies.
-
In the confirmation message, click Continue.
-
On the DaVinci Policies tab, select the policies that you want to apply to the application.
-
Click Save.
PingOne applies the first policy in the list.
-
-
Click Save.
-
Enable the OAuth 2.0 client application by using the toggle next to its name:
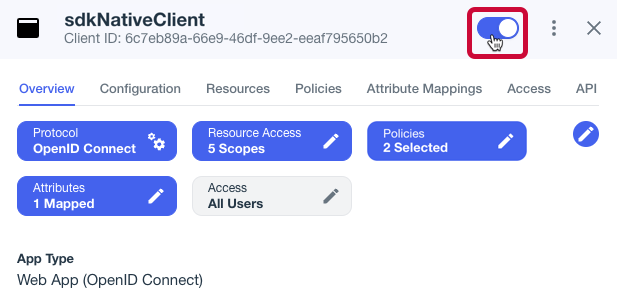 Figure 3. Enable the application using the toggle.
The application is now configured to accept client connections from and issue OAuth 2.0 tokens to the Android and iOS PingOne example applications and tutorials covered by this documentation.
Step 1. Download the samples
To start this tutorial, you need to download the ForgeRock SDK sample apps repo, which contains the projects you will use.
-
In a web browser, navigate to the SDK Sample Apps repository.
-
Download the source code using one of the following methods:
- Download a ZIP file
-
-
Click Code, and then click Download ZIP.
-
Extract the contents of the downloaded ZIP file to a suitable location.
-
- Use a Git-compatible tool to clone the repo locally
-
-
Click Code, and then copy the HTTPS URL.
-
Use the URL to clone the repository to a suitable location.
For example, from the command-line you could run:
-
The result of these steps is a local folder named sdk-sample-apps.
Step 2. Configure connection properties
In this step, you configure the "kotlin-ui-prototype" sample to connect to the OAuth 2.0 application you created in PingOne, using OIDC login.
-
In Android Studio, open the
sdk-sample-apps/android/kotlin-ui-prototypeproject you cloned in the previous step. -
In the Project pane, switch to the Android view.
-
In the Android view, navigate to app > kotlin+java > com.example.app > env, and open
EnvViewModel.kt.This file contains the server environments the sample app can use. Each specifies the properties using the
FROptionsBuilder.buildmethod. -
Add the following after any existing environments, with a suitable name. For example, you could use the name of the OAuth 2.0 client, sdkNativeClient:
val sdkNativeClient = FROptionsBuilder.build {
    server {
        url = "<PingOne Issuer URL>"
    }
    oauth {
        oauthClientId = "<PingOne Client ID>"
        oauthRedirectUri = "org.forgerock.demo://oauth2redirect"
        oauthSignOutRedirectUri = "org.forgerock.demo://oauth2redirect"
        oauthScope = "openid profile email address revoke"
    }
}
Replace the following strings with the values you obtained when you registered an OAuth 2.0 application for native mobile apps in PingOne.
- <PingOne Client ID>
-
The client ID from your OAuth 2.0 native mobile application in PingOne.
For example,
6c7eb89a-66e9-ab12-cd34-eeaf795650b2 - <PingOne Issuer URL>
-
The
Issuerendpoint from your OAuth 2.0 application in PingOne.For example,
https://auth.pingone.com/3072206d-c6ce-ch15-m0nd-f87e972c7cc3/asThe issuer URL is the same as the OIDC Discovery Endpoint, after removing /.well-known/openid-configuration.
The result resembles the following:
val sdkNativeClient = FROptionsBuilder.build { server { url = "https://auth.pingone.com/3072206d-c6ce-ch15-m0nd-f87e972c7cc3/as" } oauth { oauthClientId = "6c7eb89a-66e9-ab12-cd34-eeaf795650b2" oauthRedirectUri = "org.forgerock.demo://oauth2redirect" oauthSignOutRedirectUri = "org.forgerock.demo://oauth2redirect" oauthScope = "openid profile email address revoke" } } -
In the
initobject, add your configuration to the list of servers available to the app:The result resembles the following:
init { servers.add(localhost) // ... servers.add(sdkNativeClient) } -
Optionally, specify which of the configured policies PingOne uses to authenticate users.
In
/app/kotlin+java/com.example.app/centralize/CentralizeLoginViewModel, in thelogin(fragmentActivity: FragmentActivity)function, add anacr_valuesparameter to the authorization request by using thesetAdditionalParameters()method:fun login(fragmentActivity: FragmentActivity) { FRUser.browser().appAuthConfigurer() // Add acr values to the authorization request .authorizationRequest{ it.setAdditionalParameters( mapOf( "acr_values" to "<Policy IDs>" ) ) } .customTabsIntent { it.setColorScheme(CustomTabsIntent.COLOR_SCHEME_DARK) }.appAuthConfiguration { appAuthConfiguration → } .done() .login(fragmentActivity, object : FRListener<FRUser> { override fun onSuccess(result: FRUser) { state.update { it.copy(user = result, exception = null) } } override fun onException(e: Exception) { state.update { it.copy(user = null, exception = e) } } } ) }Replace <Policy IDs> with either a single DaVinci policy, by using its flow policy ID, or one or more PingOne policies by specifying the policy names, separated by spaces or the encoded space character
%20.Examples:
- DaVinci flow policy ID
-
"acr_values" to "d1210a6b0b2665dbaa5b652221badba2" - PingOne policy names
-
"acr_values" to "Single_Factor%20Multi_Factor"
For more information, refer to Editing an application - OIDC.
With the sample configured, you can proceed to Step 3. Test the app.
Step 3. Test the app
In the following procedure, you run the sample app that you configured in the previous step. The app performs a centralized login on your PingOne instance.
Log in as a demo user
-
In Android Studio, select .
-
On the Environment screen, ensure the PingOne environment you added in the previous step is selected.
 Figure 4. Select the PingOne environment
 -
Tap the menu icon (), and then tap Centralize Login:
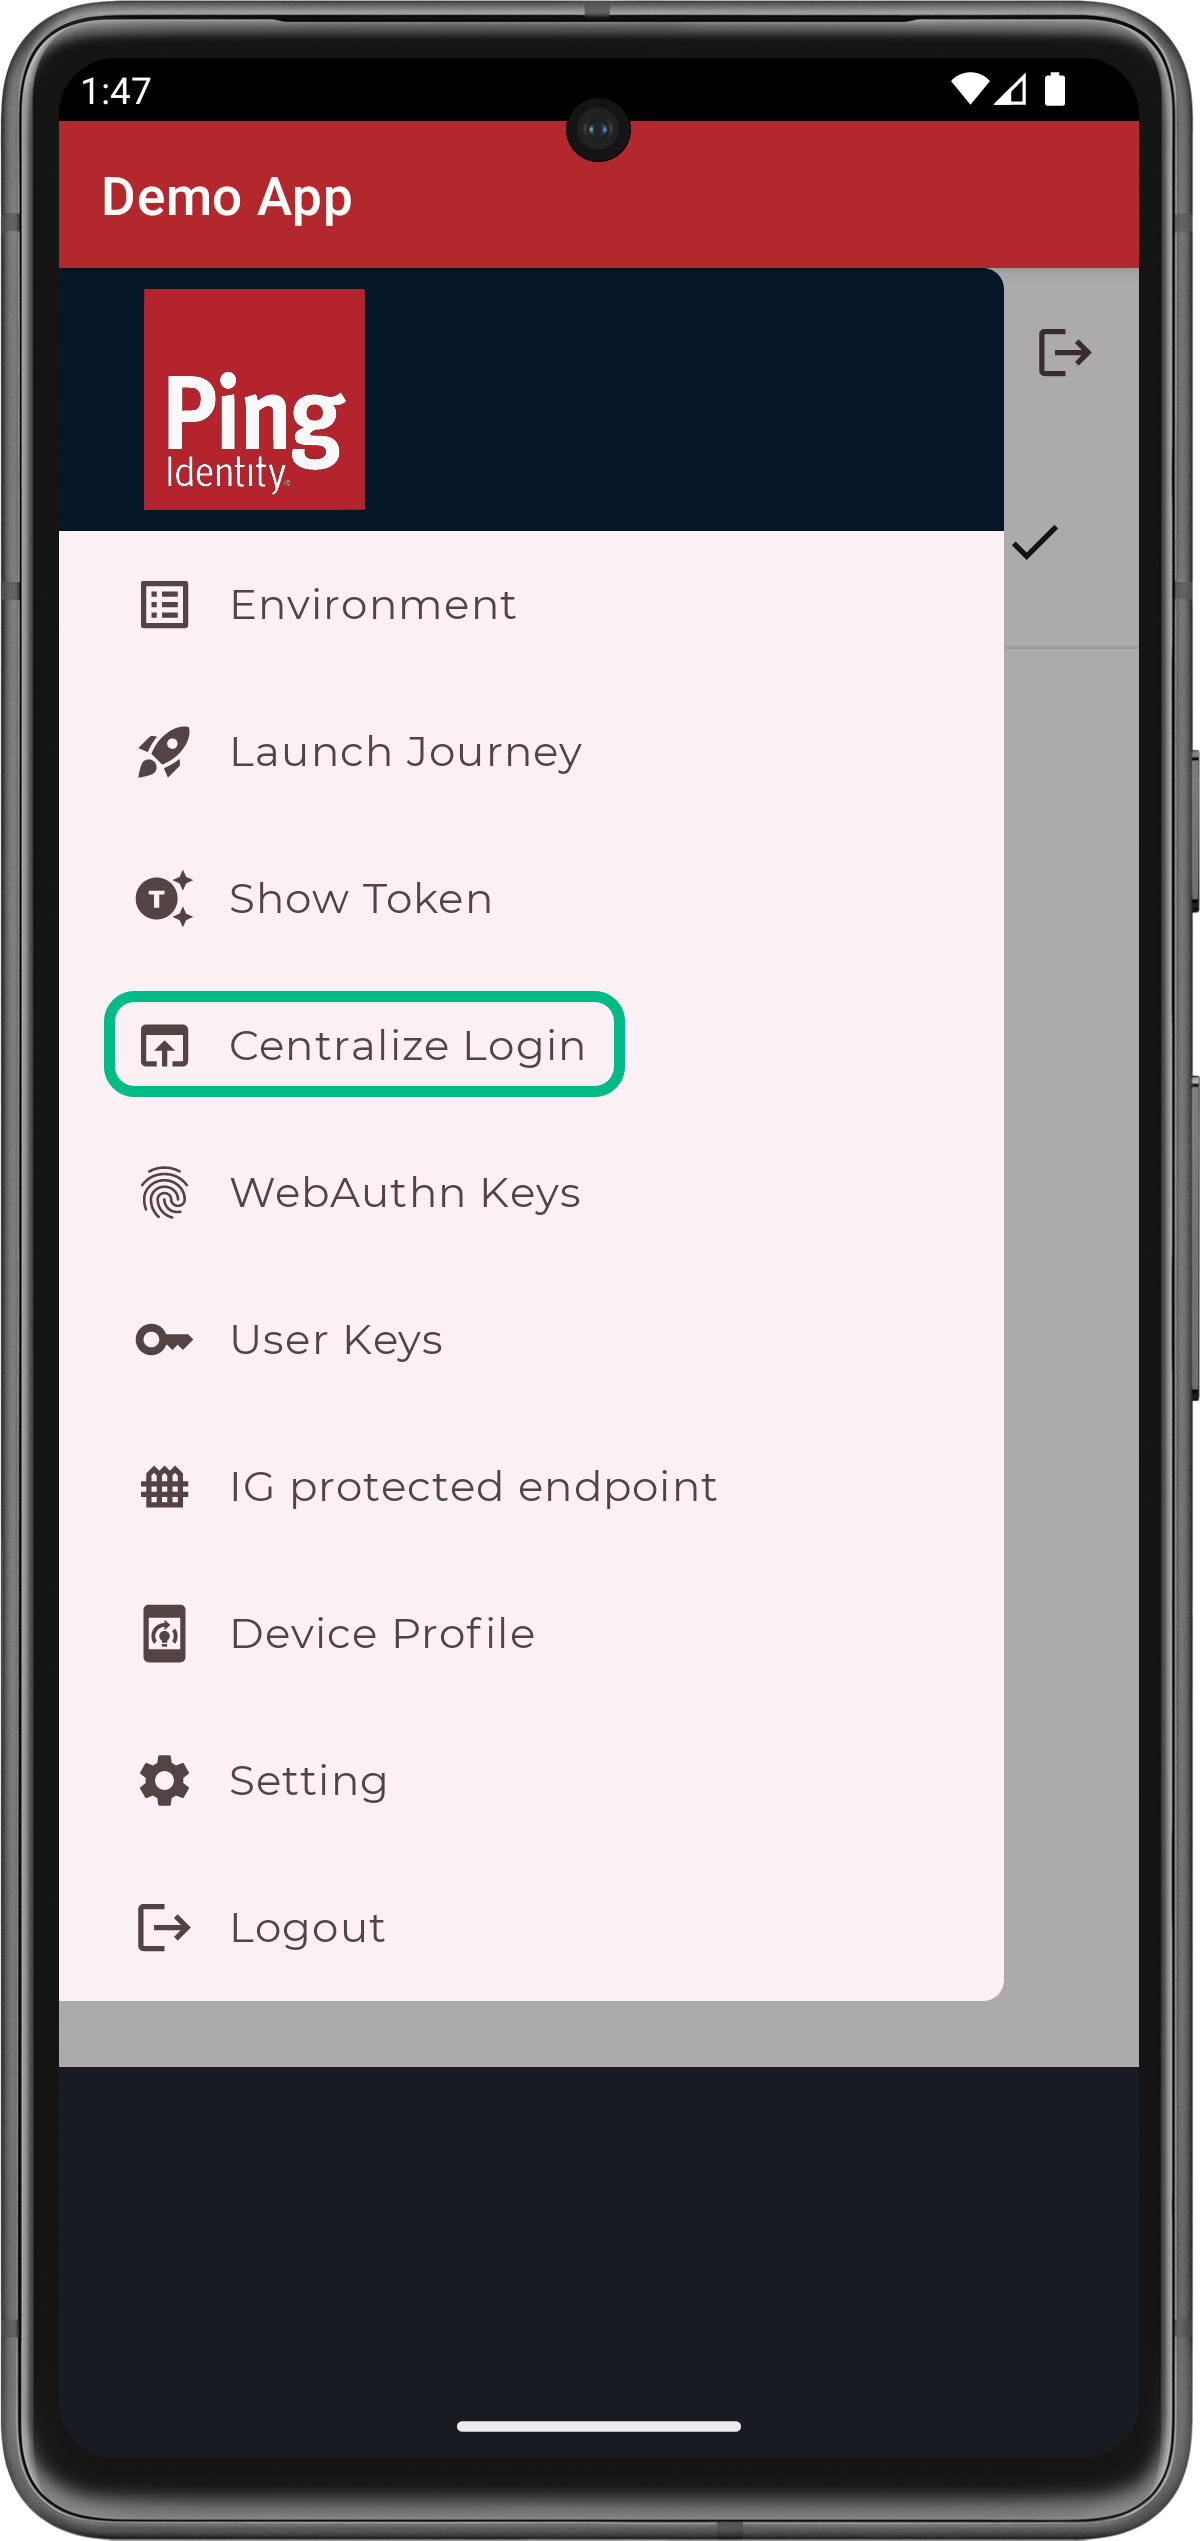 Figure 5. From the menu, select Centralize Login.
The app launches a web browser and redirects to your PingOne environment:
 Figure 6. Browser launched and redirected to PingOne
 -
Sign on as a demo user:
-
Name:
demo -
Password:
Ch4ng3it!
If authentication is successful, the application returns to the user info screen.
-
-
Tap Show Userinfo to display the details of the token issues to the demo user:
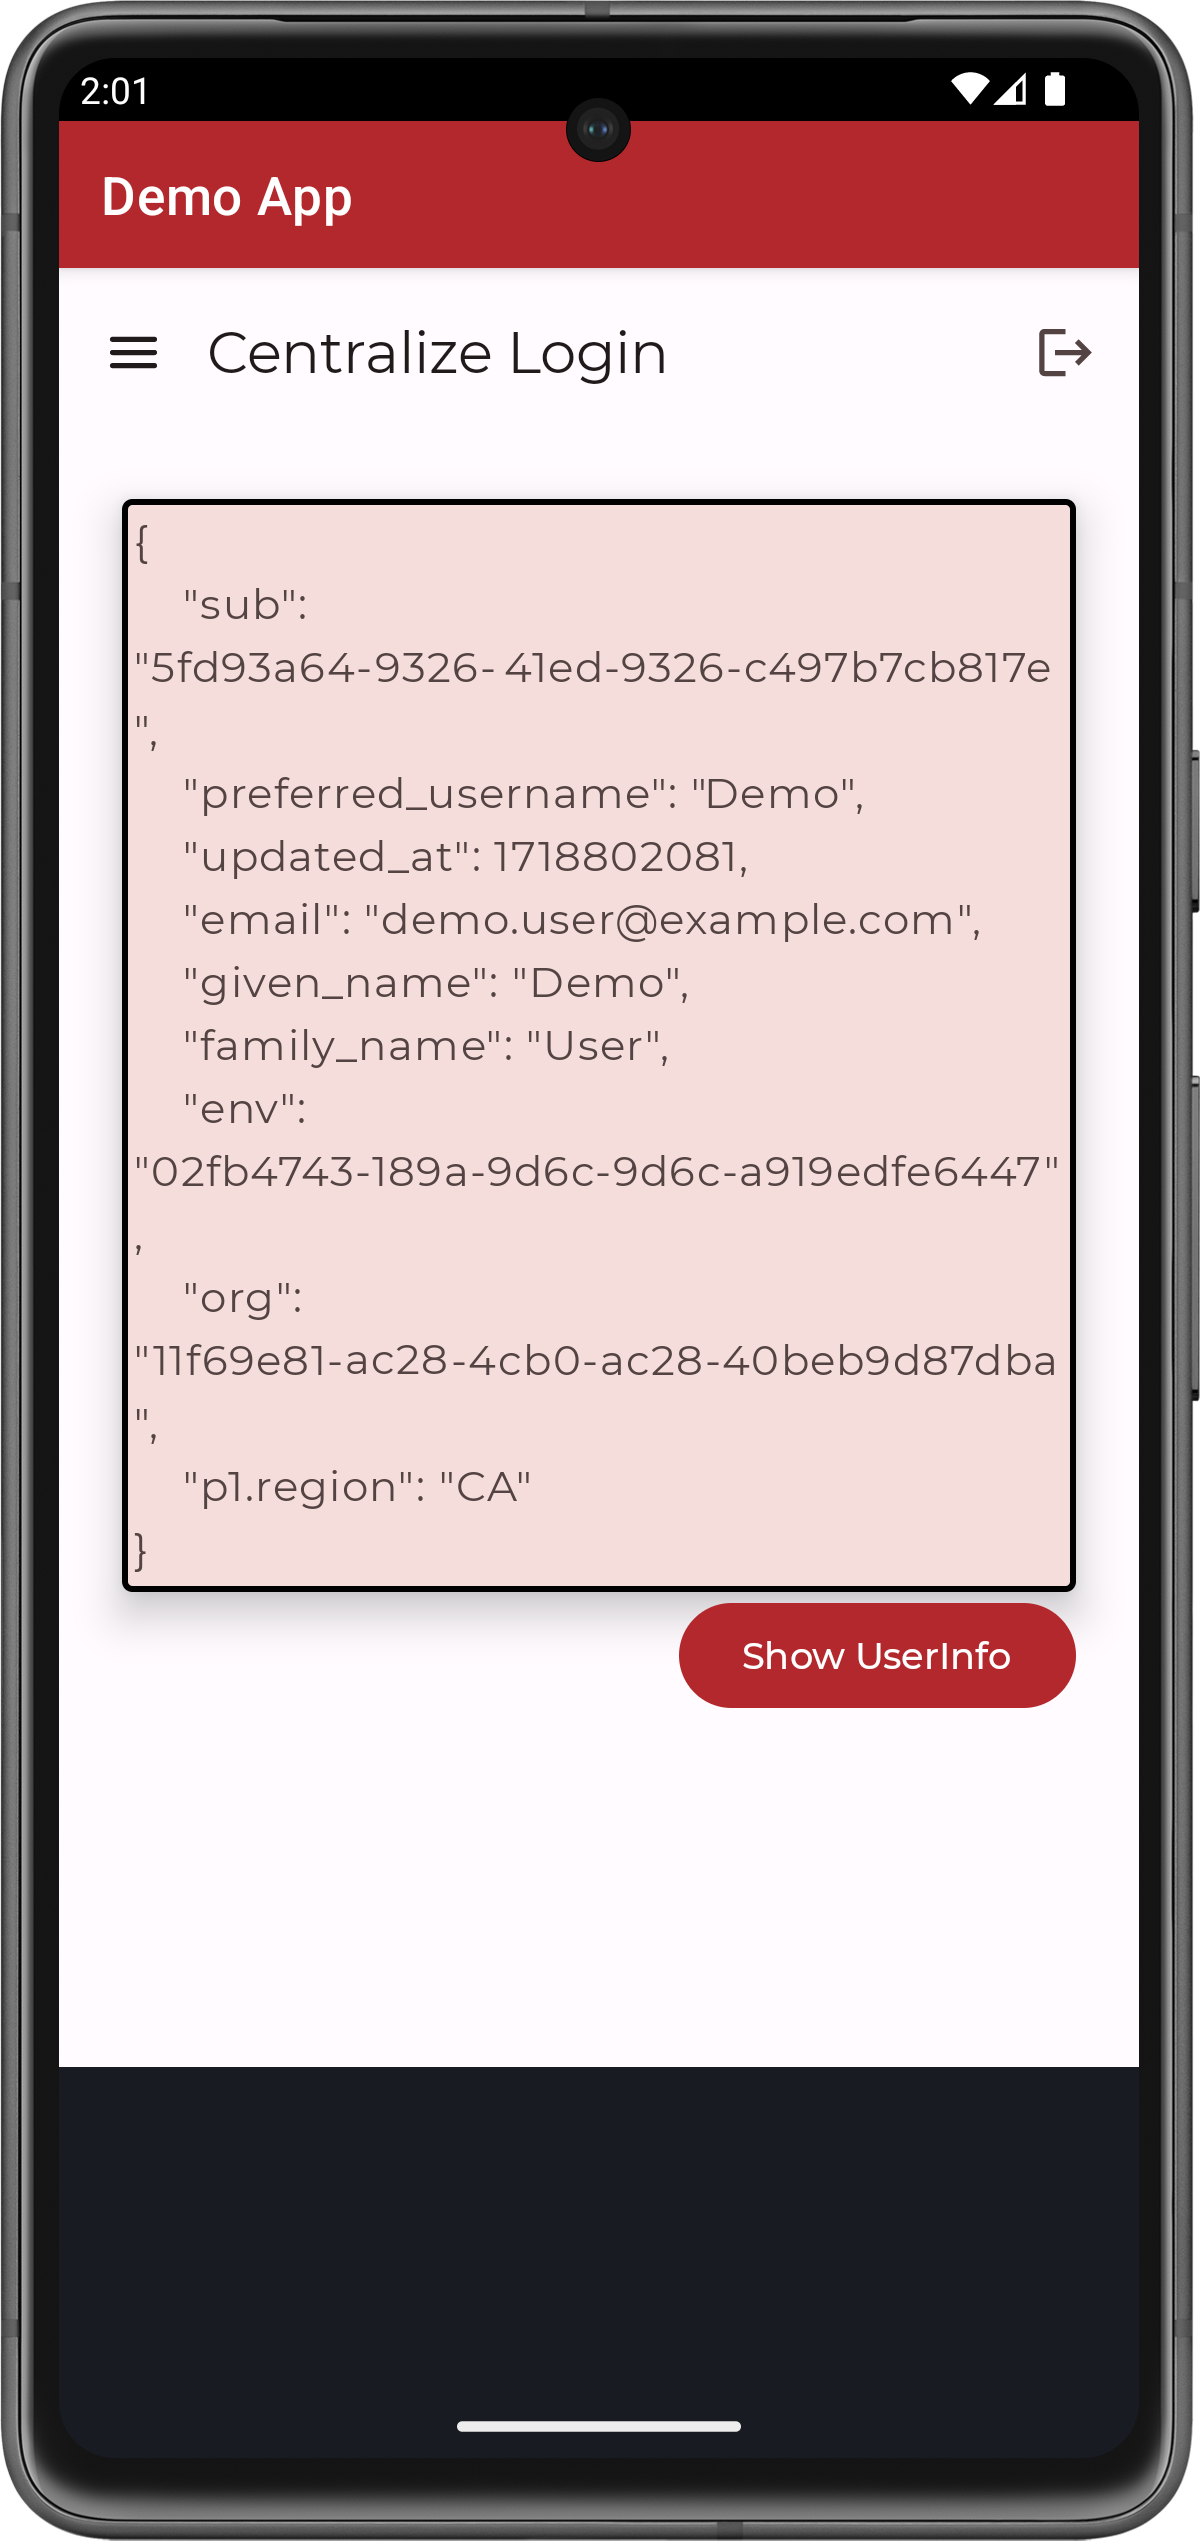 Figure 7. User info of the demo user
 -
Tap the menu icon (), and then tap Logout.
The app briefly opens a browser to log the user out of PingOne, and revoke the tokens.
To verify the user is logged out:
-
In the PingOne administration console, navigate to Directory > Users.
-
Select the user you signed in as.
-
From the Sevices dropdown, select Authentication:
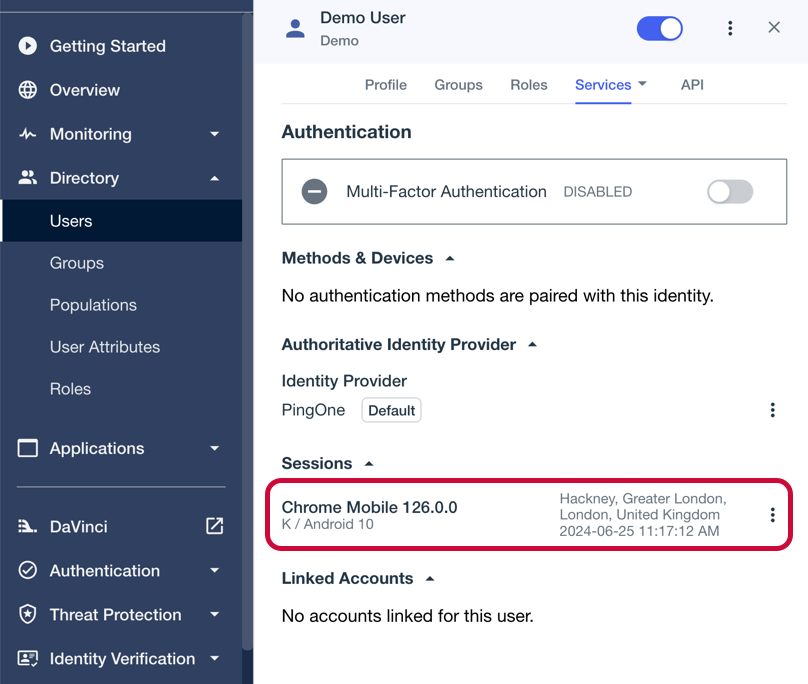 Figure 8. Checking a user’s sessions in PingOne.
The Sessions section displays any existing sessions the user has, and whether they originate from a mobile device.
-
OIDC login to PingOne Advanced Identity Cloud tutorial for Android
In this tutorial you update a sample app that uses OIDC-based login to obtain tokens by redirecting to the PingOne Advanced Identity Cloud UI for authentication.
The sample connects to the .well-known endpoint of your PingOne Advanced Identity Cloud server to obtain the correct URIs to authenticate the user, and redirects to your PingOne Advanced Identity Cloud server’s login UI.
After authentication, PingOne Advanced Identity Cloud redirects the browser back to your application, which then obtains an OAuth 2.0 access token and displays the related user information.
Before you begin
To successfully complete this tutorial refer to the prerequisites in this section.
The tutorial also requires a configured PingOne Advanced Identity Cloud tenant.
Compatibility
- Android
-
This sample requires at least Android API 23 (Android 6.0)
- Java
-
This sample requires at least Java 8 (v1.8).
Prerequisites
- Android Studio
-
Download and install Android Studio, which is available for many popular operating systems.
- An Android emulator or physical device
-
To try the quick start application as you develop it, you need an Android device. To add a virtual, emulated Android device to Android Studio, refer to Create and manage virtual devices, on the Android Developers website.
Server configuration
This tutorial requires you to configure your PingOne Advanced Identity Cloud tenant as follows:
Task 1. Create a demo user
The samples and tutorials in this documentation often require that you have an identity set up so that you can test authentication.
To create a demo user in PingOne Advanced Identity Cloud, follow these steps:
-
Log in to your PingOne Advanced Identity Cloud tenant.
-
In the left panel, click Identities > Manage.
-
Click New Alpha realm - User.
-
Enter the following details:
-
Username =
demo -
First Name =
Demo -
Last Name =
User -
Email Address =
demo.user@example.com -
Password =
Ch4ng3it!
-
-
Click Save.
Task 2. Create an authentication journey
Authentication journeys provide fine-grained authentication by allowing multiple paths and decision points throughout the flow. Authentication journeys are made up of nodes that define actions taken during authentication.
Each node performs a single task, such as collecting a username or making a simple decision. Nodes can have multiple outcomes rather than just success or failure. For details, see the Authentication nodes configuration reference in the PingAM documentation.
To create a simple journey for use when testing the Ping SDKs, follow these steps:
-
In your PingOne Advanced Identity Cloud tenant, navigate to Journeys, and click New Journey.
-
Enter a name, such as
sdkUsernamePasswordJourneyand click Save.The authentication journey designer appears.
-
Drag the following nodes into the designer area:
-
Page Node
-
Platform Username
-
Platform Password
-
Data Store Decision
-
-
Drag and drop the Platform Username and Platform Password nodes onto the Page Node, so that they both appear on the same page when logging in.
-
Connect the nodes as follows:
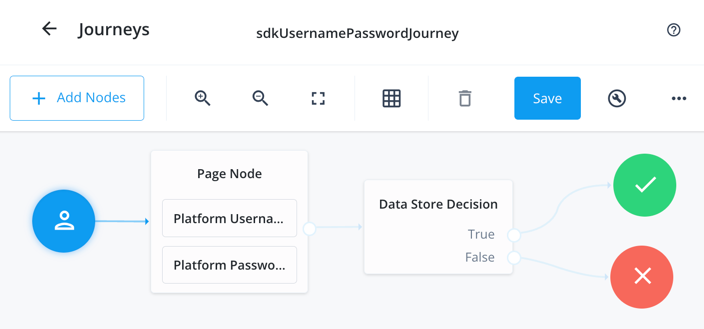 Figure 9. Example username and password authentication journey
 -
Click Save.
Task 3. Register a public OAuth 2.0 client
Public clients do not use a client secret to obtain tokens because they are unable to keep them hidden. The Ping SDKs commonly use this type of client to obtain tokens, as they cannot guarantee safekeeping of the client credentials in a browser or on a mobile device.
To register a public OAuth 2.0 client application for use with the SDKs in PingOne Advanced Identity Cloud, follow these steps:
-
Log in to your PingOne Advanced Identity Cloud tenant.
-
In the left panel, click Applications.
-
Click Custom Application.
-
Select OIDC - OpenId Connect as the sign-in method, and then click Next.
-
Select Native / SPA as the application type, and then click Next.
-
In Name, enter a name for the application, such as
Public SDK Client. -
In Owners, select a user that is responsible for maintaining the application, and then click Next.
When trying out the SDKs, you could select the demouser you created previously. -
In Client ID, enter
sdkPublicClient, and then click Create Application.PingOne Advanced Identity Cloud creates the application and displays the details screen.
-
On the Sign On tab:
-
In Sign-In URLs, enter the following values:
org.forgerock.demo://oauth2redirectAlso add any other domains where you host SDK applications. -
In Grant Types, enter the following values:
Authorization CodeRefresh Token -
In Scopes, enter the following values:
openid profile email address
-
-
Click Show advanced settings, and on the Authentication tab:
-
In Token Endpoint Authentication Method, select
none. -
In Client Type, select
Public. -
Enable the Implied Consent property.
-
-
Click Save.
The application is now configured to accept client connections from and issue OAuth 2.0 tokens to the example applications and tutorials covered by this documentation.
Task 4. Configure the OAuth 2.0 provider
The provider specifies the supported OAuth 2.0 configuration options for a realm.
To ensure the PingOne Advanced Identity Cloud OAuth 2.0 provider service is configured for use with the Ping SDKs, follow these steps:
-
In your PingOne Advanced Identity Cloud tenant, navigate to Native Consoles > Access Management.
-
In the left panel, click Services.
-
In the list of services, click OAuth2 Provider.
-
On the Core tab, ensure Issue Refresh Tokens is enabled.
-
On the Consent tab, ensure Allow Clients to Skip Consent is enabled.
-
Click Save Changes.
Step 1. Download the samples
To start this tutorial, you need to download the ForgeRock SDK sample apps repo, which contains the projects you will use.
-
In a web browser, navigate to the SDK Sample Apps repository.
-
Download the source code using one of the following methods:
- Download a ZIP file
-
-
Click Code, and then click Download ZIP.
-
Extract the contents of the downloaded ZIP file to a suitable location.
-
- Use a Git-compatible tool to clone the repo locally
-
-
Click Code, and then copy the HTTPS URL.
-
Use the URL to clone the repository to a suitable location.
For example, from the command-line you could run:
-
The result of these steps is a local folder named sdk-sample-apps.
Step 2. Configure connection properties
In this step, you configure the kotlin-central-login-oidc sample to connect to the OAuth 2.0 application you created in PingOne Advanced Identity Cloud, using OIDC login.
-
In Android Studio, open the
sdk-sample-apps/android/kotlin-central-login-oidcproject you cloned in the previous step. -
In the Project pane, switch to the Android view.
-
In the Android view, navigate to app > kotlin+java > com.example.app, and open
Config.kt. -
Edit the default values provided in the
PingConfigclass with the values from your PingOne Advanced Identity Cloud tenant:data class PingConfig( var discoveryEndpoint: String = "https://openam-sdks.forgeblocks.com/am/oauth2/realms/alpha/.well-known/openid-configuration", var oauthClientId: String = "AndroidTest", var oauthRedirectUri: String = "org.forgerock.demo://oauth2redirect", var oauthSignOutRedirectUri: String = "", var cookieName: String = "5421aeddf91aa20", var oauthScope: String = "openid profile email address" )- discoveryEndpoint
-
The
.well-knownendpoint from your PingOne Advanced Identity Cloud tenant.How do I find my PingOne Advanced Identity Cloud .well-known URL?
You can view the
.well-knownendpoint for an OAuth 2.0 client in the PingOne Advanced Identity Cloud admin console:-
Log in to your PingOne Advanced Identity Cloud administration console.
-
Click Applications, and then select the OAuth 2.0 client you created earlier. For example, sdkPublicClient.
-
On the Sign On tab, in the Client Credentials section, copy the Discovery URI value.
For example,
https://openam-forgerock-sdks.forgeblocks.com/am/oauth2/alpha/.well-known/openid-configuration -
- oauthClientId
-
The client ID from your OAuth 2.0 application in PingOne Advanced Identity Cloud.
For example,
sdkPublicClient - oauthRedirectUri
-
The
redirect_urias configured in the OAuth 2.0 client profile.This value must exactly match a value configured in your OAuth 2.0 client.
For example,
org.forgerock.demo://oauth2redirect - oauthSignOutRedirectUri
-
Leave this property empty.
It signals that the SDK does not need to open and return from a web page to perform log out.
- cookieName
-
The name of the cookie your PingOne Advanced Identity Cloud tenant uses to store SSO tokens in client browsers.
How do I find my PingOne Advanced Identity Cloud cookie name?
To locate the cookie name in an PingOne Advanced Identity Cloud tenant:
-
Navigate to Tenant settings > Global Settings
-
Copy the value of the Cookie property.
For example,
ch15fefc5407912 -
- oauthScope
-
The scopes you added to your OAuth 2.0 application in PingOne Advanced Identity Cloud.
For example,
openid profile email address
The result resembles the following:
data class PingConfig( var discoveryEndpoint: String = "https://openam-forgerock-sdks.forgeblocks.com/am/oauth2/realms/alpha/.well-known/openid-configuration", var oauthClientId: String = "sdkNativeClient", var oauthRedirectUri: String = "org.forgerock.demo://oauth2redirect", var oauthSignOutRedirectUri: String = "", var cookieName: String = "ch15fefc5407912", var oauthScope: String = "openid profile email address" ) -
Save your changes.
Step 3. Test the app
In the following procedure, you run the sample app that you configured in the previous step. The app performs a centralized login on your PingOne Advanced Identity Cloud instance.
Log in as a demo user
-
In Android Studio, select Run > Run 'ping-oidc.app'.
-
On the Environment screen, ensure the PingOne Advanced Identity Cloud environment you added earlier is correct.
You can edit any of the values in the app if required.
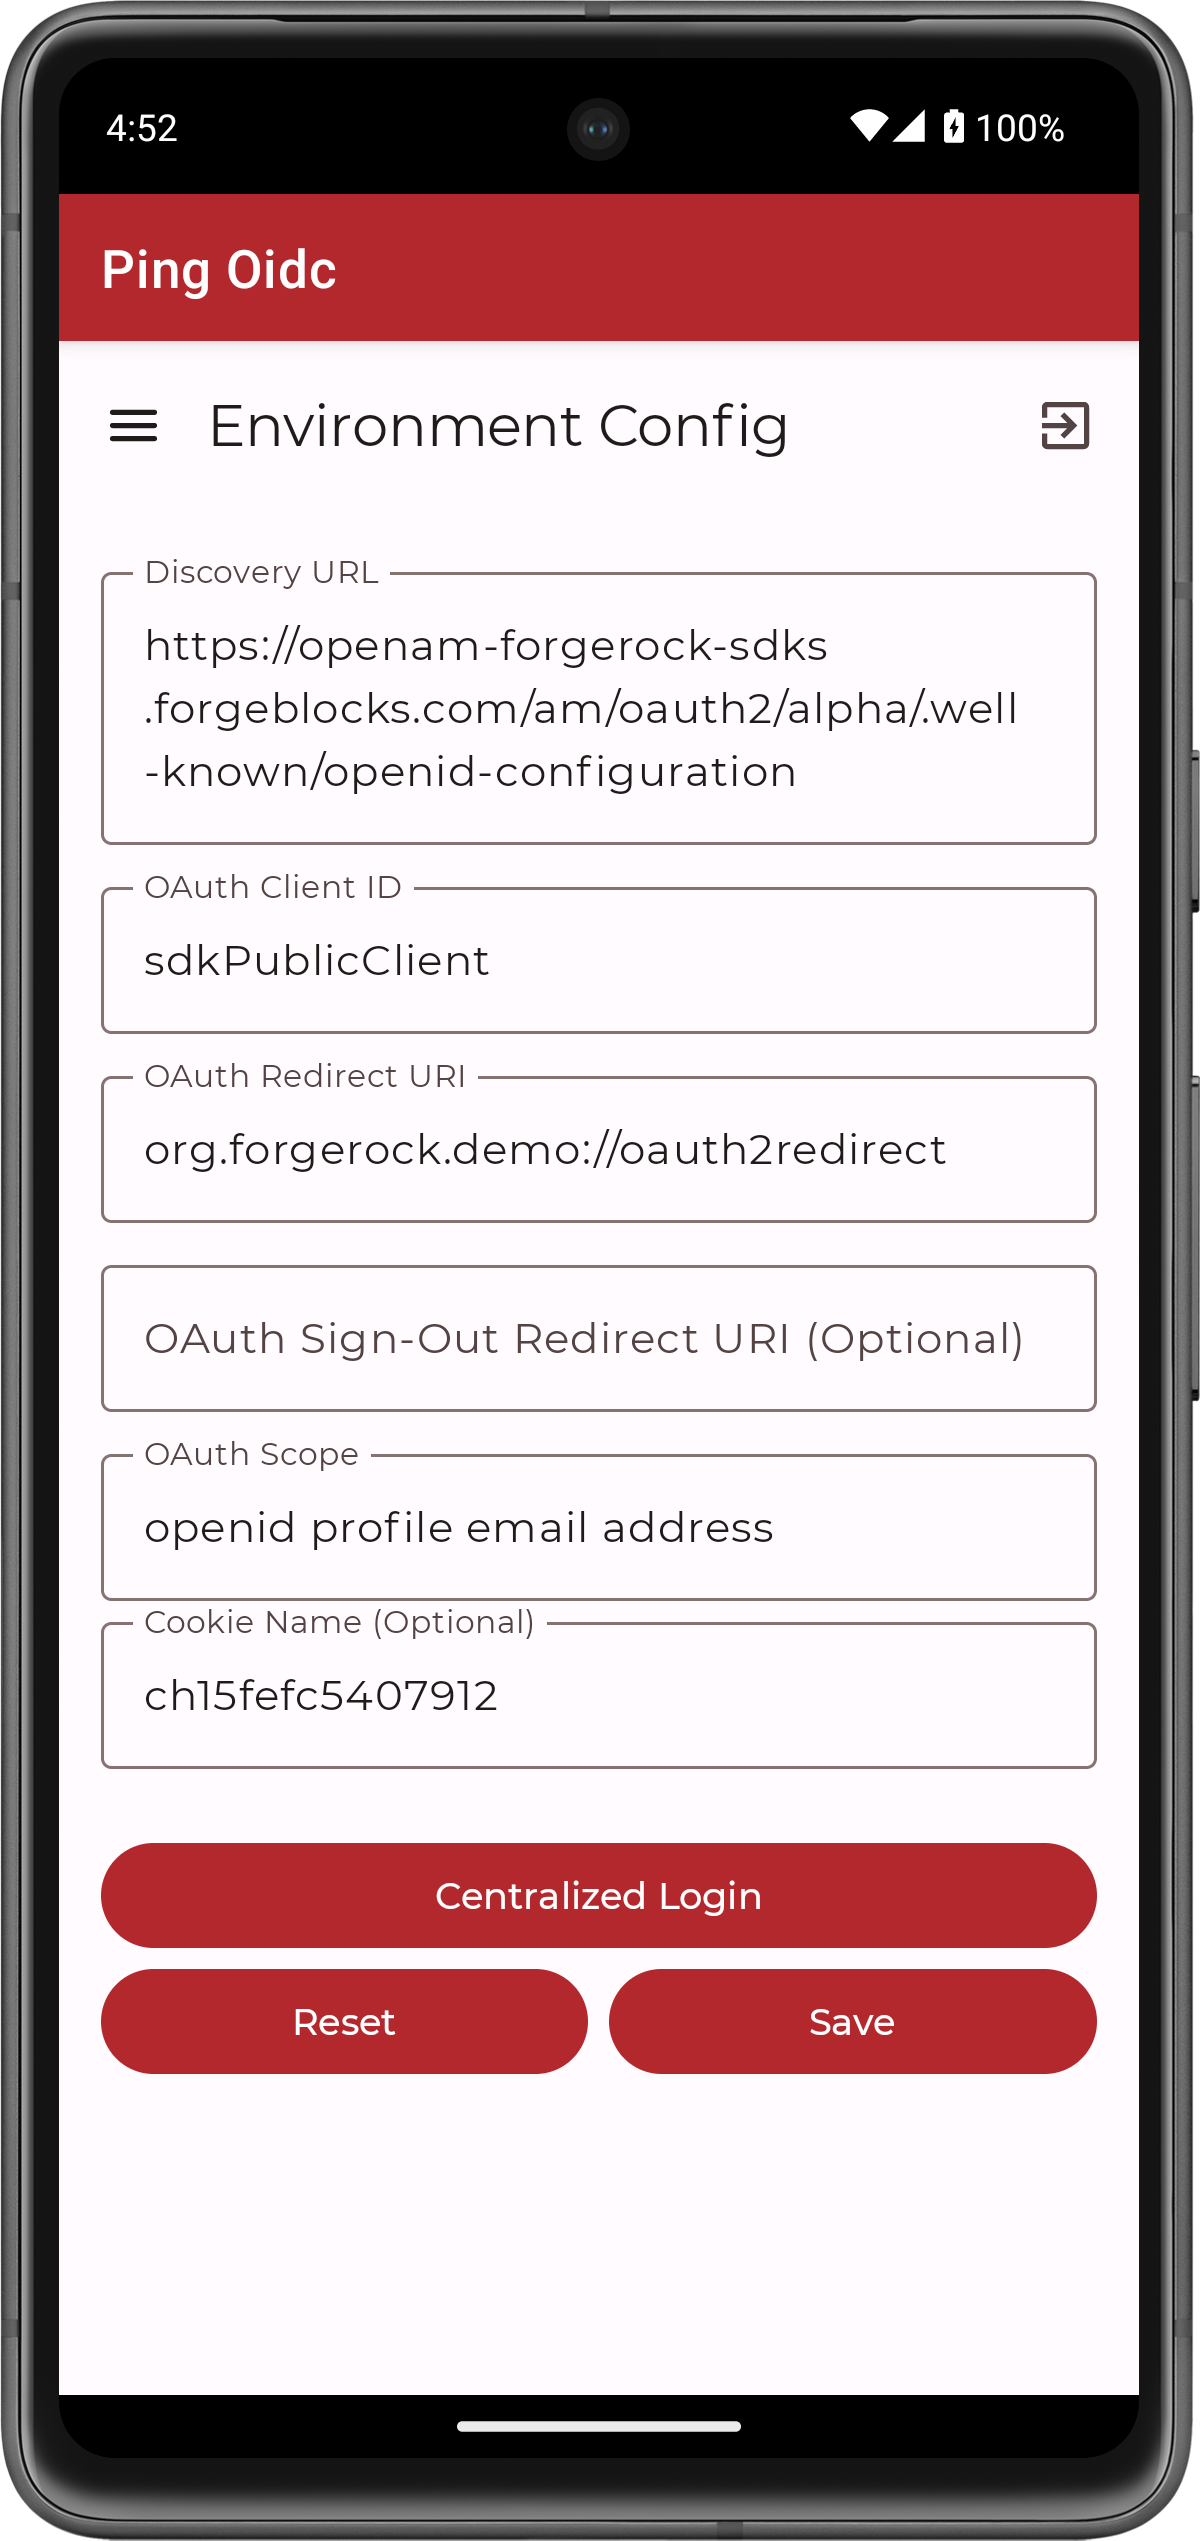 Figure 10. Confirm the PingOne Advanced Identity Cloud connection properties
 -
Tap Centralized Login.
The app launches a web browser and redirects to your PingOne Advanced Identity Cloud environment:
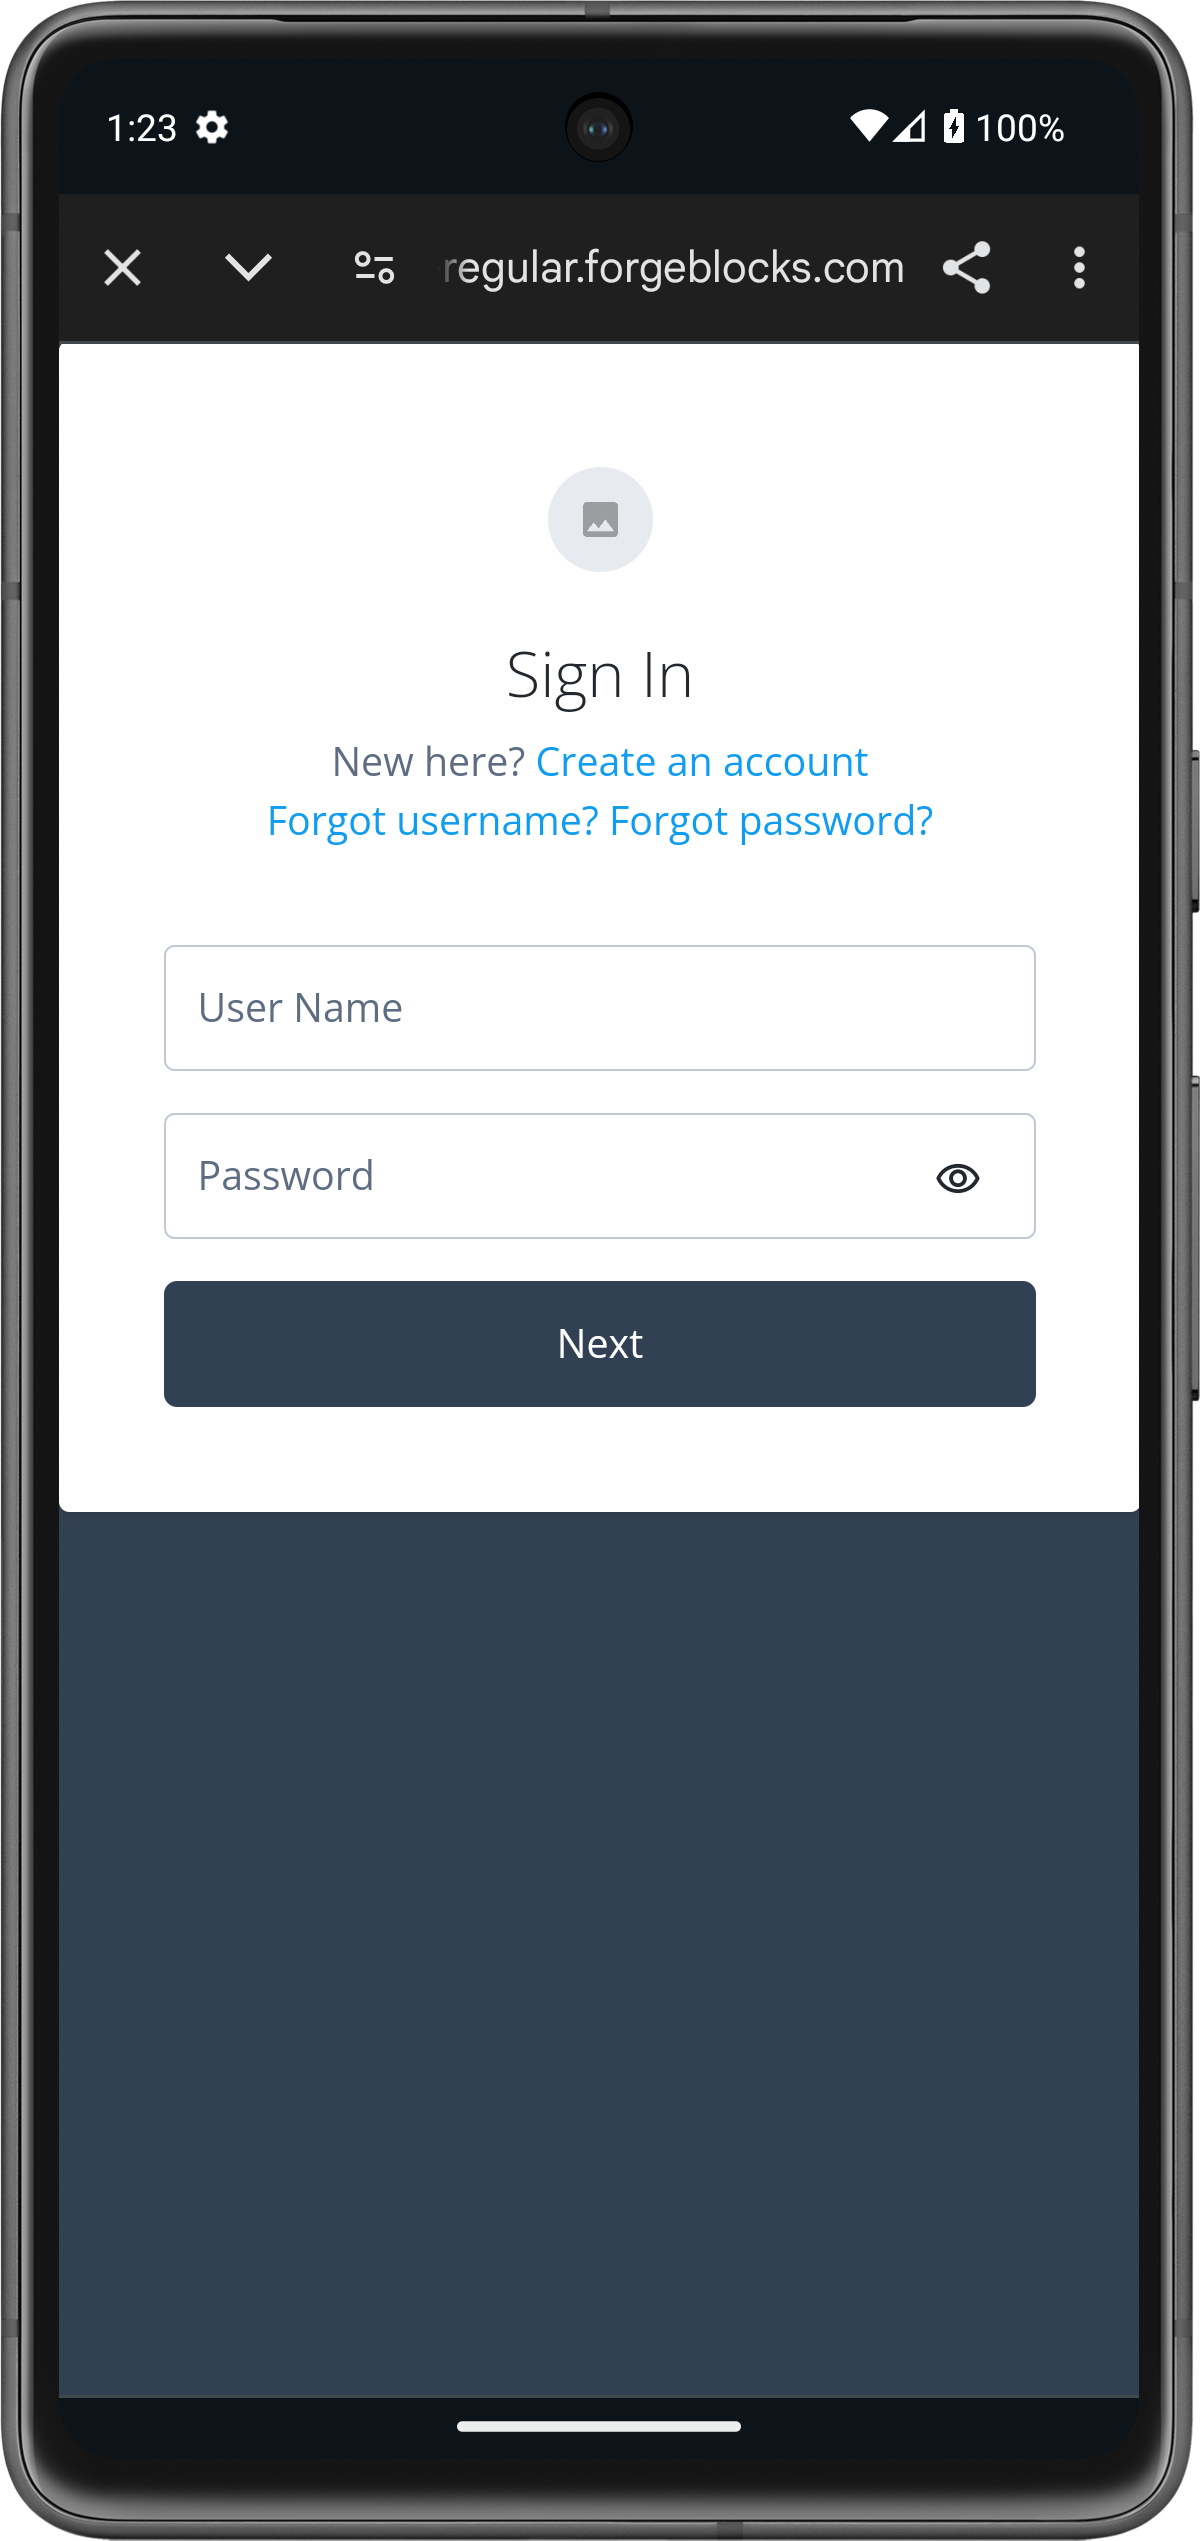 Figure 11. Browser launched and redirected to PingOne Advanced Identity Cloud
 -
Sign on as a demo user:
-
Name:
demo -
Password:
Ch4ng3it!
If authentication is successful, the application returns to the access token screen.
-
-
Tap the menu icon (), and then tap User Profile:
 Figure 12. User info of the demo user
 -
Tap the menu icon (), and then tap Logout.
The app logs the user out of PingOne Advanced Identity Cloud, revokes the tokens, and returns to the config page.
OIDC login to PingAM tutorial for Android
In this tutorial you update a sample app that uses OIDC-based login to obtain tokens by redirecting to the PingAM UI for authentication.
The sample connects to the .well-known endpoint of your PingAM server to obtain the correct URIs to authenticate the user, and redirects to your PingAM server’s login UI.
After authentication, PingAM redirects the browser back to your application, which then obtains an OAuth 2.0 access token and displays the related user information.
Before you begin
To successfully complete this tutorial refer to the prerequisites in this section.
The tutorial also requires a configured PingAM server.
Compatibility
- Android
-
This sample requires at least Android API 23 (Android 6.0)
- Java
-
This sample requires at least Java 8 (v1.8).
Prerequisites
- Android Studio
-
Download and install Android Studio, which is available for many popular operating systems.
- An Android emulator or physical device
-
To try the quick start application as you develop it, you need an Android device. To add a virtual, emulated Android device to Android Studio, refer to Create and manage virtual devices, on the Android Developers website.
Server configuration
This tutorial requires you to configure your PingAM server as follows:
Task 1. Create a demo user
The samples and tutorials in this documentation often require that you have an identity set up so that you can test authentication.
To create a demo user in PingAM, follow these steps:
-
Log in to the PingAM admin UI as an administrator.
-
Navigate to Identities, and then click Add Identity.
-
Enter the following details:
-
User ID =
demo -
Password =
Ch4ng3it! -
Email Address =
demo.user@example.com
-
-
Click Create.
Task 2. Create an authentication tree
Authentication trees provide fine-grained authentication by allowing multiple paths and decision points throughout the authentication flow. Authentication trees are made up of nodes that define actions taken during authentication.
Each node performs a single task, such as collecting a username or making a simple decision. Nodes can have multiple outcomes rather than just success or failure. For details, see the Authentication nodes configuration reference in the PingAM documentation.
To create a simple tree for use when testing the Ping SDKs, follow these steps:
-
Under Realm Overview, click Authentication Trees, then click Create Tree.
-
Enter a tree name, for example
sdkUsernamePasswordJourney, and then click Create.The authentication tree designer appears, showing the Start entry point connected to the Failure exit point.
-
Drag the following nodes from the Components panel on the left side into the designer area:
-
Page Node
-
Username Collector
-
Password Collector
-
Data Store Decision
-
-
Drag and drop the Username Collector and Password Collector nodes onto the Page Node, so that they both appear on the same page when logging in.
-
Connect the nodes as follows:
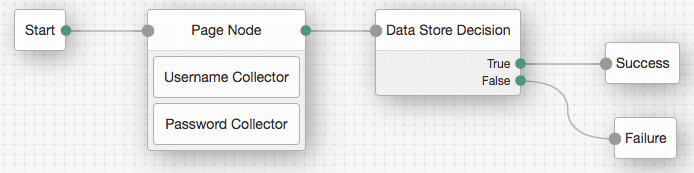 Figure 13. Example username and password authentication tree
 -
Select the Page Node, and in the Properties pane, set the Stage property to
UsernamePassword.You can configure the node properties by selecting a node and altering properties in the right-hand panel. One of the samples uses this specific value to determine the custom UI to display.
-
Click Save.
Task 3. Register a public OAuth 2.0 client
Public clients do not use a client secret to obtain tokens because they are unable to keep them hidden. The Ping SDKs commonly use this type of client to obtain tokens, as they cannot guarantee safekeeping of the client credentials in a browser or on a mobile device.
To register a public OAuth 2.0 client application for use with the SDKs in PingOne Advanced Identity Cloud, follow these steps:
-
Log in to your PingOne Advanced Identity Cloud tenant.
-
In the left panel, click Applications.
-
Click Custom Application.
-
Select OIDC - OpenId Connect as the sign-in method, and then click Next.
-
Select Native / SPA as the application type, and then click Next.
-
In Name, enter a name for the application, such as
Public SDK Client. -
In Owners, select a user that is responsible for maintaining the application, and then click Next.
When trying out the SDKs, you could select the demouser you created previously. -
In Client ID, enter
sdkPublicClient, and then click Create Application.PingOne Advanced Identity Cloud creates the application and displays the details screen.
-
On the Sign On tab:
-
In Sign-In URLs, enter the following values:
org.forgerock.demo://oauth2redirectAlso add any other domains where you host SDK applications. -
In Grant Types, enter the following values:
Authorization CodeRefresh Token -
In Scopes, enter the following values:
openid profile email address
-
-
Click Show advanced settings, and on the Authentication tab:
-
In Token Endpoint Authentication Method, select
none. -
In Client Type, select
Public. -
Enable the Implied Consent property.
-
-
Click Save.
The application is now configured to accept client connections from and issue OAuth 2.0 tokens to the example applications and tutorials covered by this documentation.
Task 4. Configure the OAuth 2.0 provider
The provider specifies the supported OAuth 2.0 configuration options for a realm.
To ensure the PingOne Advanced Identity Cloud OAuth 2.0 provider service is configured for use with the Ping SDKs, follow these steps:
-
In your PingOne Advanced Identity Cloud tenant, navigate to Native Consoles > Access Management.
-
In the left panel, click Services.
-
In the list of services, click OAuth2 Provider.
-
On the Core tab, ensure Issue Refresh Tokens is enabled.
-
On the Consent tab, ensure Allow Clients to Skip Consent is enabled.
-
Click Save Changes.
Step 1. Download the samples
To start this tutorial, you need to download the ForgeRock SDK sample apps repo, which contains the projects you will use.
-
In a web browser, navigate to the SDK Sample Apps repository.
-
Download the source code using one of the following methods:
- Download a ZIP file
-
-
Click Code, and then click Download ZIP.
-
Extract the contents of the downloaded ZIP file to a suitable location.
-
- Use a Git-compatible tool to clone the repo locally
-
-
Click Code, and then copy the HTTPS URL.
-
Use the URL to clone the repository to a suitable location.
For example, from the command-line you could run:
-
The result of these steps is a local folder named sdk-sample-apps.
Step 2. Configure connection properties
In this step, you configure the kotlin-central-login-oidc sample to connect to the OAuth 2.0 application you created in PingOne Advanced Identity Cloud, using OIDC login.
-
In Android Studio, open the
sdk-sample-apps/android/kotlin-central-login-oidcproject you cloned in the previous step. -
In the Project pane, switch to the Android view.
-
In the Android view, navigate to app > kotlin+java > com.example.app, and open
Config.kt. -
Edit the default values provided in the
PingConfigclass with the values from your PingOne Advanced Identity Cloud tenant:data class PingConfig( var discoveryEndpoint: String = "https://openam-sdks.forgeblocks.com/am/oauth2/realms/alpha/.well-known/openid-configuration", var oauthClientId: String = "AndroidTest", var oauthRedirectUri: String = "org.forgerock.demo://oauth2redirect", var oauthSignOutRedirectUri: String = "", var cookieName: String = "5421aeddf91aa20", var oauthScope: String = "openid profile email address" )- discoveryEndpoint
-
The
.well-knownendpoint from your PingOne Advanced Identity Cloud tenant.How do I find my PingOne Advanced Identity Cloud .well-known URL?
You can view the
.well-knownendpoint for an OAuth 2.0 client in the PingOne Advanced Identity Cloud admin console:-
Log in to your PingOne Advanced Identity Cloud administration console.
-
Click Applications, and then select the OAuth 2.0 client you created earlier. For example, sdkPublicClient.
-
On the Sign On tab, in the Client Credentials section, copy the Discovery URI value.
For example,
https://openam-forgerock-sdks.forgeblocks.com/am/oauth2/alpha/.well-known/openid-configuration -
- oauthClientId
-
The client ID from your OAuth 2.0 application in PingOne Advanced Identity Cloud.
For example,
sdkPublicClient - oauthRedirectUri
-
The
redirect_urias configured in the OAuth 2.0 client profile.This value must exactly match a value configured in your OAuth 2.0 client.
For example,
org.forgerock.demo://oauth2redirect - oauthSignOutRedirectUri
-
Leave this property empty.
It signals that the SDK does not need to open and return from a web page to perform log out.
- cookieName
-
The name of the cookie your PingOne Advanced Identity Cloud tenant uses to store SSO tokens in client browsers.
How do I find my PingOne Advanced Identity Cloud cookie name?
To locate the cookie name in an PingOne Advanced Identity Cloud tenant:
-
Navigate to Tenant settings > Global Settings
-
Copy the value of the Cookie property.
For example,
ch15fefc5407912 -
- oauthScope
-
The scopes you added to your OAuth 2.0 application in PingOne Advanced Identity Cloud.
For example,
openid profile email address
The result resembles the following:
data class PingConfig( var discoveryEndpoint: String = "https://openam-forgerock-sdks.forgeblocks.com/am/oauth2/realms/alpha/.well-known/openid-configuration", var oauthClientId: String = "sdkNativeClient", var oauthRedirectUri: String = "org.forgerock.demo://oauth2redirect", var oauthSignOutRedirectUri: String = "", var cookieName: String = "ch15fefc5407912", var oauthScope: String = "openid profile email address" ) -
Save your changes.
Step 3. Test the app
In the following procedure, you run the sample app that you configured in the previous step. The app performs a centralized login on your PingAM instance.
Log in as a demo user
-
In Android Studio, select Run > Run 'ping-oidc.app'.
-
On the Environment screen, ensure the PingAM environment you added earlier is correct.
You can edit any of the values in the app if required.
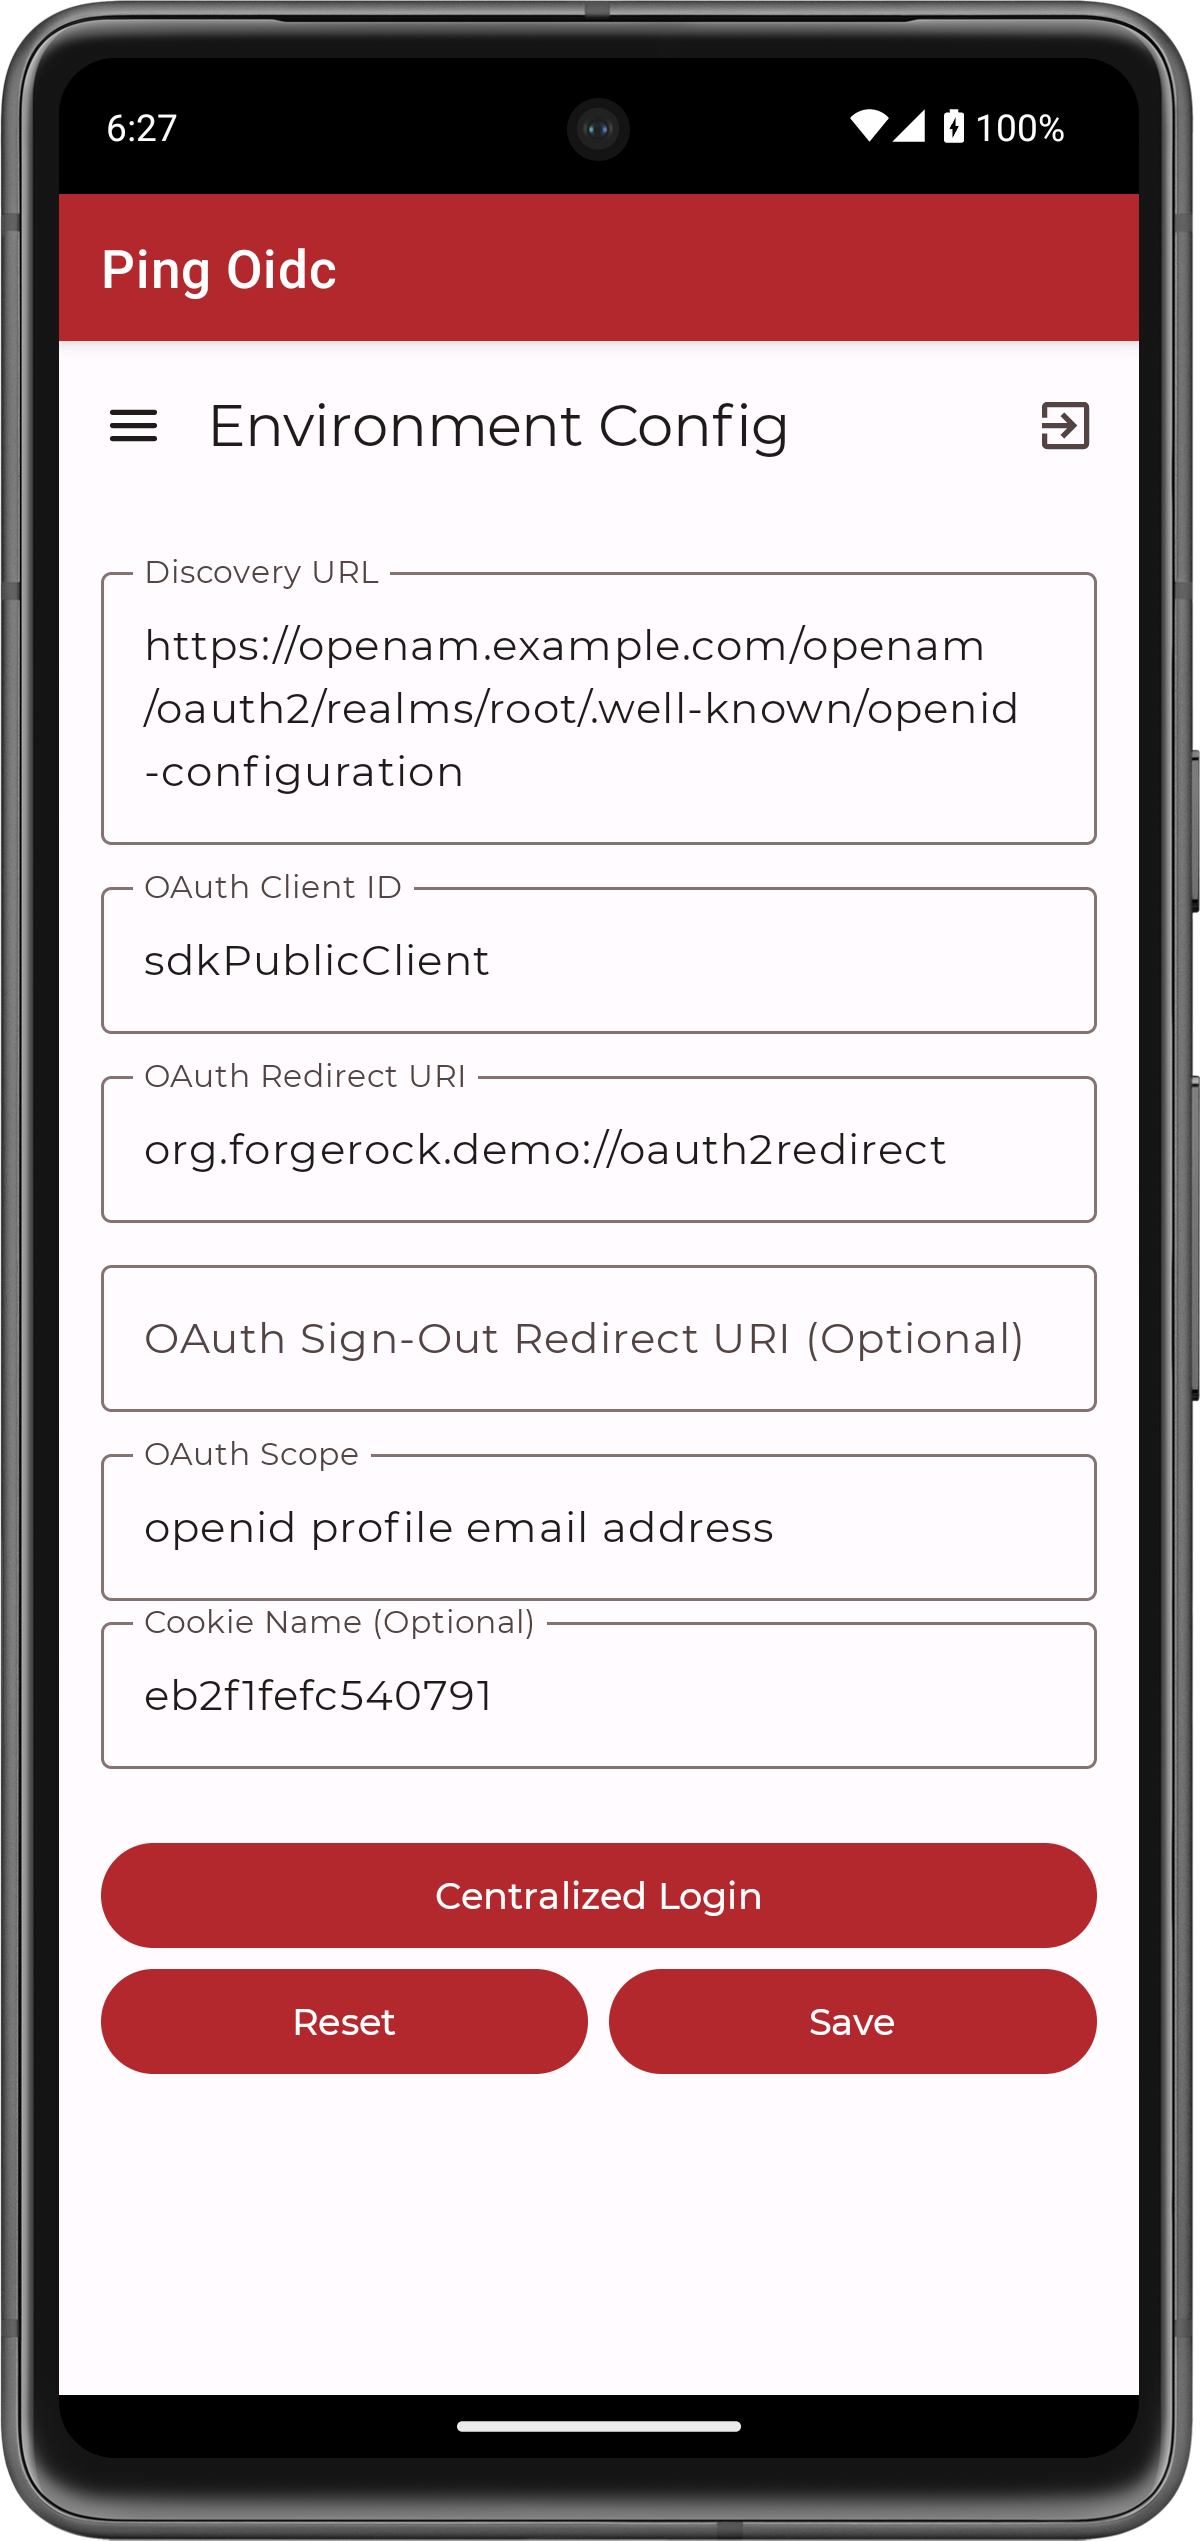 Figure 14. Confirm the PingAM connection properties
 -
Tap Centralized Login.
The app launches a web browser and redirects to your PingAM environment:
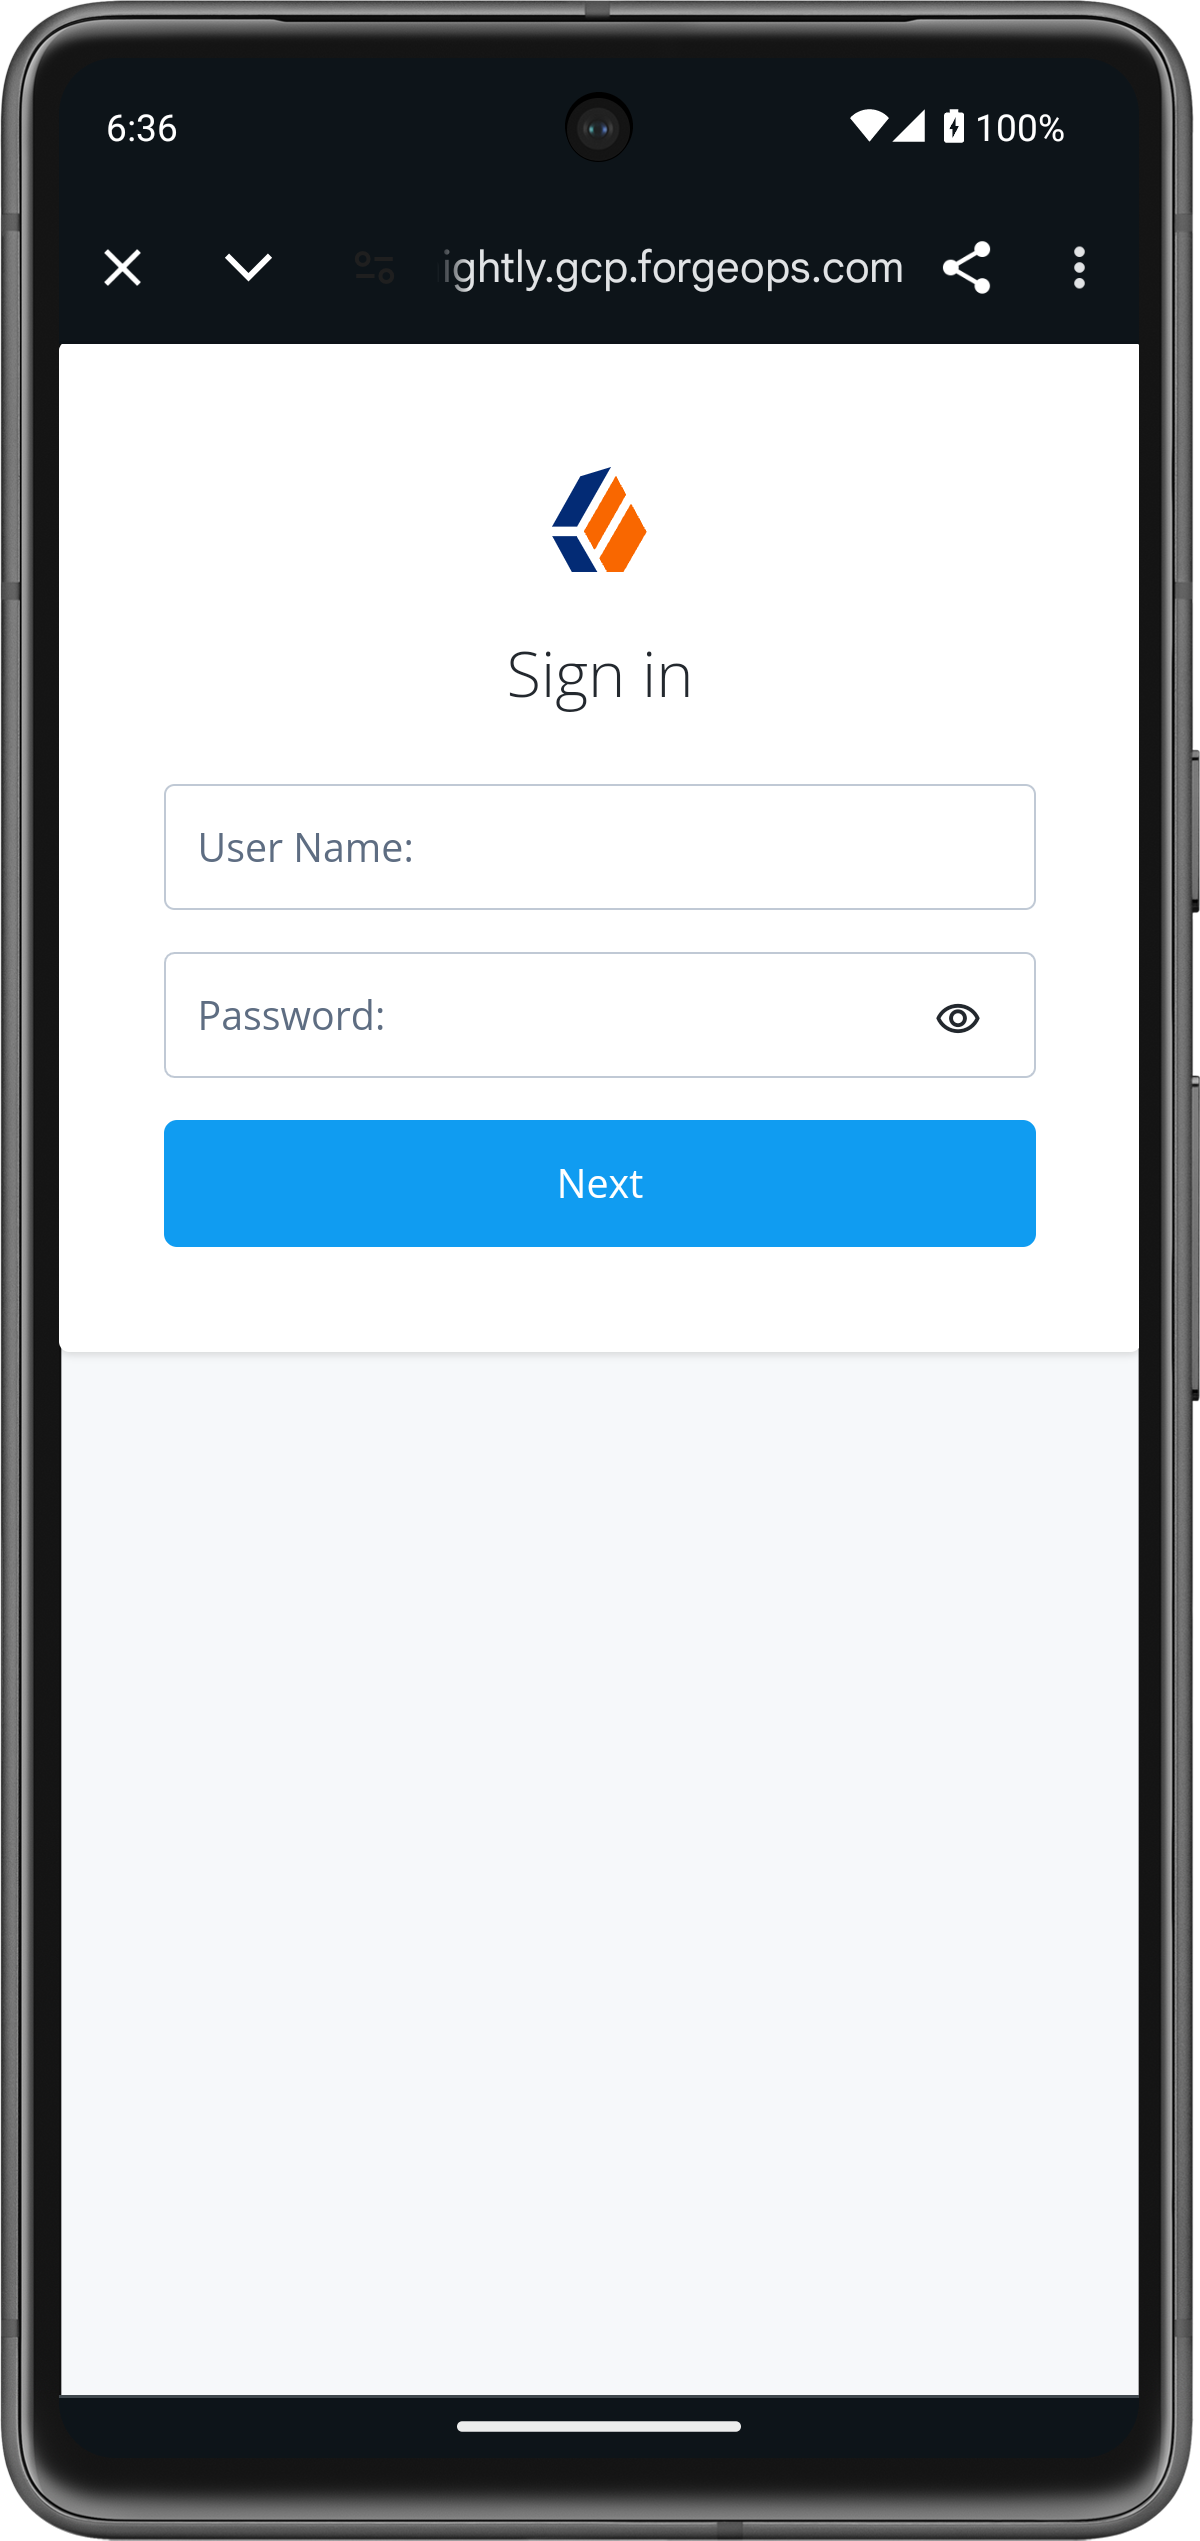 Figure 15. Browser launched and redirected to PingAM
 -
Sign on as a demo user:
-
Name:
demo -
Password:
Ch4ng3it!
If authentication is successful, the application returns to the access token screen.
-
-
Tap the menu icon (), and then tap User Profile:
Figure 16. User info of the demo user -
Tap the menu icon (), and then tap Logout.
The app logs the user out of PingAM, revokes the tokens, and returns to the config page.
OIDC login to PingFederate tutorial for Android
In this tutorial you update a sample app that uses OIDC-based login to obtain tokens by redirecting to the PingFederate UI for authentication.
The sample connects to the .well-known endpoint of your PingFederate server to obtain the correct URIs to authenticate the user, and redirects to your PingFederate server’s login UI.
After authentication, PingFederate redirects the browser back to your application, which then obtains an OAuth 2.0 access token and displays the related user information.
Before you begin
To successfully complete this tutorial refer to the prerequisites and compatibility requirements in this section.
The tutorial also requires a configured PingFederate server.
Compatibility
- Android
-
This sample requires at least Android API 23 (Android 6.0)
- Java
-
This sample requires at least Java 8 (v1.8).
Prerequisites
- Android Studio
-
Download and install Android Studio, which is available for many popular operating systems.
- An Android emulator or physical device
-
To try the quick start application as you develop it, you need an Android device. To add a virtual, emulated Android device to Android Studio, refer to Create and manage virtual devices, on the Android Developers website.
Server configuration
This tutorial requires you to configure your PingFederate server as follows:
Task 1. Register a public OAuth 2.0 client
OAuth 2.0 client application profiles define how applications connect to PingFederate and obtain OAuth 2.0 tokens.
To allow the Ping SDKs to connect to PingFederate and obtain OAuth 2.0 tokens, you must register an OAuth 2.0 client application:
-
Log in to the PingFederate administration console as an administrator.
-
Navigate to .
-
Click Add Client.
PingFederate displays the Clients | Client page.
-
In Client ID and Name, enter a name for the profile, for example
sdkPublicClientMake a note of the Client ID value, you will need it when you configure the sample code.
-
In Client Authentication, select
None. -
In Redirect URIs, add the following values:
org.forgerock.demo://oauth2redirectAlso add any other URLs where you host SDK applications.
Failure to add redirect URLs that exactly match your client app’s values can cause PingFederate to display an error message such as
Redirect URI mismatchwhen attempting to end a session by redirecting from the SDK. -
In Allowed Grant Types, select the following values:
Authorization CodeRefresh Token -
In the OpenID Connect section:
-
In Logout Mode, select Ping Front-Channel
-
In Front-Channel Logout URIs, add the following values:
org.forgerock.demo://oauth2redirectAlso add any other URLs that redirect users to PingFederate to end their session.
Failure to add sign off URLs that exactly match your client app’s values can cause PingFederate to display an error message such as
invalid post logout redirect URIwhen attempting to end a session by redirecting from the SDK. -
In Post-Logout Redirect URIs, add the following values:
org.forgerock.demo://oauth2redirect
-
-
Click Save.
After changing PingFederate configuration using the administration console, you must replicate the changes to each server node in the cluster before they take effect.
In the PingFederate administration console, navigate to System > Server > Cluster Management, and click Replicate.
The application is now configured to accept client connections from and issue OAuth 2.0 tokens to the Ping SDK PingFederate example applications and tutorials covered by this documentation.
Task 2. Configure CORS
Cross-origin resource sharing (CORS) lets user agents make cross-domain server requests. In PingFederate, you can configure CORS to allow browsers or apps from trusted domains to access protected resources.
To configure CORS in PingFederate follow these steps:
-
Log in to the PingFederate administration console as an administrator.
-
Navigate to .
-
In the Cross-Origin Resource Sharing Settings section, in the Allowed Origin field, enter any DNS aliases you use for your SDK apps.
This documentation assumes the following configuration:
Property Values Allowed Originorg.forgerock.demo://oauth2redirect -
Click Save.
After changing PingFederate configuration using the administration console, you must replicate the changes to each server node in the cluster before they take effect.
In the PingFederate administration console, navigate to System > Server > Cluster Management, and click Replicate.
Your PingFederate server is now able to accept connections from origins hosting apps built with the Ping SDKs.
Step 1. Download the samples
To start this tutorial, you need to download the projects you will use.
-
In a web browser, navigate to the SDK Sample Apps repository.
-
Download the source code using one of the following methods:
- Download a ZIP file
-
-
Click Code, and then click Download ZIP.
-
Extract the contents of the downloaded ZIP file to a suitable location.
-
- Use a Git-compatible tool to clone the repo locally
-
-
Click Code, and then copy the HTTPS URL.
-
Use the URL to clone the repository to a suitable location.
For example, from the command-line you could run:
git clone https://github.com/ForgeRock/sdk-sample-apps.git
-
The result of these steps is a local folder named sdk-sample-apps.
Step 2. Configure connection properties
In this step, you configure the "kotlin-ui-prototype" sample to connect to the OAuth 2.0 application you created in PingFederate, using OIDC login.
-
In Android Studio, open the
sdk-sample-apps/android/kotlin-ui-prototypefolder you cloned in the previous step. -
In the Project pane, switch to the Android view.
-
In the Android view, navigate to app > kotlin+java > com.example.app > env, and open
EnvViewModel.kt.This file has the server environments the sample app uses. Each specifies the properties using the
FROptionsBuilder.buildmethod. -
Update the
PingFederateexample configuration with your environment’s details:// Example values for a PingFederate instance val PingFederate = FROptionsBuilder.build { server { url = "<PingFederate Base URL>" } oauth { oauthClientId = "<PingFederate Client ID>" oauthRedirectUri = "org.forgerock.demo://oauth2redirect" oauthSignOutRedirectUri = "org.forgerock.demo://oauth2redirect" oauthScope = "openid profile email address" } }Replace the following string with the value you obtained when you registered an OAuth 2.0 application in PingFederate.
- <PingFederate Client ID>
-
The client ID from your OAuth 2.0 application in PingFederate.
For example,
sdkPublicClient - <PingFederate Base URL>
-
The
Base URLof your PingFederate server.How do I find my PingFederate Base URL?
To verify the base URL of your PingFederate server:
-
Log in to your PingFederate administration console.
-
Navigate to .
-
Make a note of the Base URL value.
For example,
https://pingfed.example.comDo not use the admin console URL.
The sample code adds
/.well-known/openid-configurationafter the base URL value to form the.well-knownendpoint of your server. The SDK reads the OAuth 2.0 paths it requires from this endpoint. -
The result resembles the following:
val PingFederate = FROptionsBuilder.build { server { url = "https://pingfed.example.com" } oauth { oauthClientId = "sdkPublicClient" oauthRedirectUri = "org.forgerock.demo://oauth2redirect" oauthSignOutRedirectUri = "org.forgerock.demo://oauth2redirect" oauthScope = "openid profile email address" } } -
In the
initobject, check thatPingFederateis in the list of server configurations available to the sample app:For example:
init {
    servers.add(PingAM)
    servers.add(PingAdvancedIdentityCloud)
    servers.add(PingOne)
    servers.add(PingFederate)
}
With the sample configured, you can proceed to Step 3. Test the app.
Step 3. Test the app
In the following procedure, you run the sample app that you configured in an earlier step. The app performs a centralized login on your PingFederate instance.
Log in as a demo user
-
In Android Studio, select .
-
On the Environment screen, select the PingFederate
.well-knownendpoint you added in the earlier step.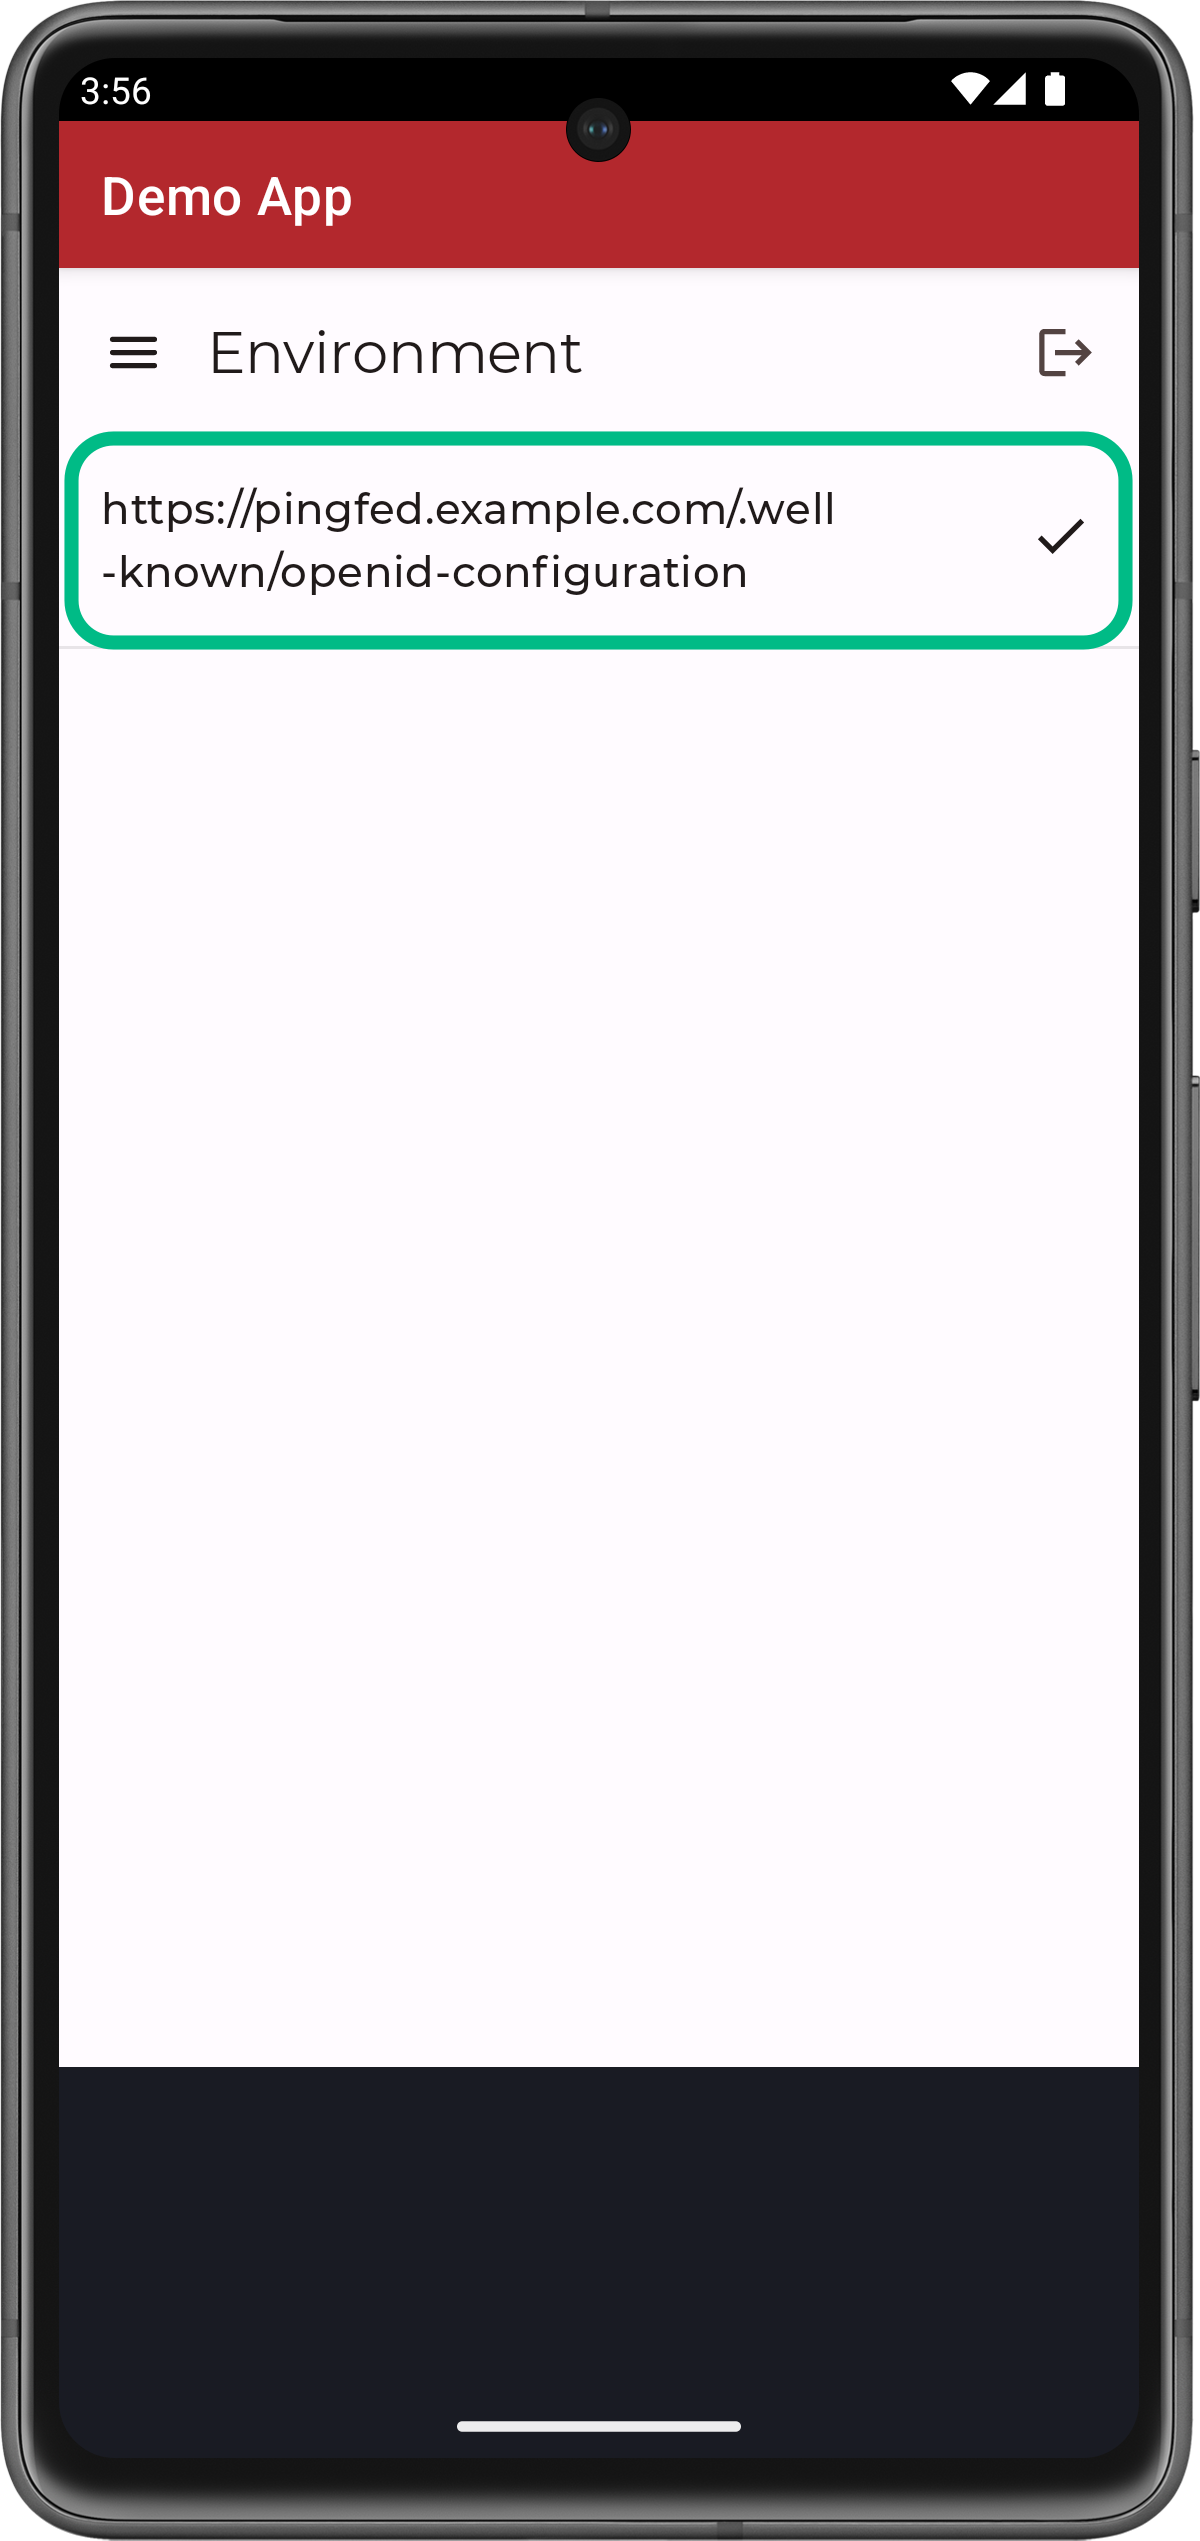 Figure 17. Select the PingFederate environment
 -
Tap the menu icon (), and then tap Centralize Login:
Figure 18. From the menu, select Centralize Login.The app launches a web browser and redirects to your PingFederate environment:
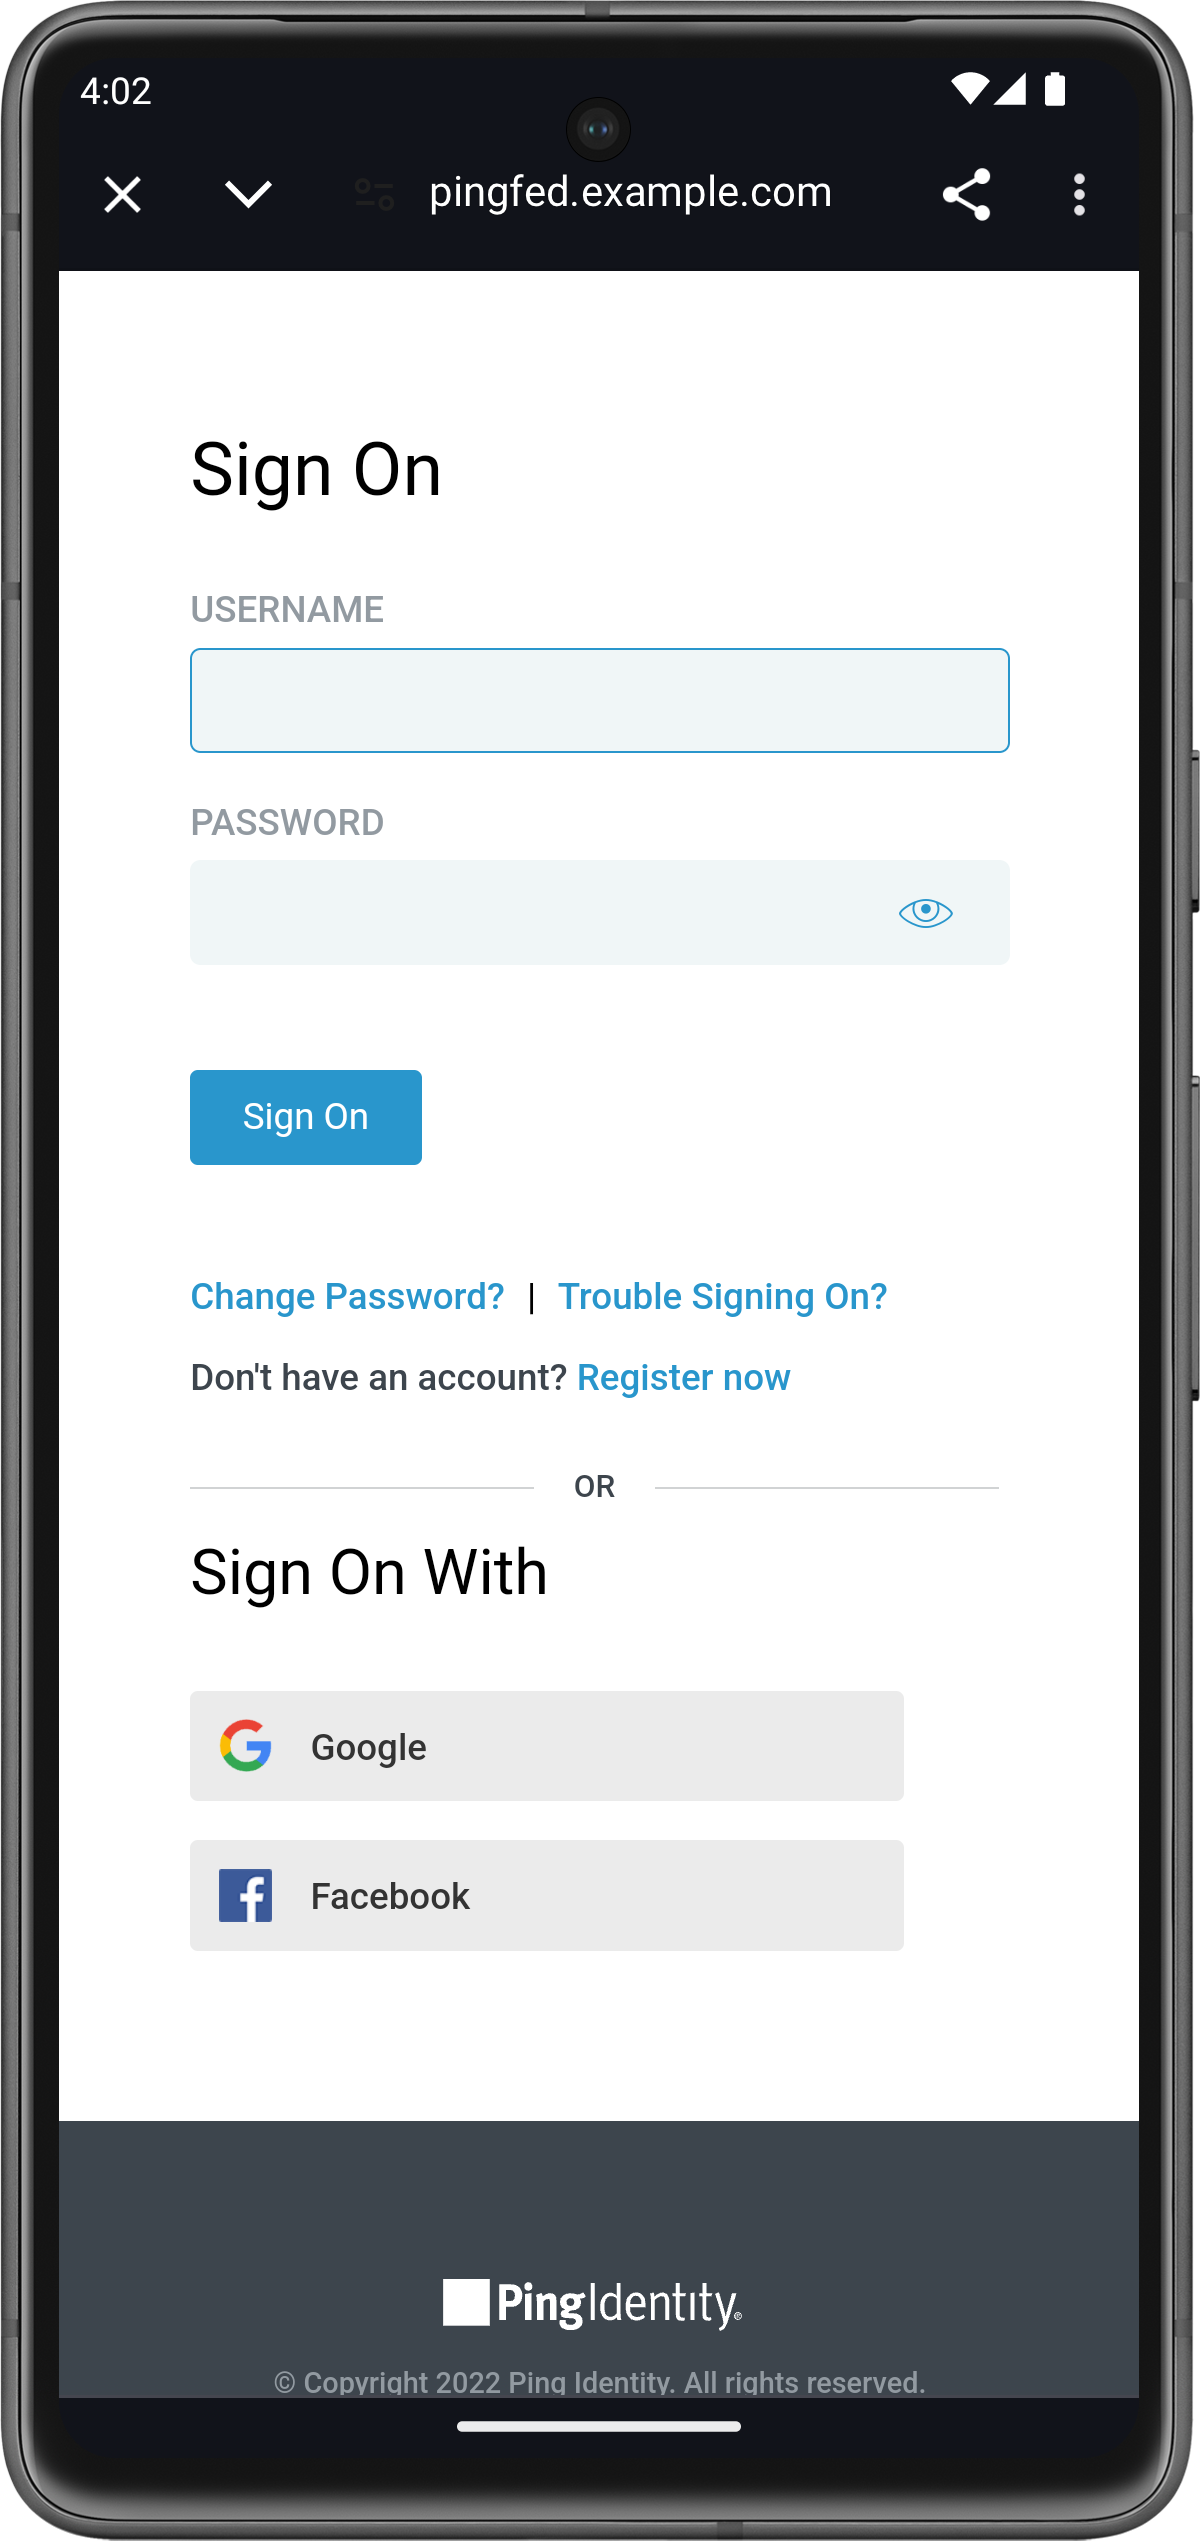 Figure 19. Browser launched and redirected to PingFederate
 -
Sign on using your PingFederate credentials
If authentication is successful, the application returns to the user info screen.
-
Tap Show Userinfo to display the details of the token issues to the demo user:
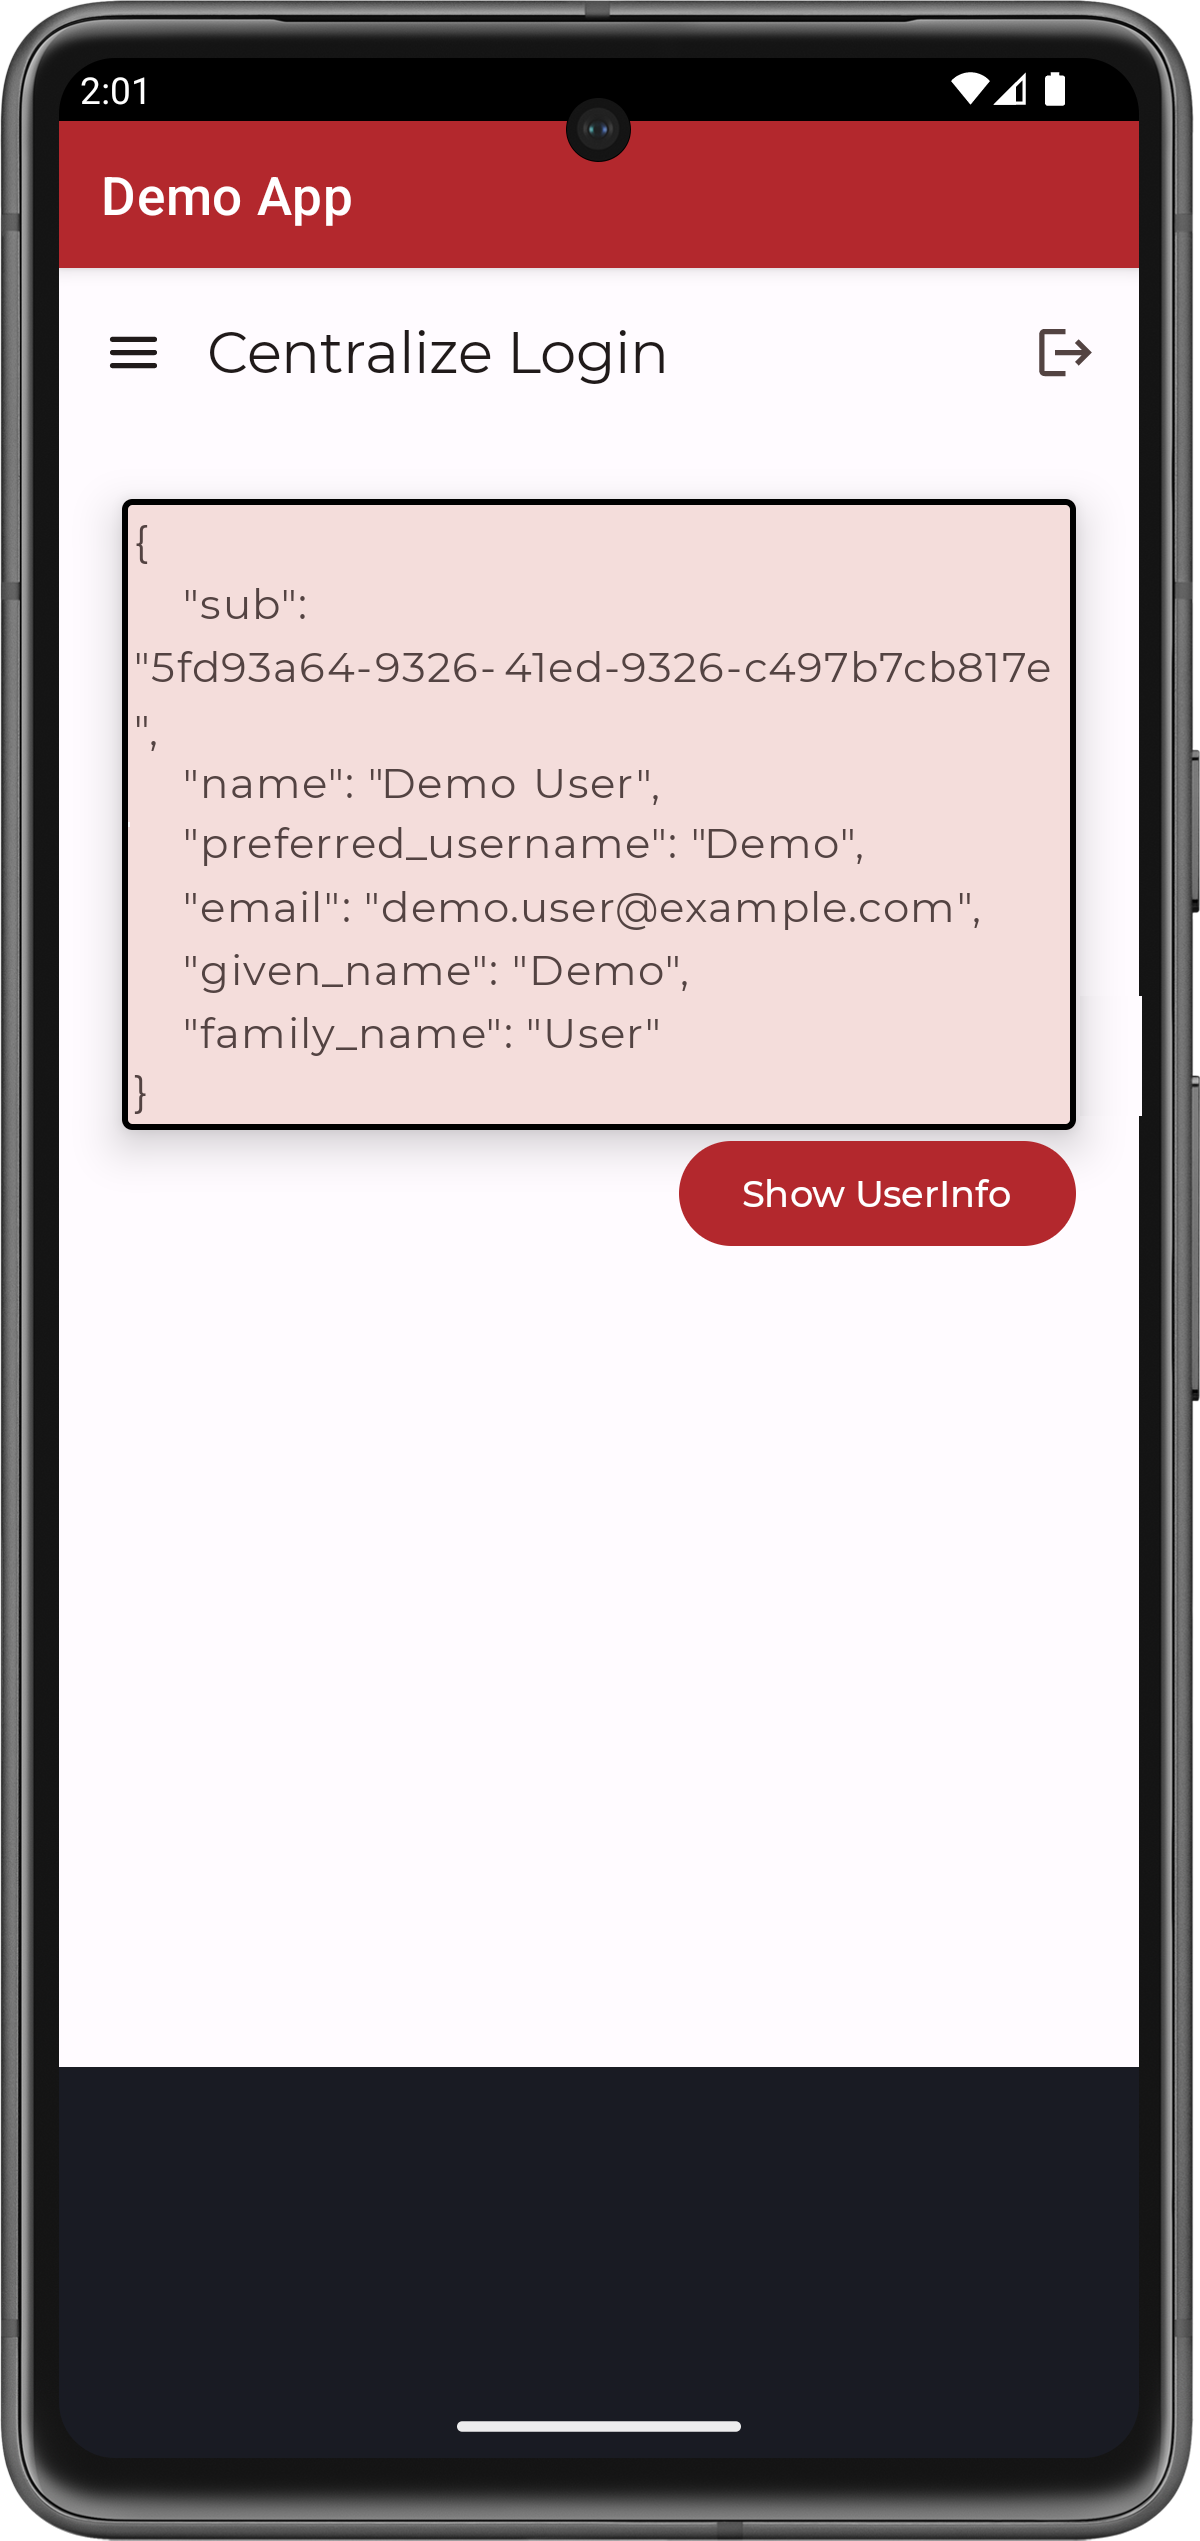 Figure 20. User info of the demo user
 -
Tap the menu icon (), and then tap Logout.
The app opens a browser momentarily to log the user out of PingFederate, and revoke the tokens.
Apple iOS OIDC login tutorials
Follow these iOS tutorials to integrate your apps using OpenID Connect login to the following servers:
Authentication journey tutorial for iOS
In this tutorial you update a sample app that uses OIDC-based login to obtain tokens by redirecting to the PingOne UI for authentication.
The sample connects to the .well-known endpoint of your PingOne server to obtain the correct URIs to authenticate the user, and redirects to your PingOne server’s login UI.
After authentication, PingOne redirects the browser back to your application, which then obtains an OAuth 2.0 access token and displays the related user information.
Before you begin
To successfully complete this tutorial refer to the prerequisites and compatibility requirements in this section.
The tutorial also requires a configured PingOne instance.
Prerequisites
- Xcode
-
You can download the latest version for free from https://developer.apple.com/xcode/.
Server configuration
This tutorial requires you to configure your PingOne server as follows:
Task 1. Create a demo user
The samples and tutorials in this documentation often require that you have an identity set up so that you can test authentication.
To create a demo user in PingOne, follow these steps:
-
Log in to your PingOne administration console.
-
In the left panel, navigate to Directory > Users.
-
Next to the Users label, click the plus icon ().
PingOne displays the Add User panel.
-
Enter the following details:
-
Given Name =
Demo -
Family Name =
User -
Username =
demo -
Email =
demo.user@example.com -
Population =
Default -
Password =
Ch4ng3it!
-
-
Click Save.
Task 2. Register a public OAuth 2.0 client
To register a public OAuth 2.0 client application in PingOne for use with the Ping SDKs for Android and iOS, follow these steps:
-
Log in to your PingOne administration console.
-
In the left panel, navigate to Applications > Applications.
-
Next to the Applications label, click the plus icon ().
PingOne displays the Add Application panel.
-
In Application Name, enter a name for the profile, for example
sdkNativeClient -
Select Native as the Application Type, and then click Save.
-
On the Configuration tab, click the pencil icon ().
-
In Grant Type, select the following values:
Authorization CodeRefresh Token -
In Redirect URIs, enter the following value:
org.forgerock.demo://oauth2redirect -
In Token Endpoint Authentication Method, select
None. -
In the Advanced Settings section, enable Terminate User Session by ID Token.
-
Click Save.
-
-
On the Resources tab, next to Allowed Scopes, click the pencil icon ().
-
In Scopes, select the following values:
emailphoneprofileThe openidscope is selected by default.The result resembles the following:
Figure 21. Adding scopes to an application.
-
-
Optionally, on the Policies tab, click the pencil icon () to select the authentication policies for the application.
Applications that have no authentication policy assignments use the environment’s default authentication policy to authenticate users.
If you have a DaVinci license, you can select PingOne policies or DaVinci Flow policies, but not both. If you do not have a DaVinci license, the page only displays PingOne policies.
To use a PingOne policy:
-
Click Add policies and then select the policies that you want to apply to the application.
-
Click Save.
PingOne applies the policies in the order in which they appear in the list. PingOne evaluates the first policy in the list first. If the requirements are not met, PingOne moves to the next one.
For more information, see Authentication policies for applications.
To use a DaVinci Flow policy:
-
You must clear all PingOne policies. Click Deselect all PingOne Policies.
-
In the confirmation message, click Continue.
-
On the DaVinci Policies tab, select the policies that you want to apply to the application.
-
Click Save.
PingOne applies the first policy in the list.
-
-
Click Save.
-
Enable the OAuth 2.0 client application by using the toggle next to its name:
Figure 22. Enable the application using the toggle.
The application is now configured to accept client connections from and issue OAuth 2.0 tokens to the Android and iOS PingOne example applications and tutorials covered by this documentation.
Step 1. Download the samples
To start this tutorial, you need to download the ForgeRock SDK sample apps repo, which contains the projects you will use.
-
In a web browser, navigate to the SDK Sample Apps repository.
-
Download the source code using one of the following methods:
- Download a ZIP file
-
-
Click Code, and then click Download ZIP.
-
Extract the contents of the downloaded ZIP file to a suitable location.
-
- Use a Git-compatible tool to clone the repo locally
-
-
Click Code, and then copy the HTTPS URL.
-
Use the URL to clone the repository to a suitable location.
For example, from the command-line you could run:
git clone https://github.com/ForgeRock/sdk-sample-apps.git
-
The result of these steps is a local folder named sdk-sample-apps.
Step 2. Configure connection properties
In this step, you configure the "FRExample" app to connect to the OAuth 2.0 application you created in PingOne, using OIDC login.
-
In Xcode, on the File menu, click Open.
-
Navigate to the
sdk-sample-appsfolder you cloned in the previous step, navigate toiOS>uikit-frexamples>FrExample>FrExample>FRExample.xcodeproj, and then click Open. -
In the Project Navigator pane, navigate to FRExample > FRExample, and open the
ViewControllerfile. -
In the
ViewControllerfile:-
Change the
useDiscoveryURLvariable totrue:let useDiscoveryURL = trueChanging the variable causes the sample to use the
discovermethod to get many of the required configuration values from your PingOne OIDC.well-knownendpoint. -
Replace
CLIENT_ID_PLACEHOLDERwith the ID of the OAuth 2.0 client application you created previously in PingOne:let config = ["forgerock_oauth_client_id": "6c7eb89a-66e9-ab12-cd34-eeaf795650b2", "forgerock_oauth_redirect_uri": "org.forgerock.demo://oauth2redirect", "forgerock_oauth_scope" : "openid profile email address revoke", "forgerock_ssl_pinning_public_key_hashes": ["SSL_PINNING_HASH_PLACEHOLDER"]] -
Remove or comment out the
forgerock_ssl_pinning_public_key_hashesline.For information on SSL pinning, refer to Enable SSL pinning.
-
Replace
DISCOVERY_URL_PLACEHOLDERwith the.well-knownendpoint from your OAuth 2.0 native mobile application in PingOne.How do I find my PingOne .well-known URL?
To find the
.well-knownendpoint for an OAuth 2.0 client in PingOne:-
Log in to your PingOne administration console.
-
Go to Applications > Applications, and then select the OAuth 2.0 client you created earlier.
For example, sdkPublicClient.
-
On the Configuration tab, expand the URLs section, and then copy the OIDC Discovery Endpoint value.
For example:
let discoveryURL = "https://auth.pingone.com/3072206d-c6ce-ch15-m0nd-f87e972c7cc3/as/.well-known/openid-configuration" -
-
Optionally, specify which of the configured policies PingOne uses to authenticate users.
In the
performCentralizedLoginfunction, add anacr_valuesparameter to the authorization request by using thesetCustomParam()method:func performCentralizedLogin() { FRUser.browser()? .set(presentingViewController: self) .set(browserType: .authSession) // Add acr values to the authorization request .setCustomParam(key: "acr_values", value: "<Policy IDs>") .build().login { (user, error) in self.displayLog("User: \(String(describing: user)) || Error: \(String(describing: error))") } return }Replace <Policy IDs> with either a single DaVinci policy, by using its flow policy ID, or one or more PingOne policies by specifying the policy names, separated by spaces or the encoded space character
%20.Examples:
- DaVinci flow policy ID
-
.setCustomParam(key: "acr_values", value: "d1210a6b0b2665dbaa5b652221badba2") - PingOne policy names
-
.setCustomParam(key: "acr_values", value: "Single_Factor%20Multi_Factor")
For more information, refer to Editing an application - OIDC.
-
With the sample configured, you can proceed to Step 3. Test the app.
Step 3. Test the app
In the following procedure, you run the sample app that you configured in the previous step. The app performs a centralized login on your PingOne instance.
Log in as a demo user
-
In Xcode, select .
Xcode launches the sample app in the iPhone simulator.
-
In the sample app on the iPhone simulator, in the Select an action menu, select Login with Browser, and then click Perform Action.
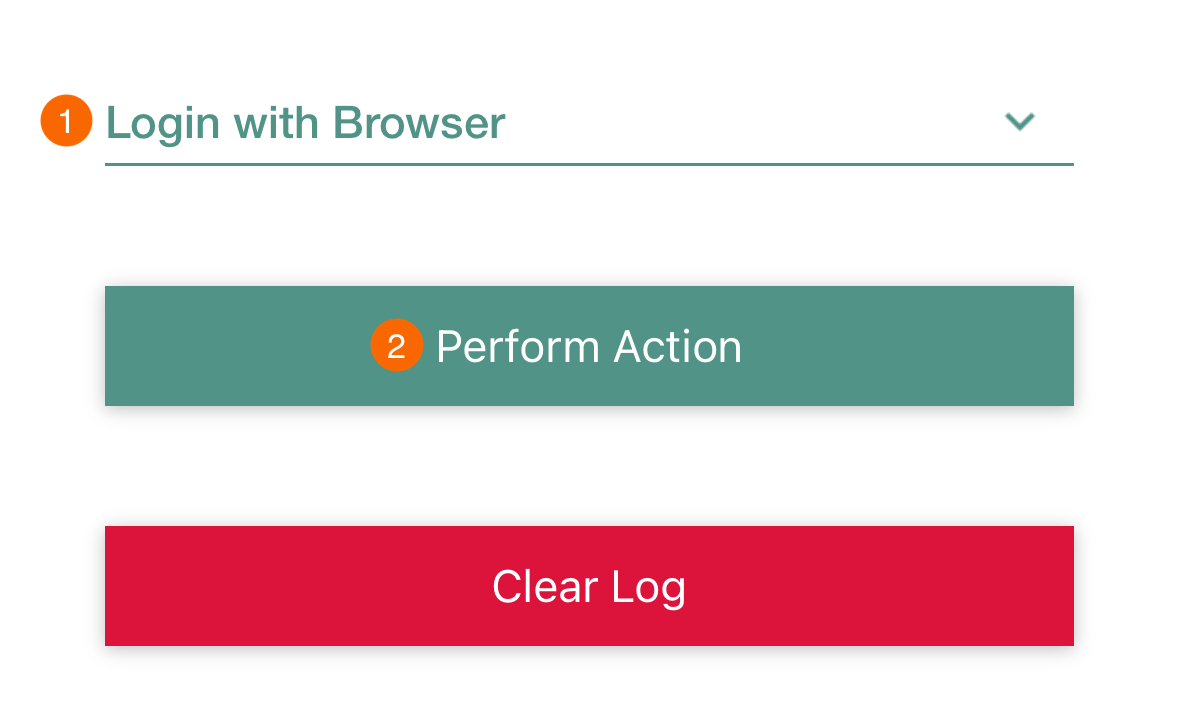 Figure 23. Select the PingOne environment
You might see a dialog asking if you want to open a browser. If you do, tap Continue. The app launches a web browser and redirects to your PingOne environment:
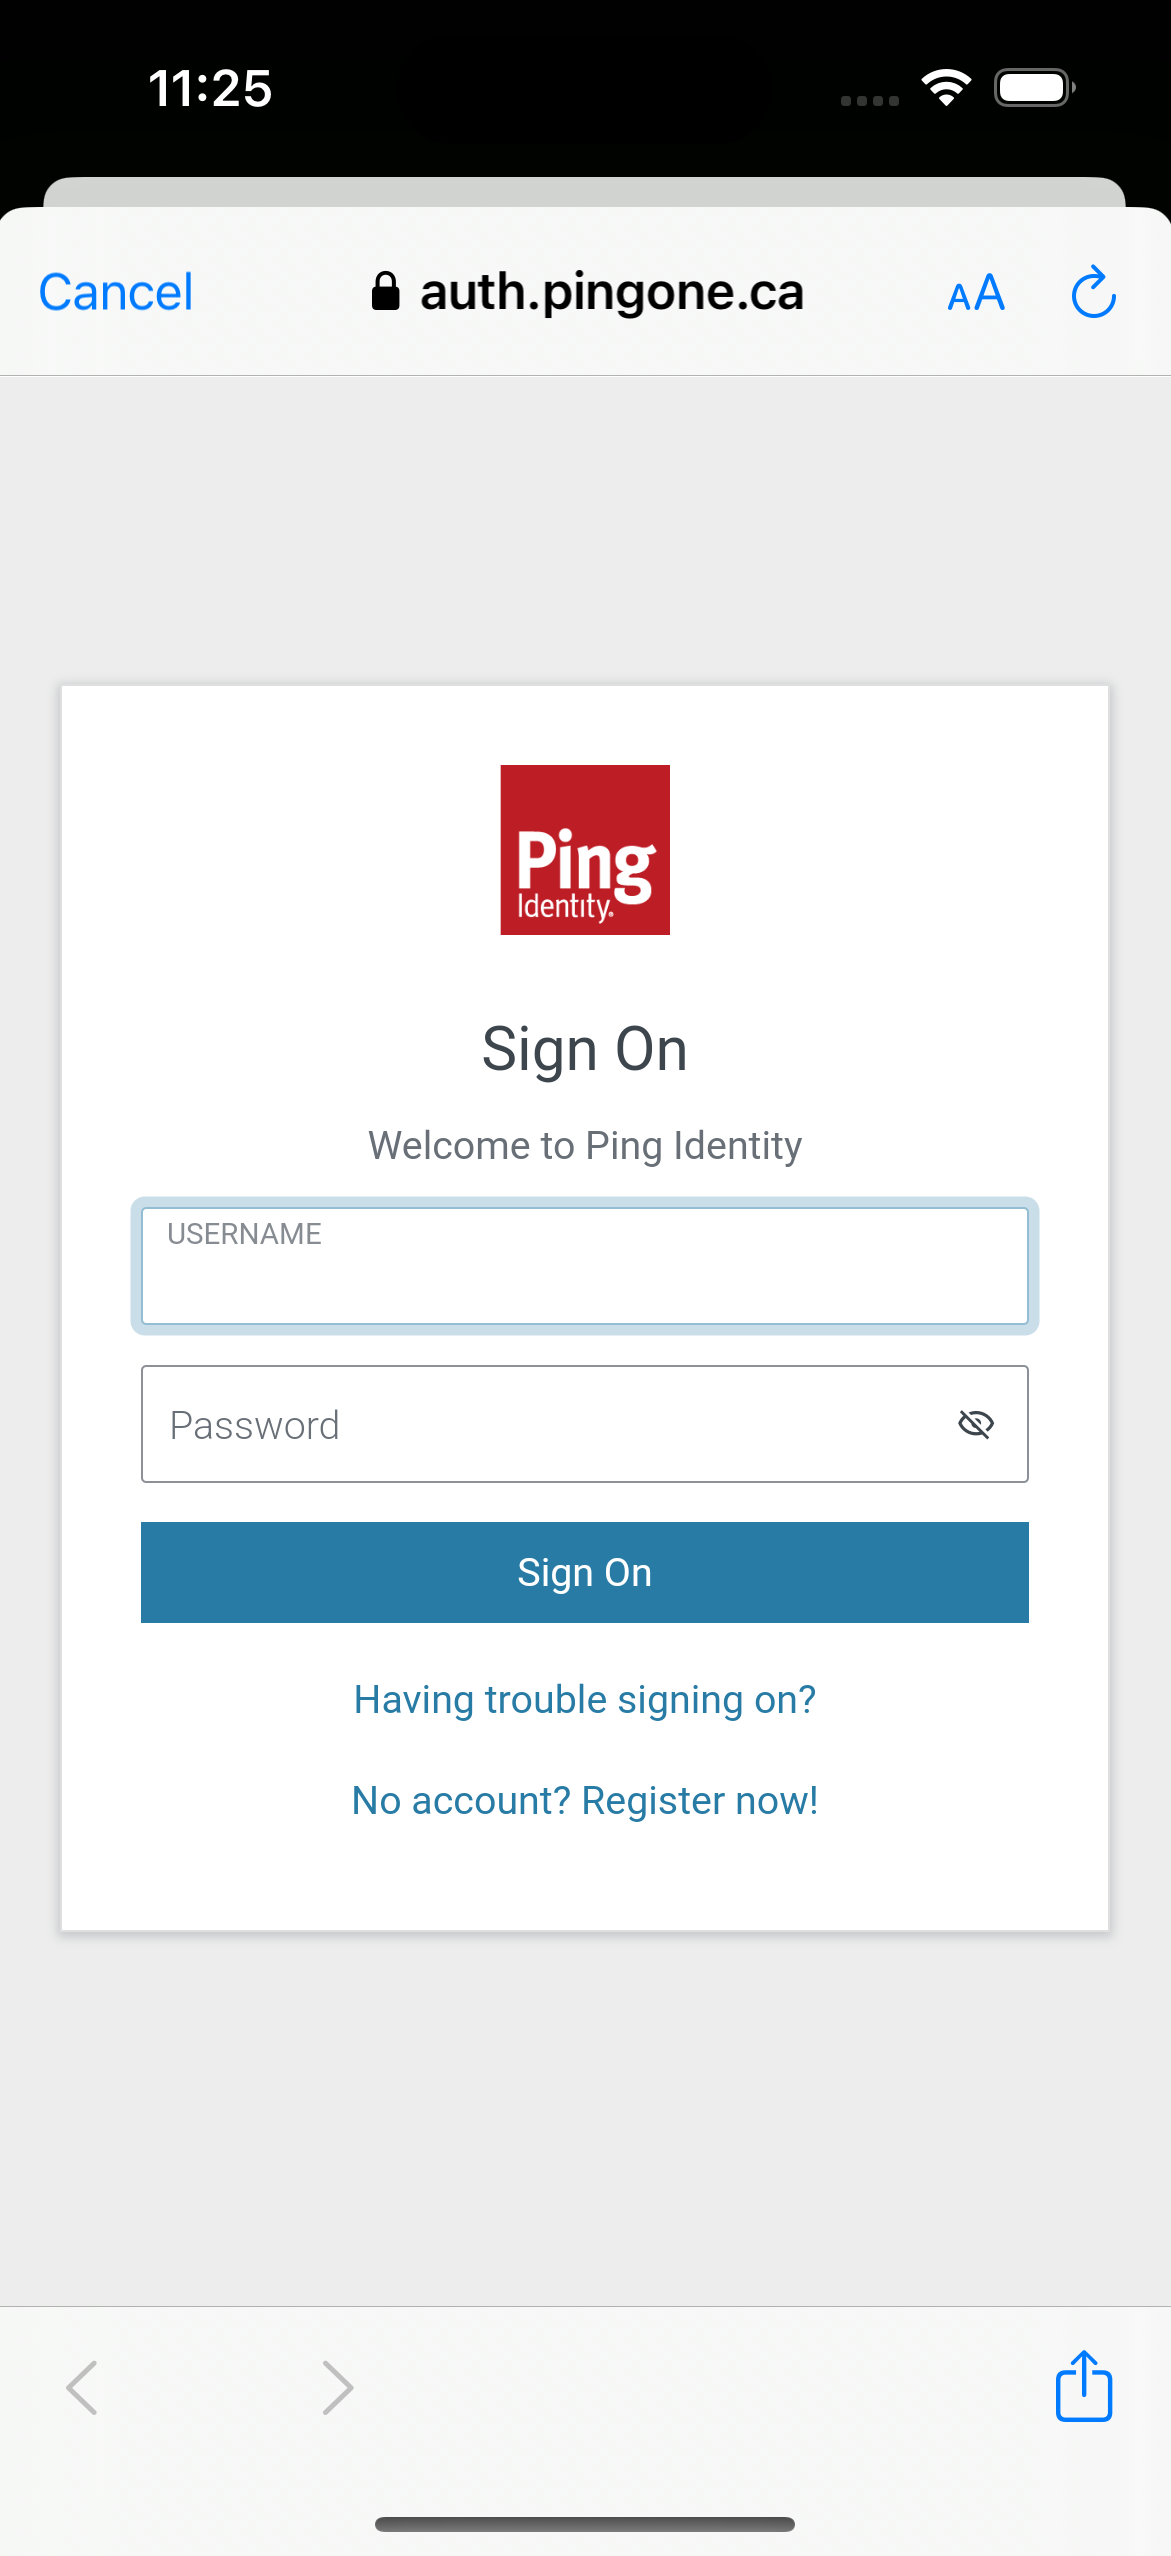 Figure 24. Browser launched and redirected to PingOne
 -
Sign on as a demo user:
-
Name:
demo -
Password:
Ch4ng3it!
If authentication is successful, the application displays the tokens issued by PingOne.
-
-
Tap Login with Browser to open the drop-down menu, select User Logout, and then tap Perform Action.
The app briefly opens a browser to sign the user out of PingOne, and revoke the tokens.
To verify the user is signed out:
-
In the PingOne administration console, navigate to Directory > Users.
-
Select the user you signed in as.
-
From the Sevices dropdown, select Authentication:
Figure 25. Checking a user’s sessions in PingOne.The Sessions section displays any existing sessions the user has, and whether they originate from a mobile device.
-
OIDC login to PingOne Advanced Identity Cloud tutorial for Android
In this tutorial you update a sample app that uses OIDC-based login to obtain tokens by redirecting to the PingOne Advanced Identity Cloud UI for authentication.
The sample connects to the .well-known endpoint of your PingOne Advanced Identity Cloud server to obtain the correct URIs to authenticate the user, and redirects to your PingOne Advanced Identity Cloud server’s login UI.
After authentication, PingOne Advanced Identity Cloud redirects the browser back to your application, which then obtains an OAuth 2.0 access token and displays the related user information.
Before you begin
To successfully complete this tutorial refer to the prerequisites in this section.
The tutorial also requires a configured PingOne Advanced Identity Cloud tenant.
Prerequisites
- Xcode
-
You can download the latest version for free from https://developer.apple.com/xcode/.
Server configuration
This tutorial requires you to configure your PingOne Advanced Identity Cloud tenant as follows:
Task 1. Create a demo user
The samples and tutorials in this documentation often require that you have an identity set up so that you can test authentication.
To create a demo user in PingOne Advanced Identity Cloud, follow these steps:
-
Log in to your PingOne Advanced Identity Cloud tenant.
-
In the left panel, click Identities > Manage.
-
Click New Alpha realm - User.
-
Enter the following details:
-
Username =
demo -
First Name =
Demo -
Last Name =
User -
Email Address =
demo.user@example.com -
Password =
Ch4ng3it!
-
-
Click Save.
Task 2. Create an authentication journey
Authentication journeys provide fine-grained authentication by allowing multiple paths and decision points throughout the flow. Authentication journeys are made up of nodes that define actions taken during authentication.
Each node performs a single task, such as collecting a username or making a simple decision. Nodes can have multiple outcomes rather than just success or failure. For details, see the Authentication nodes configuration reference in the PingAM documentation.
To create a simple journey for use when testing the Ping SDKs, follow these steps:
-
In your PingOne Advanced Identity Cloud tenant, navigate to Journeys, and click New Journey.
-
Enter a name, such as
sdkUsernamePasswordJourneyand click Save.The authentication journey designer appears.
-
Drag the following nodes into the designer area:
-
Page Node
-
Platform Username
-
Platform Password
-
Data Store Decision
-
-
Drag and drop the Platform Username and Platform Password nodes onto the Page Node, so that they both appear on the same page when logging in.
-
Connect the nodes as follows:
Figure 26. Example username and password authentication journey -
Click Save.
Task 3. Register a public OAuth 2.0 client
Public clients do not use a client secret to obtain tokens because they are unable to keep them hidden. The Ping SDKs commonly use this type of client to obtain tokens, as they cannot guarantee safekeeping of the client credentials in a browser or on a mobile device.
To register a public OAuth 2.0 client application for use with the SDKs in PingOne Advanced Identity Cloud, follow these steps:
-
Log in to your PingOne Advanced Identity Cloud tenant.
-
In the left panel, click Applications.
-
Click Custom Application.
-
Select OIDC - OpenId Connect as the sign-in method, and then click Next.
-
Select Native / SPA as the application type, and then click Next.
-
In Name, enter a name for the application, such as
Public SDK Client. -
In Owners, select a user that is responsible for maintaining the application, and then click Next.
When trying out the SDKs, you could select the demouser you created previously. -
In Client ID, enter
sdkPublicClient, and then click Create Application.PingOne Advanced Identity Cloud creates the application and displays the details screen.
-
On the Sign On tab:
-
In Sign-In URLs, enter the following values:
org.forgerock.demo://oauth2redirectAlso add any other domains where you host SDK applications. -
In Grant Types, enter the following values:
Authorization CodeRefresh Token -
In Scopes, enter the following values:
openid profile email address
-
-
Click Show advanced settings, and on the Authentication tab:
-
In Token Endpoint Authentication Method, select
none. -
In Client Type, select
Public. -
Enable the Implied Consent property.
-
-
Click Save.
The application is now configured to accept client connections from and issue OAuth 2.0 tokens to the example applications and tutorials covered by this documentation.
Task 4. Configure the OAuth 2.0 provider
The provider specifies the supported OAuth 2.0 configuration options for a realm.
To ensure the PingOne Advanced Identity Cloud OAuth 2.0 provider service is configured for use with the Ping SDKs, follow these steps:
-
In your PingOne Advanced Identity Cloud tenant, navigate to Native Consoles > Access Management.
-
In the left panel, click Services.
-
In the list of services, click OAuth2 Provider.
-
On the Core tab, ensure Issue Refresh Tokens is enabled.
-
On the Consent tab, ensure Allow Clients to Skip Consent is enabled.
-
Click Save Changes.
Step 1. Download the samples
To start this tutorial, you need to download the ForgeRock SDK sample apps repo, which contains the projects you will use.
-
In a web browser, navigate to the SDK Sample Apps repository.
-
Download the source code using one of the following methods:
- Download a ZIP file
-
-
Click Code, and then click Download ZIP.
-
Extract the contents of the downloaded ZIP file to a suitable location.
-
- Use a Git-compatible tool to clone the repo locally
-
-
Click Code, and then copy the HTTPS URL.
-
Use the URL to clone the repository to a suitable location.
For example, from the command-line you could run:
git clone https://github.com/ForgeRock/sdk-sample-apps.git
-
The result of these steps is a local folder named sdk-sample-apps.
Step 2. Configure connection properties
In this step, you configure the "swiftui-oidc" app to connect to the OAuth 2.0 application you created in PingOne Advanced Identity Cloud, and display the login UI of the server.
-
In Xcode, on the File menu, click Open.
-
Navigate to the
sdk-sample-appsfolder you cloned in the previous step, navigate toiOS>swiftui-oidc>PingExample>PingExample.xcodeproj, and then click Open. -
In the Project Navigator pane, navigate to PingExample > PingExample > Utilities, and open the
ConfigurationManagerfile. -
Locate the
ConfigurationViewModelfunction which contains placeholder configuration properties.The function is commented with //TODO:in the source to make it easier to locate.return ConfigurationViewModel( clientId: "[CLIENT ID]", scopes: ["openid", "email", "address", "phone", "profile"], redirectUri: "[REDIRECT URI]", signOutUri: "[SIGN OUT URI]", discoveryEndpoint: "[DISCOVERY ENDPOINT URL]", environment: "[ENVIRONMENT - EITHER AIC OR PingOne]", cookieName: "[COOKIE NAME - OPTIONAL (Applicable for AIC only)]", browserSeletorType: .authSession ) -
In the
ConfigurationViewModelfunction, update the following properties with the values you obtained when preparing your environment.- clientId
-
The client ID from your OAuth 2.0 application in PingOne Advanced Identity Cloud.
For example,
sdkPublicClient - scopes
-
The scopes you added to your OAuth 2.0 application in PingOne Advanced Identity Cloud.
For example,
address email openid phone profile - redirectUri
-
The
redirect_urito return to after logging in with the server UI, for example the URI to your client app.This value must exactly match a value configured in your OAuth 2.0 client. For example,
org.forgerock.demo://oauth2redirect. - signOutUri
-
The URI to redirect to after logging out of the authorization server, for example the URI to your client app.
This value must exactly match a value configured in your OAuth 2.0 client. For example,
org.forgerock.demo://oauth2redirect. - discoveryEndpoint
-
The
.well-knownendpoint from your PingOne Advanced Identity Cloud tenant.How do I find my PingOne Advanced Identity Cloud .well-known URL?
You can view the
.well-knownendpoint for an OAuth 2.0 client in the PingOne Advanced Identity Cloud admin console:-
Log in to your PingOne Advanced Identity Cloud administration console.
-
Click Applications, and then select the OAuth 2.0 client you created earlier. For example, sdkPublicClient.
-
On the Sign On tab, in the Client Credentials section, copy the Discovery URI value.
For example,
https://openam-forgerock-sdks.forgeblocks.com/am/oauth2/alpha/.well-known/openid-configuration -
- environment
-
Ensures the sample app uses the correct behavior for the different servers it supports, for example what logout parameters to use.
For PingOne Advanced Identity Cloud and PingAM servers, specify
AIC. - cookieName
-
The name of the cookie your PingOne Advanced Identity Cloud tenant uses to store SSO tokens in client browsers.
How do I find my PingOne Advanced Identity Cloud cookie name?
To locate the cookie name in an PingOne Advanced Identity Cloud tenant:
-
Navigate to Tenant settings > Global Settings
-
Copy the value of the Cookie property.
For example,
ch15fefc5407912 -
- browserSeletorType
-
You can specify what type of browser the client iOS device opens to handle centralized login.
Each browser has slightly different characteristics, which make them suitable to different scenarios, as outlined in this table:
Browser type Characteristics .authSessionOpens a web authentication session browser.
Designed specifically for authentication sessions, however it prompts the user before opening the browser with a modal that asks them to confirm the domain is allowed to authenticate them.
This is the default option in the Ping SDK for iOS.
.ephemeralAuthSessionOpens a web authentication session browser, but enables the
prefersEphemeralWebBrowserSessionparameter.This browser type does not prompt the user before opening the browser with a modal.
The difference between this and
.authSessionis that the browser does not include any existing data such as cookies in the request, and also discards any data obtained during the browser session, including any session tokens.When is
ephemeralAuthSessionsuitable:-
ephemeralAuthSessionis not suitable when you require single sign-on (SSO) between your iOS apps, as the browser will not maintain session tokens. -
ephemeralAuthSessionis not suitable when you require a session token to log a user out of the server, for example for logging out of PingOne, as the browser will not maintain session tokens. -
Use
ephemeralAuthSessionwhen you do not want the user’s existing sessions to affect the authentication.
.nativeBrowserAppOpens the installed browser that is marked as the default by the user. Often Safari.
The browser opens without any interaction from the user. However, the browser does display a modal when returning to your application.
.sfViewControllerOpens a Safari view controller browser.
Your client app is not able to interact with the pages in the
sfViewControlleror access the data or browsing history.The view controller opens within your app without any interaction from the user. As the user does not leave your app, the view controller does not need to display a warning modal when authentication is complete and control returns to your application.
-
The result resembles the following:
return ConfigurationViewModel( clientId: "sdkPublicClient", scopes: ["openid", "email", "address", "phone", "profile"], redirectUri: "org.forgerock.demo://oauth2redirect", signOutUri: "org.forgerock.demo://oauth2redirect", discoveryEndpoint: "https://openam-forgerock-sdks.forgeblocks.com/am/oauth2/alpha/.well-known/openid-configuration", environment: "AIC", cookieName: "ch15fefc5407912", browserSeletorType: .authSession ) -
Optionally, specify ACR values to choose which authentication journey the server uses.
-
Navigate to PingExample > PingExample > ViewModels, and open the
OIDCViewModelfile. -
In the
startOIDC()function, add anacr_valuesparameter to the authorization request by using thesetCustomParam()method:public func startOIDC() async throws → FRUser { return try await withCheckedThrowingContinuation({ (continuation: CheckedContinuation<FRUser, Error>) in Task { @MainActor in FRUser.browser()? .set(presentingViewController: self.topViewController!) .set(browserType: ConfigurationManager.shared.currentConfigurationViewModel?.getBrowserType() ?? .authSession) .setCustomParam(key: "acr_values", value: "sdkUsernamePasswordJourney") .build().login { (user, error) in if let frUser = user { Task { @MainActor in self.status = "User is authenticated" } continuation.resume(returning: frUser) } else { Task { @MainActor in self.status = error?.localizedDescription ?? "Error was nil" } continuation.resume(throwing: error!) } } } }) }Enter one or more of the ACR mapping keys as configured in the OAuth 2.0 provider service.
To learn more, refer to Choose journeys with ACR values.
You can list the available keys by inspecting the acr_values_supportedproperty in the output of your/oauth2/.well-known/openid-configurationendpoint.
-
Step 3. Test the app
In this step, run the sample app that you configured in the previous step. The app performs OIDC login to your PingOne Advanced Identity Cloud instance.
-
In Xcode, select .
Xcode launches the sample app in the iPhone simulator.
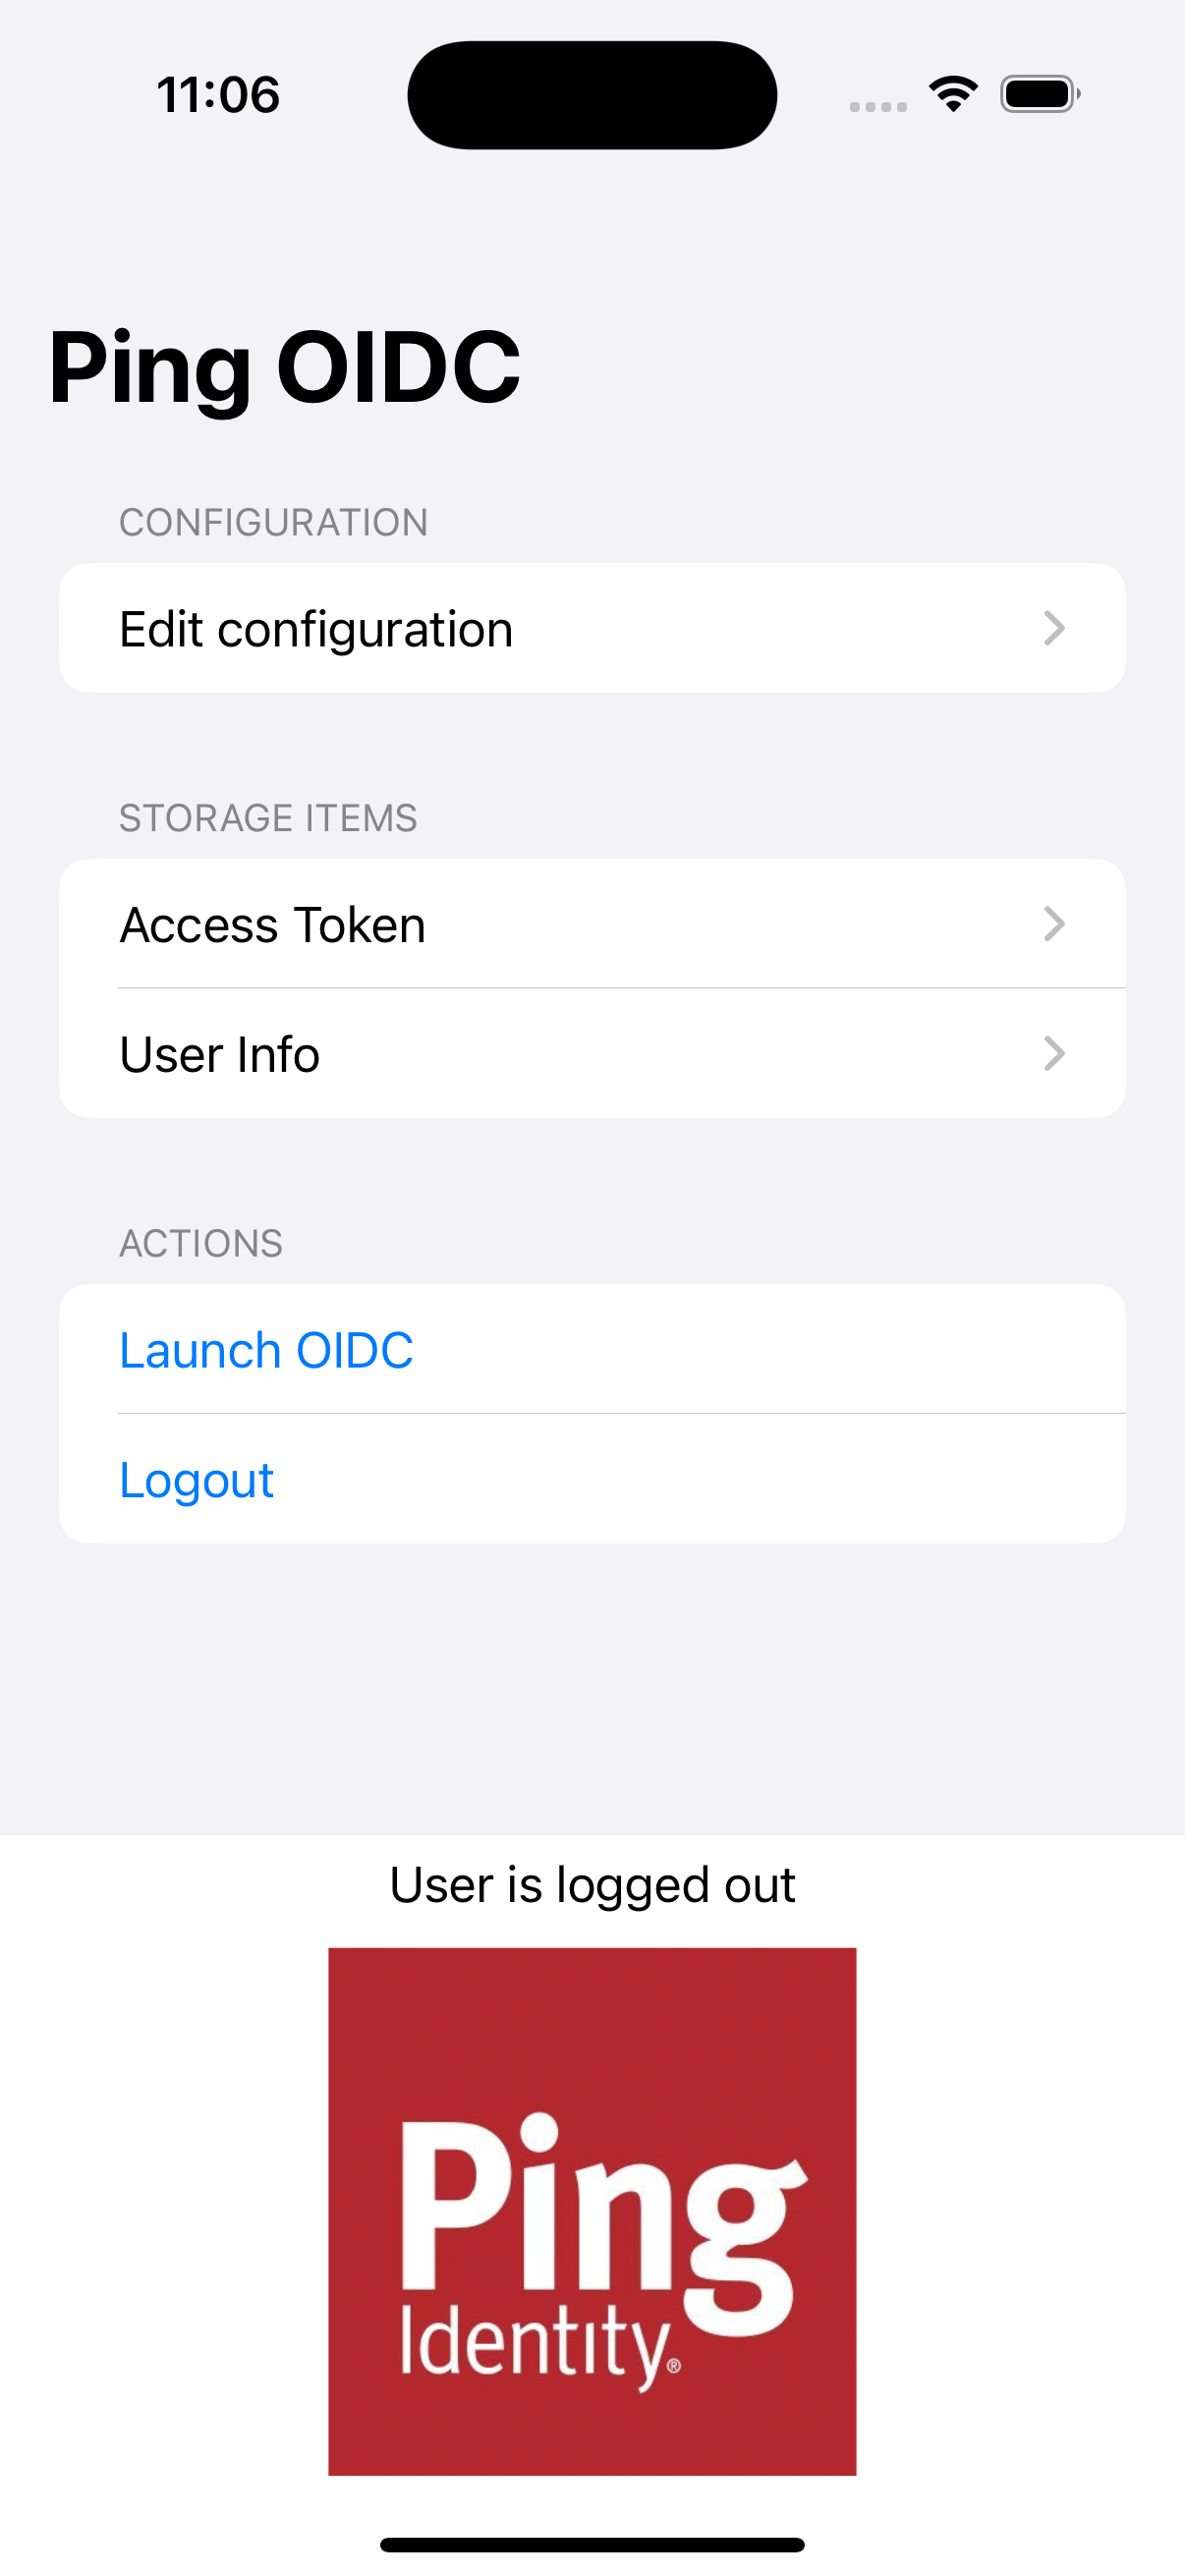 Figure 27. iOS OIDC login sample home screen
 -
In the sample app on the iPhone simulator, tap Edit configuration, and verify or edit the configuration you entered in the previous step.
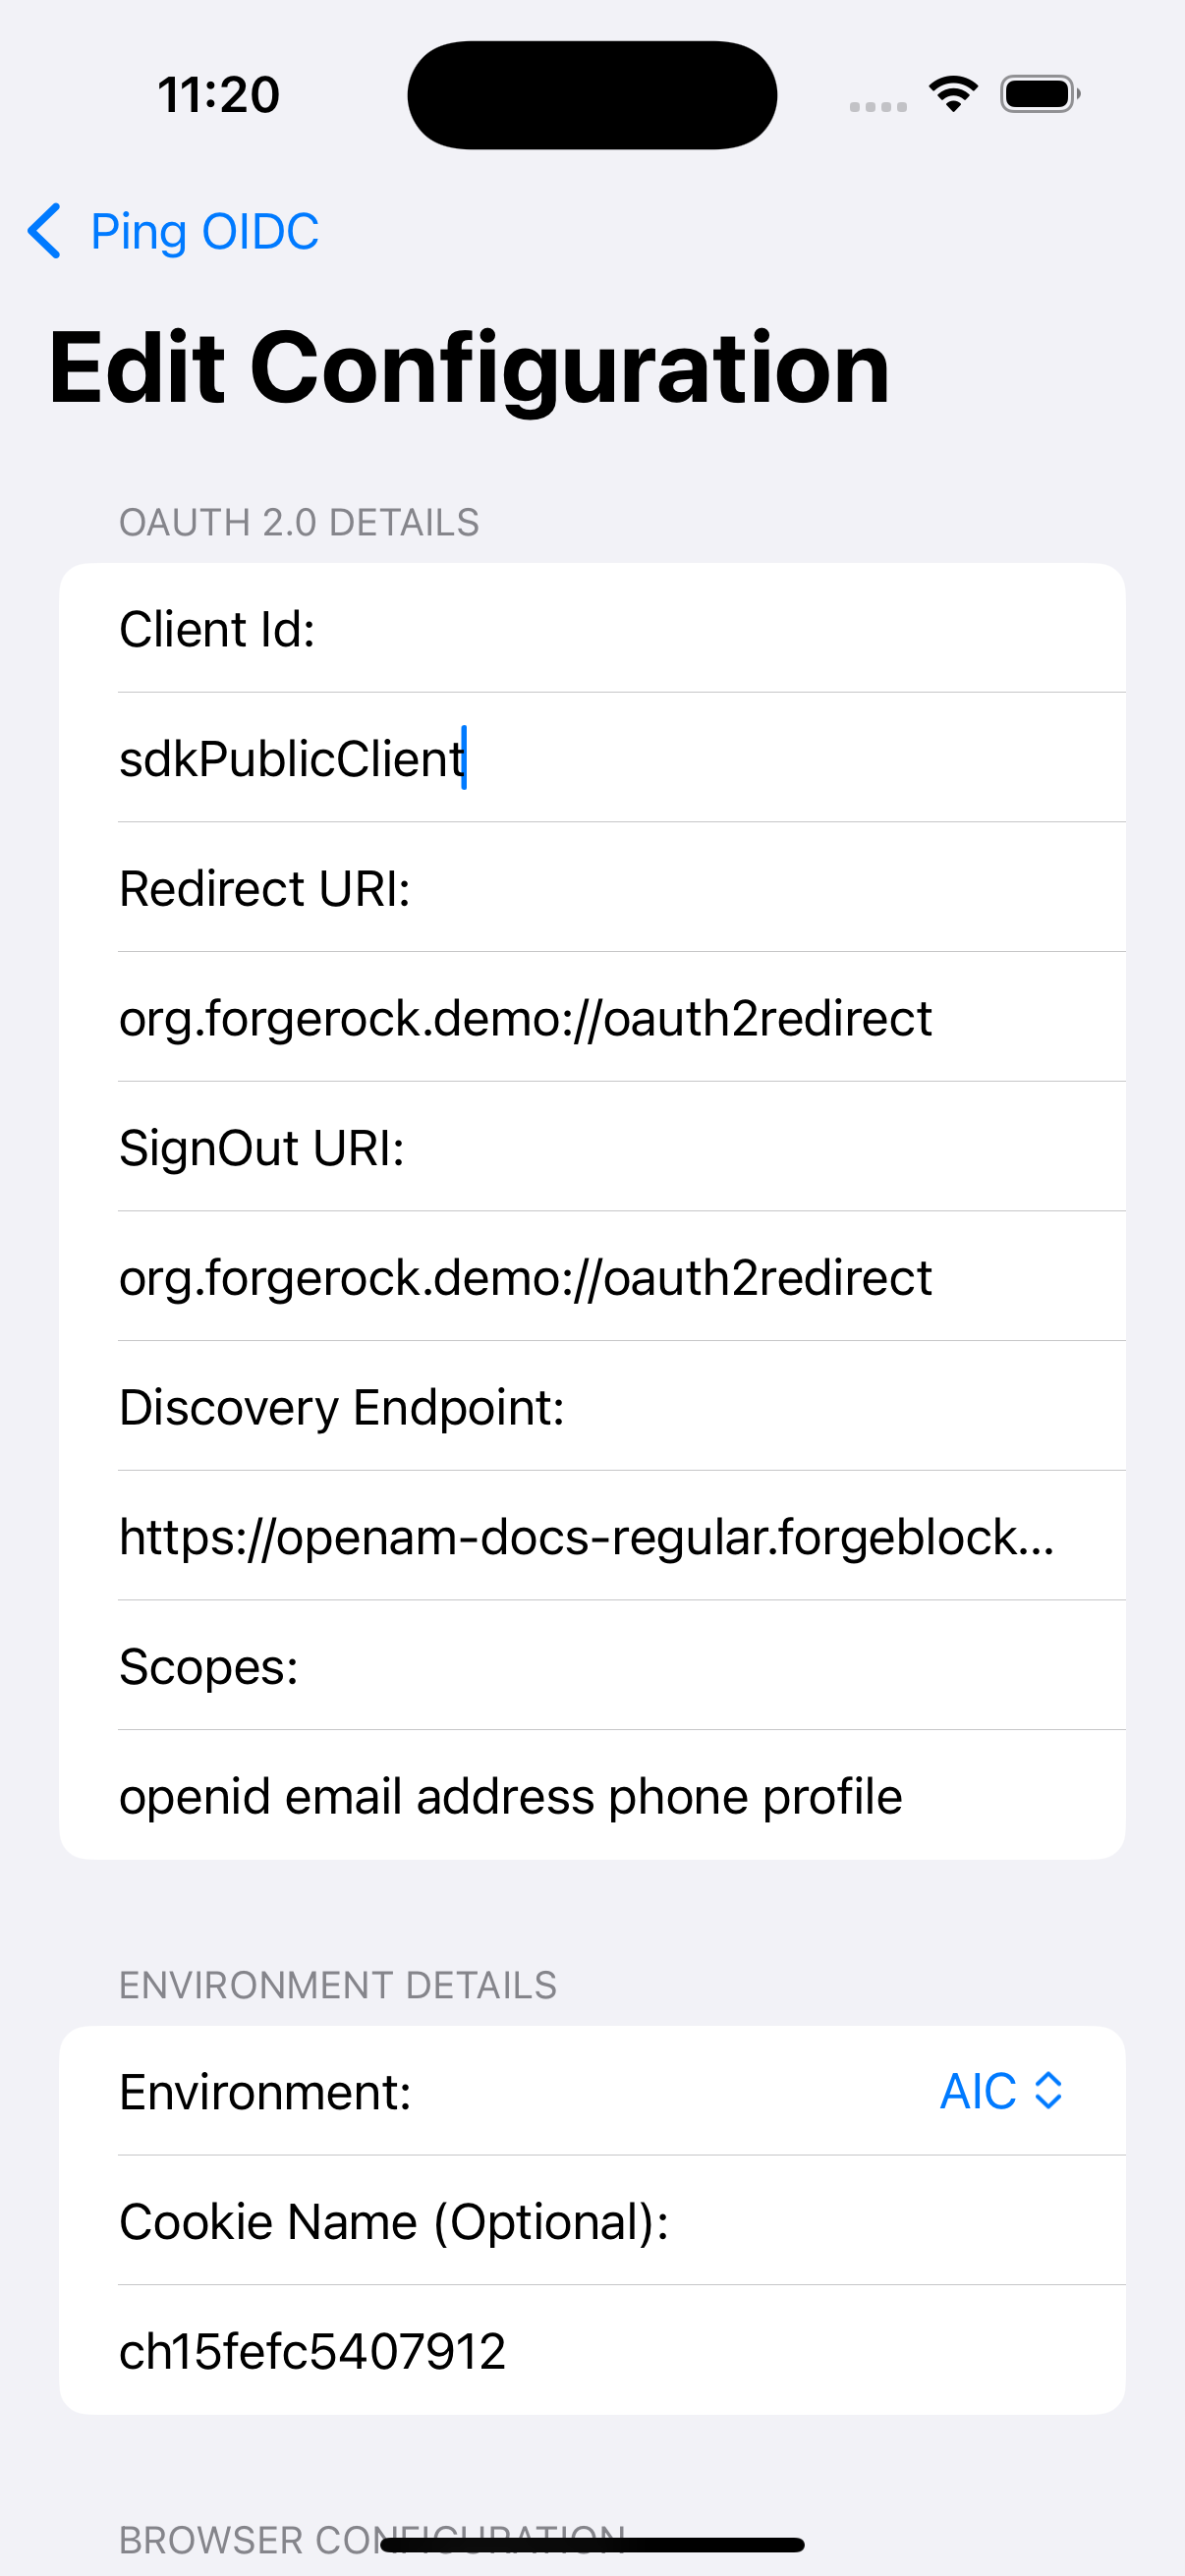 Figure 28. Verify the configuration settings
 -
Tap Ping OIDC to go back to the main menu, and then tap Launch OIDC.
You might see a dialog asking if you want to open a browser. If you do, tap Continue. The app launches a web browser and redirects to your PingOne Advanced Identity Cloud login UI:
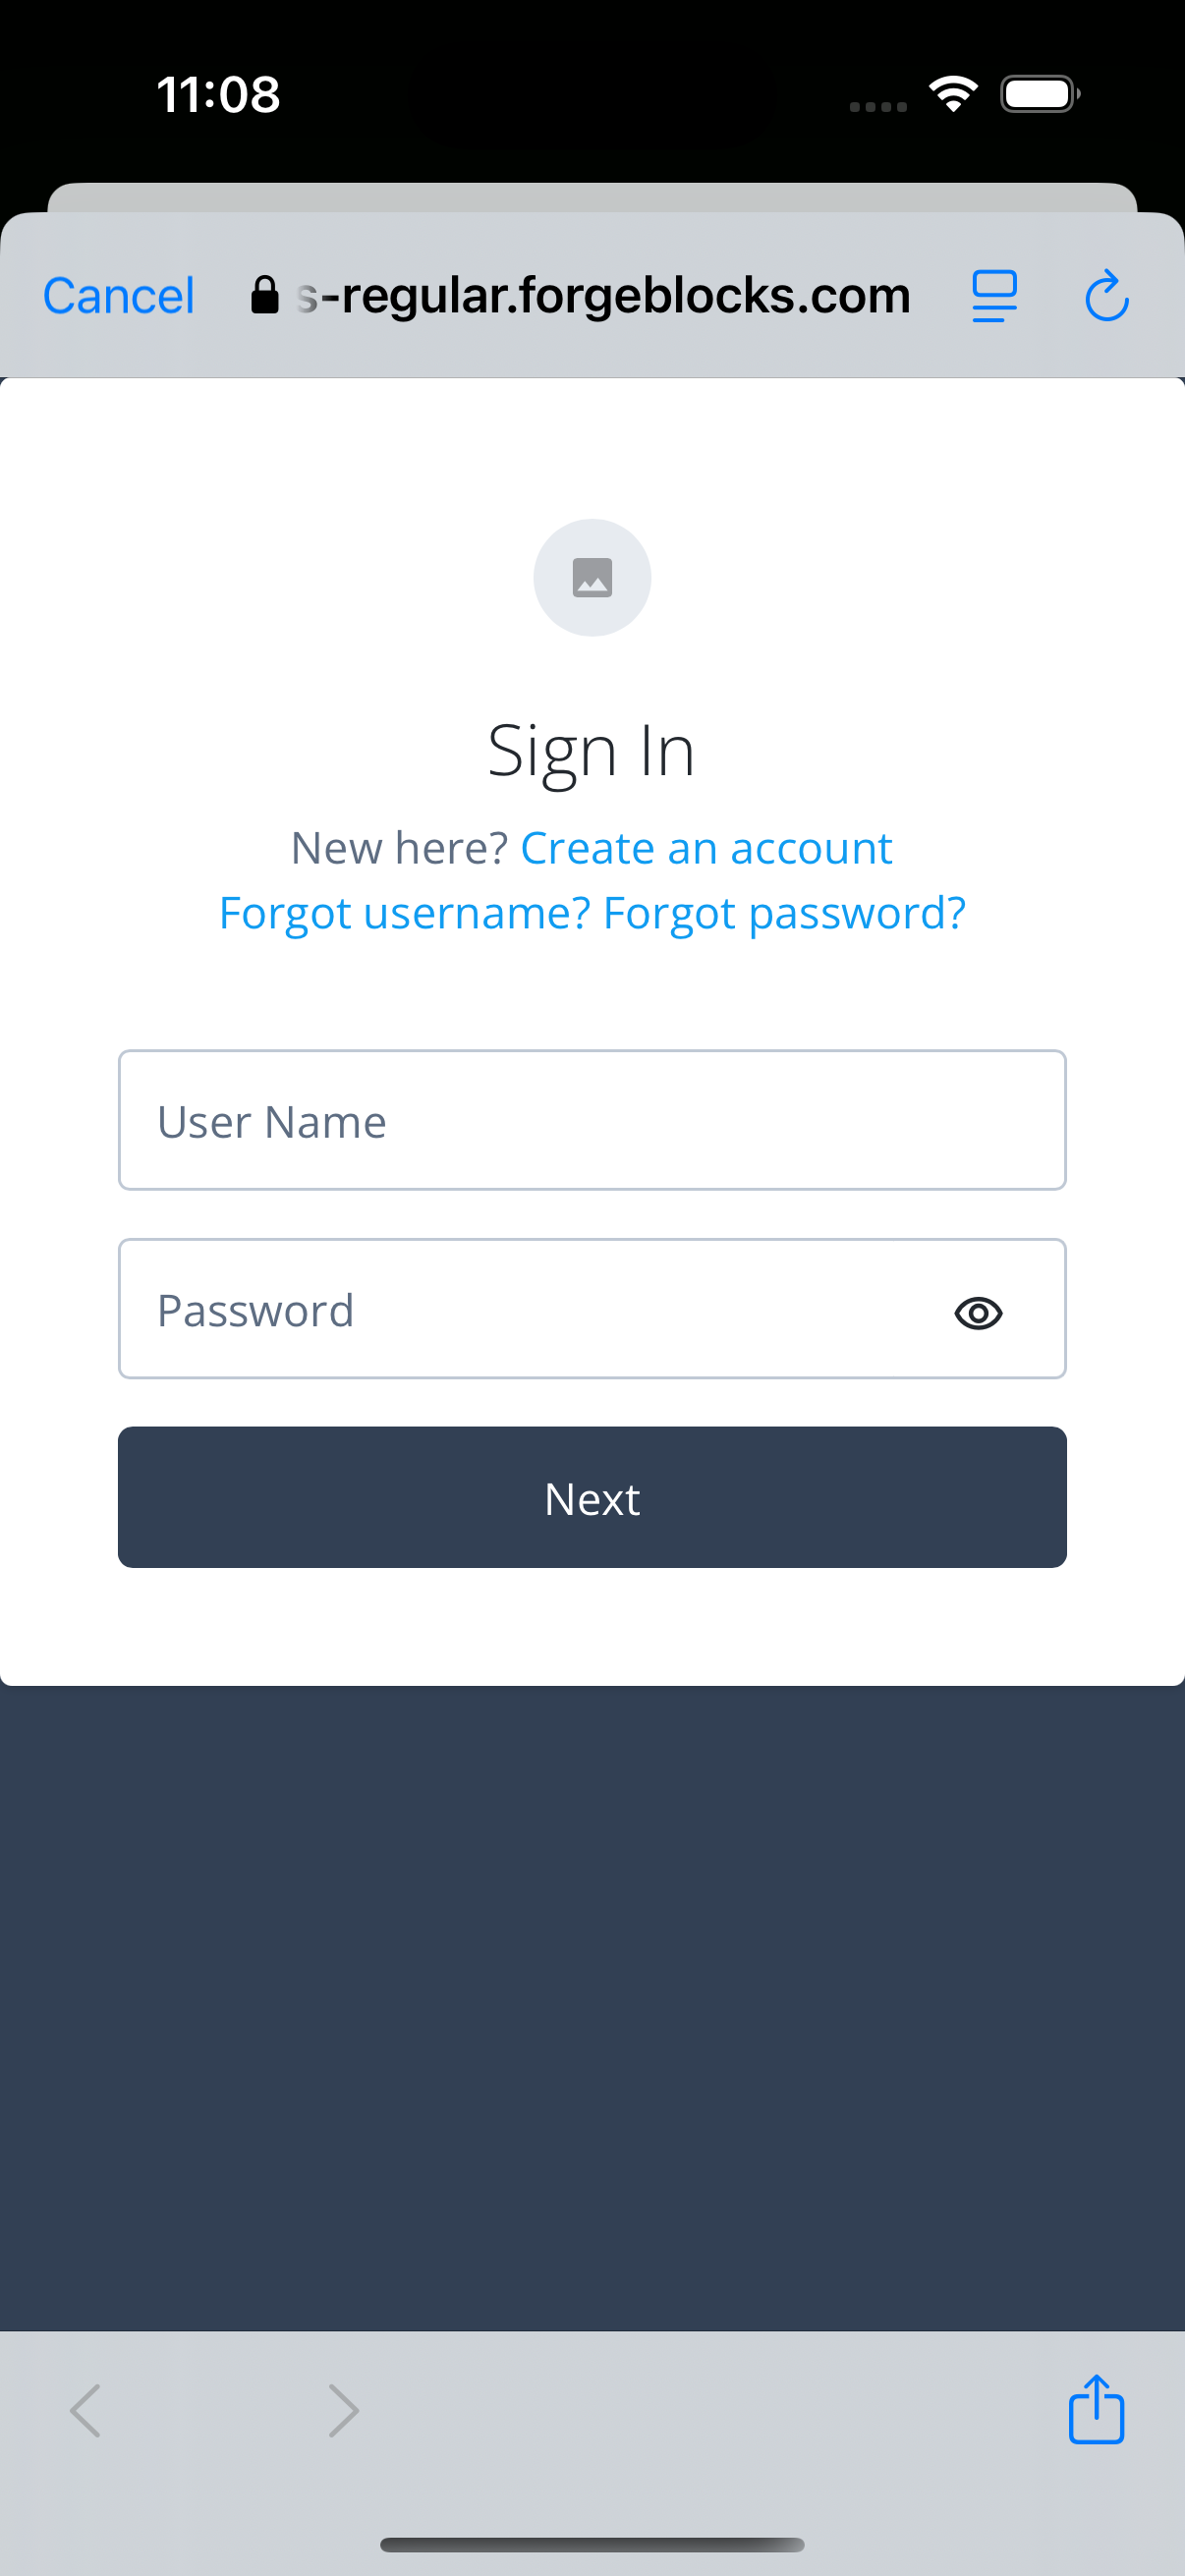 Figure 29. Browser launched and redirected to PingOne Advanced Identity Cloud
 -
Sign on as a demo user:
-
Name:
demo -
Password:
Ch4ng3it!
If authentication is successful, the application displays the access token issued by PingOne Advanced Identity Cloud.
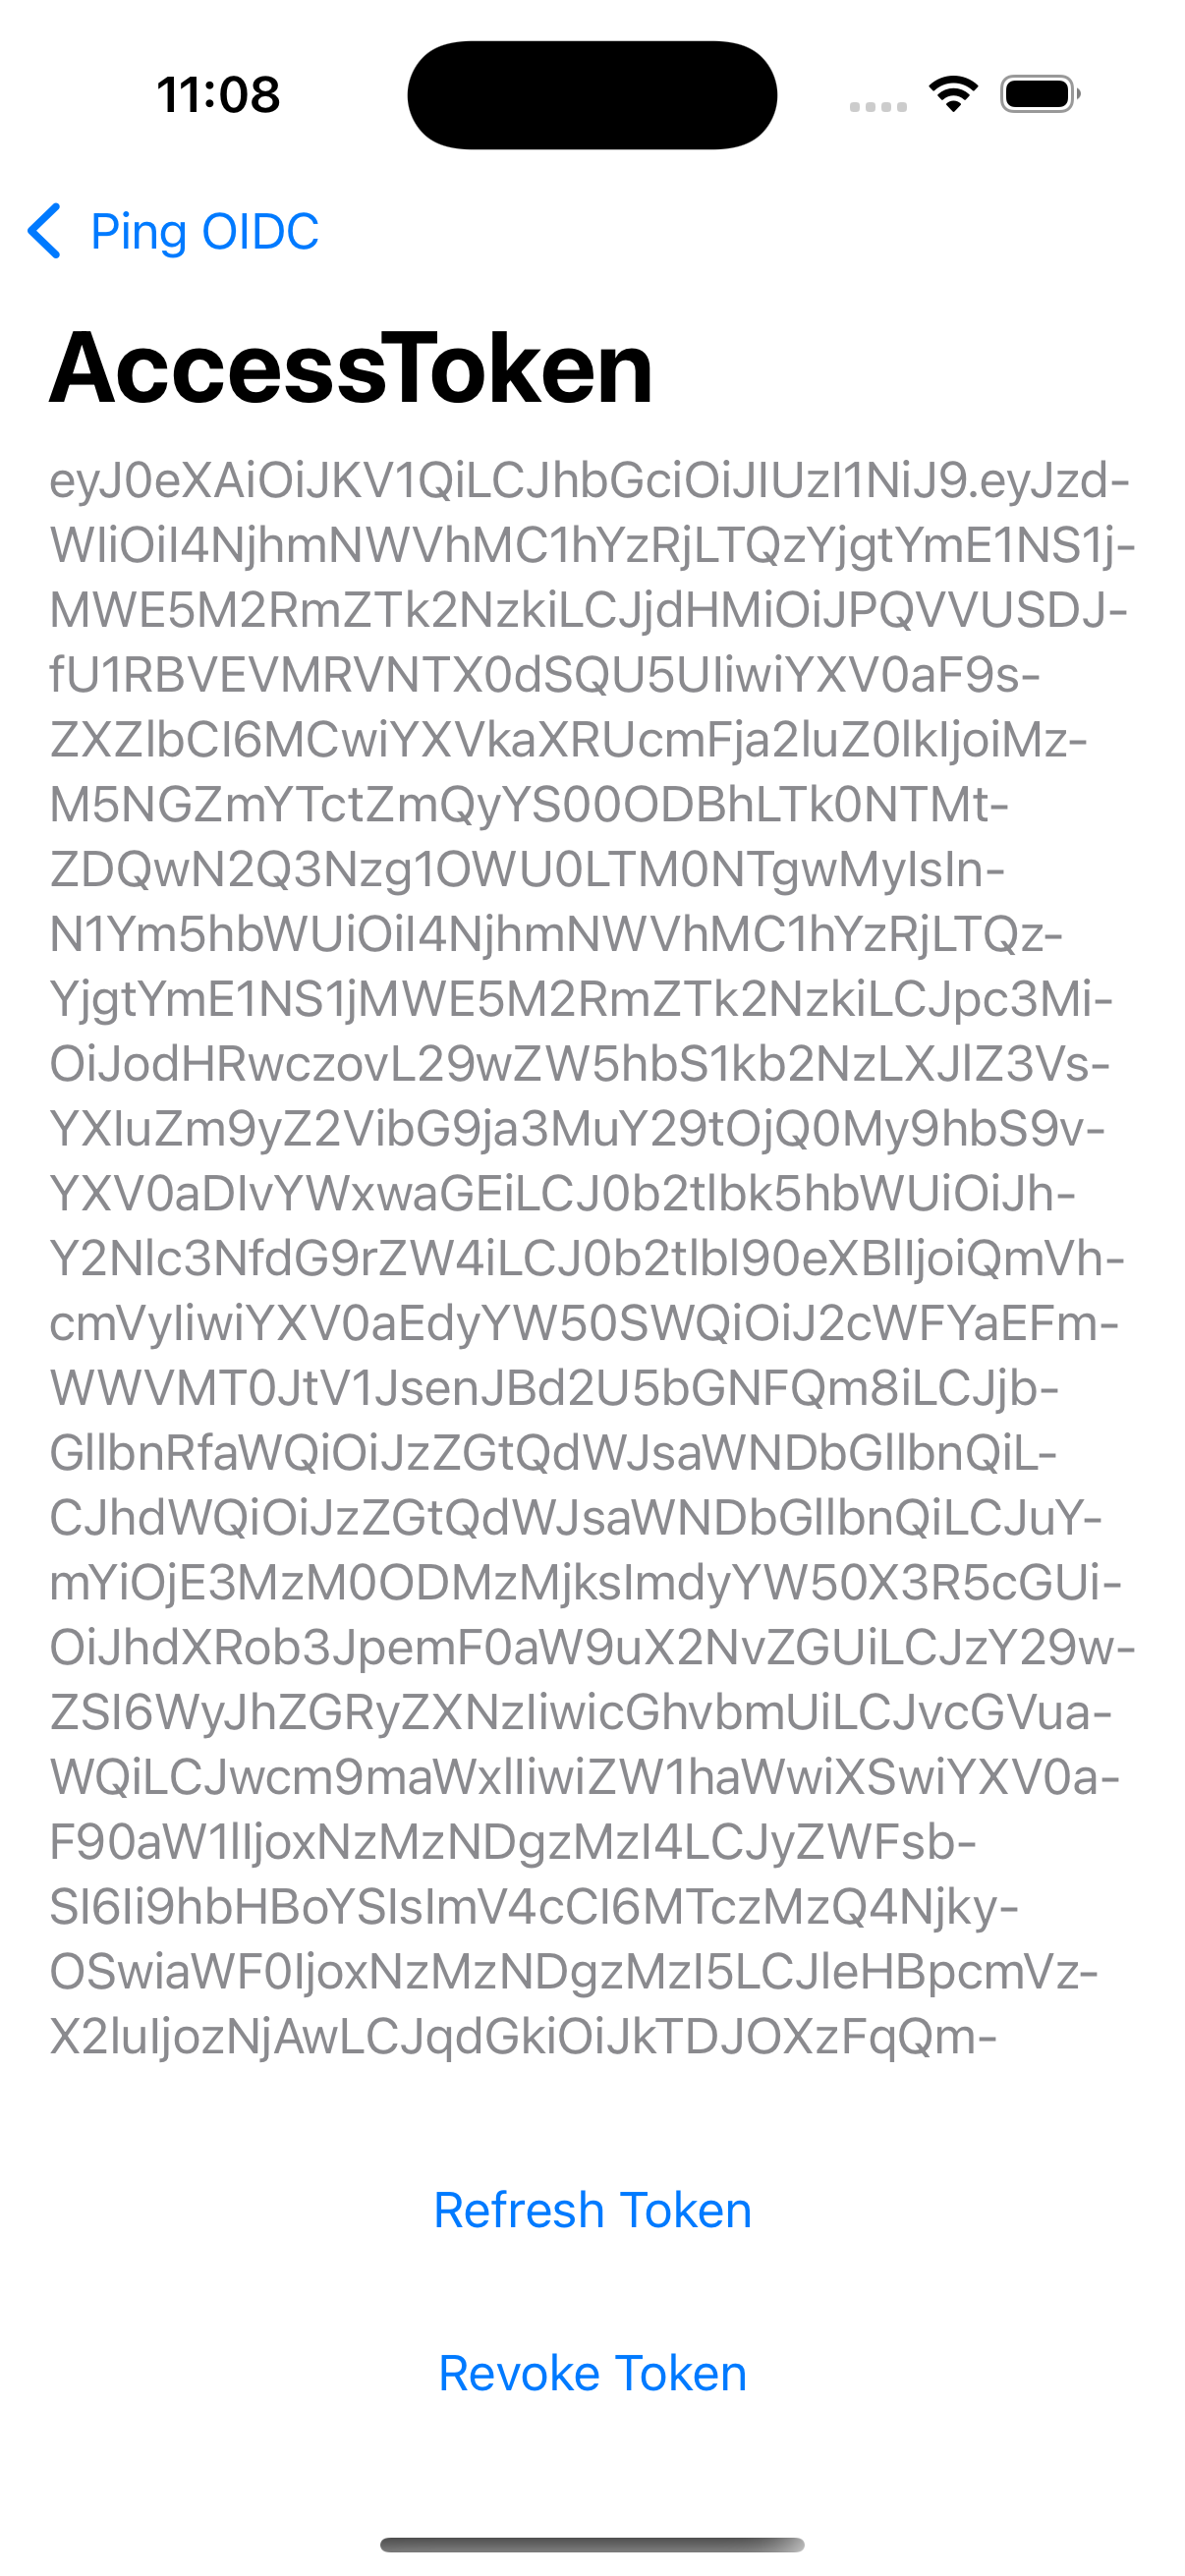 Figure 30. Access token after successful authentication
 -
-
Tap Ping OIDC to go back to the main menu, and then tap User Info.
The app displays the information relating to the access token:
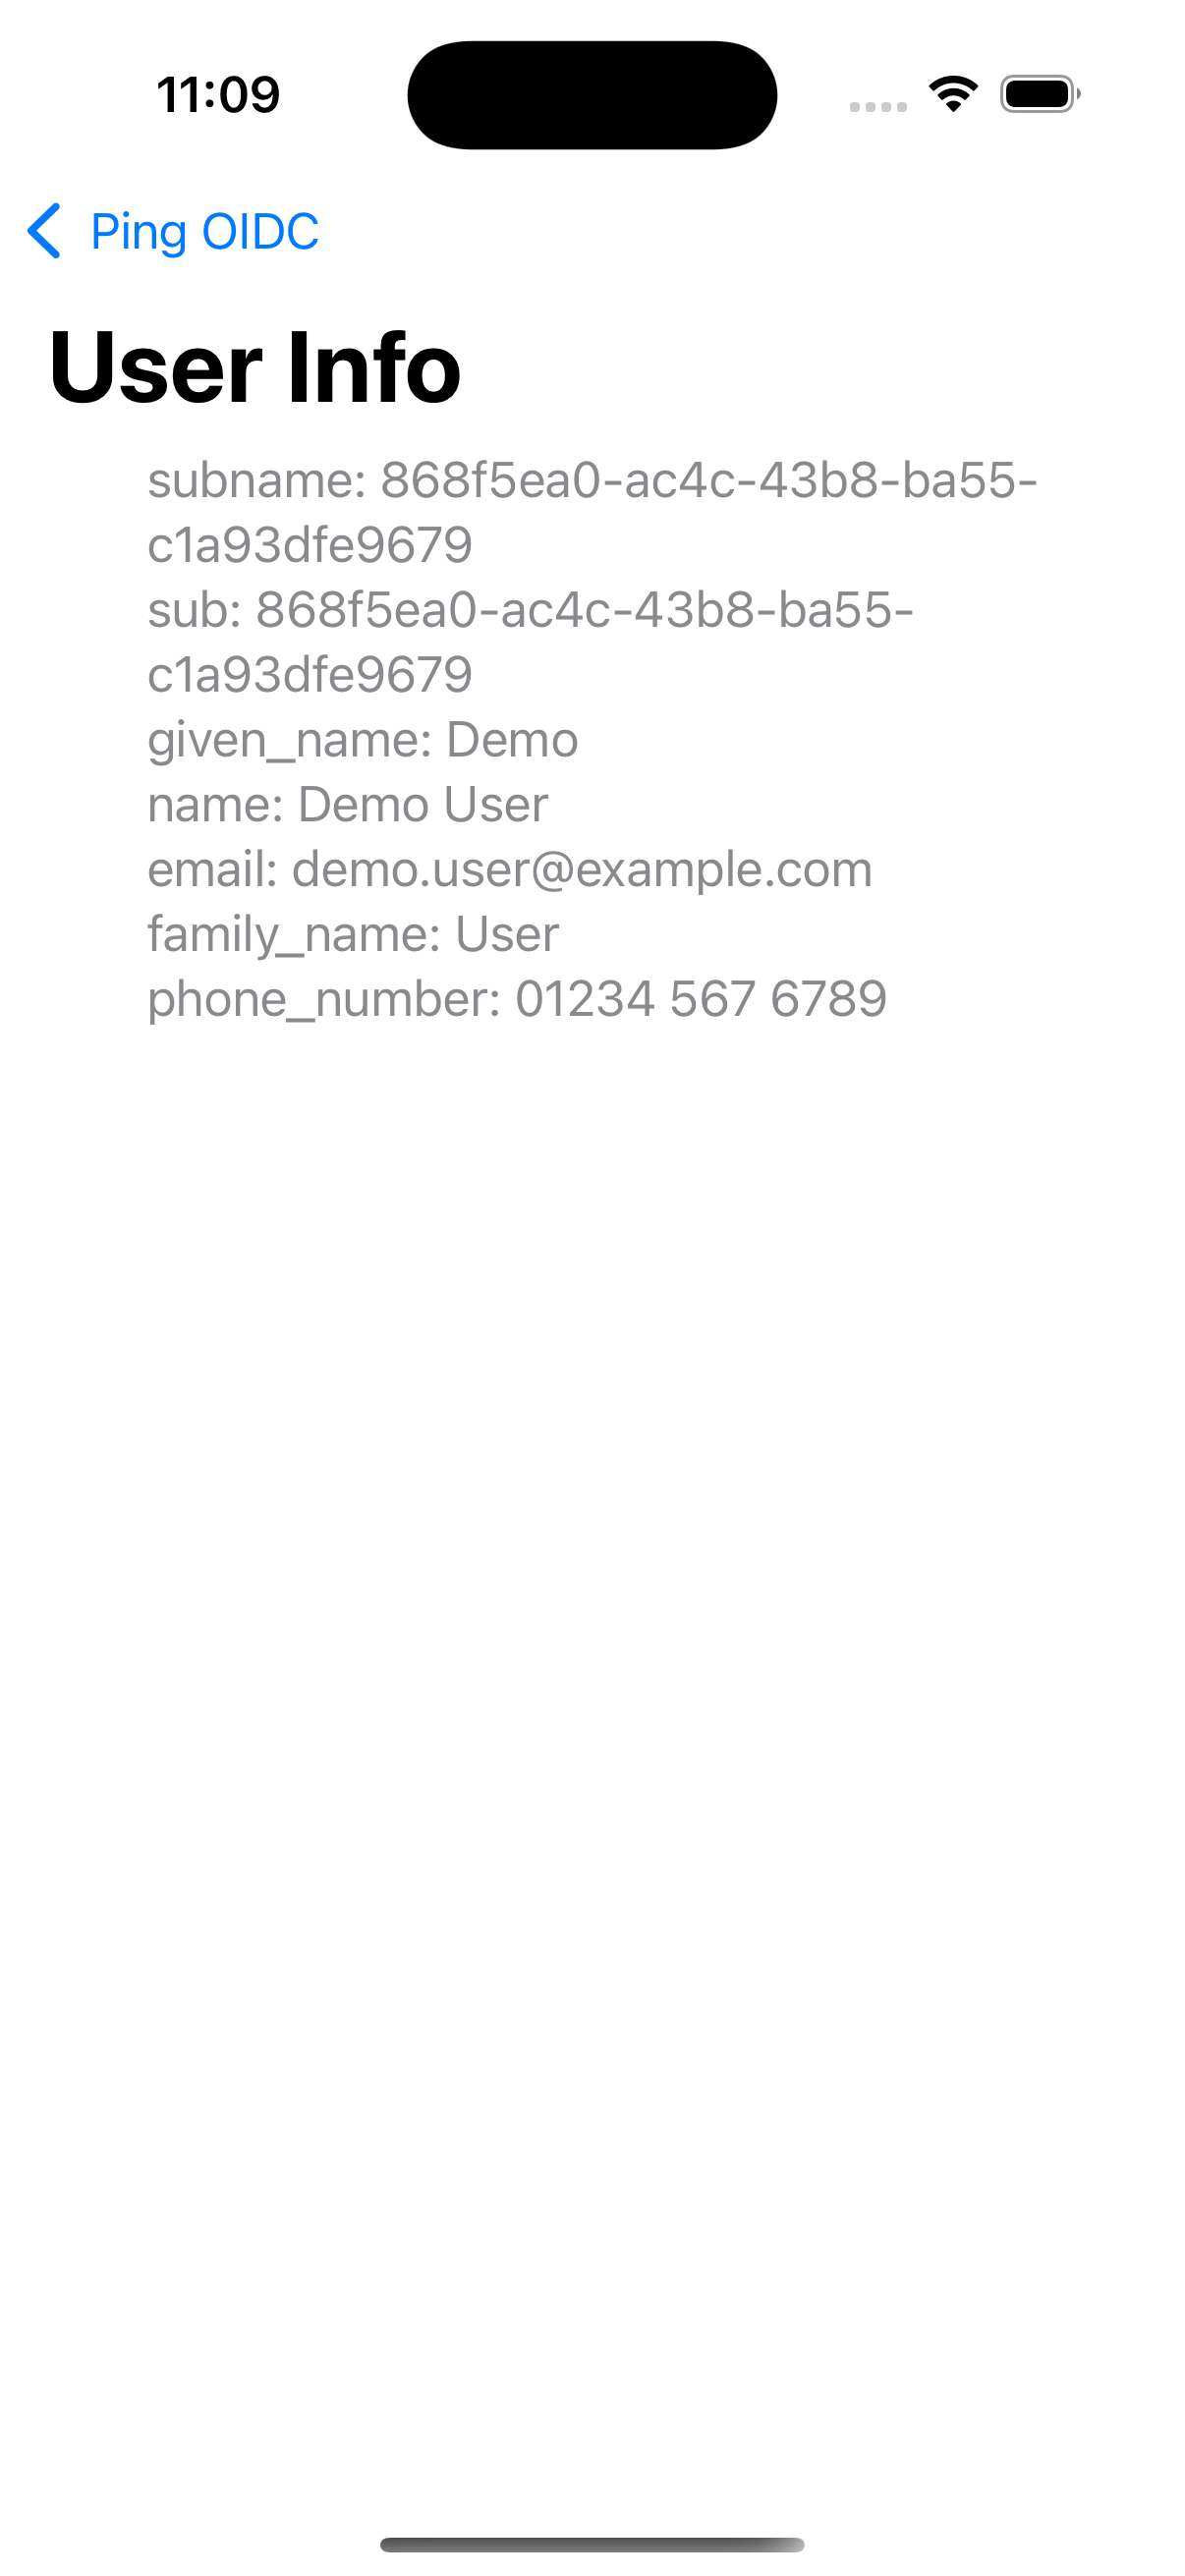 Figure 31. User info relating to the access token
 -
Tap Ping OIDC to go back to the main menu, and then tap Logout.
The app logs the user out of the authorization server and prints a message to the Xcode console:
[FRCore][4.7.0] [🌐 - Network] Response | [✅ 204] :
  https://openam-forgerock-sdks.forgeblocks.com:443/am/oauth2/alpha/connect/endSession?id_token_hint=eyJ0...sbrA&client_id=sdkPublicClient in 34 ms
[FRAuth][4.7.0] [FRUser.swift:211 : logout()] [Verbose]
  Invalidating OIDC Session successful
OIDC login to PingAM tutorial for Android
In this tutorial you update a sample app that uses OIDC-based login to obtain tokens by redirecting to the PingAM UI for authentication.
The sample connects to the .well-known endpoint of your PingAM server to obtain the correct URIs to authenticate the user, and redirects to your PingAM server’s login UI.
After authentication, PingAM redirects the browser back to your application, which then obtains an OAuth 2.0 access token and displays the related user information.
Before you begin
To successfully complete this tutorial refer to the prerequisites in this section.
The tutorial also requires a configured PingAM server.
Prerequisites
- Xcode
-
You can download the latest version for free from https://developer.apple.com/xcode/.
Server configuration
This tutorial requires you to configure your PingAM server as follows:
Task 1. Create a demo user
The samples and tutorials in this documentation often require that you have an identity set up so that you can test authentication.
To create a demo user in PingAM, follow these steps:
-
Log in to the PingAM admin UI as an administrator.
-
Navigate to Identities, and then click Add Identity.
-
Enter the following details:
-
User ID =
demo -
Password =
Ch4ng3it! -
Email Address =
demo.user@example.com
-
-
Click Create.
Task 2. Create an authentication journey
Authentication trees provide fine-grained authentication by allowing multiple paths and decision points throughout the authentication flow. Authentication trees are made up of nodes that define actions taken during authentication.
Each node performs a single task, such as collecting a username or making a simple decision. Nodes can have multiple outcomes rather than just success or failure. For details, see the Authentication nodes configuration reference in the PingAM documentation.
To create a simple tree for use when testing the Ping SDKs, follow these steps:
-
Under Realm Overview, click Authentication Trees, then click Create Tree.
-
Enter a tree name, for example
sdkUsernamePasswordJourney, and then click Create.The authentication tree designer appears, showing the Start entry point connected to the Failure exit point.
-
Drag the following nodes from the Components panel on the left side into the designer area:
-
Page Node
-
Username Collector
-
Password Collector
-
Data Store Decision
-
-
Drag and drop the Username Collector and Password Collector nodes onto the Page Node, so that they both appear on the same page when logging in.
-
Connect the nodes as follows:
Figure 32. Example username and password authentication tree -
Select the Page Node, and in the Properties pane, set the Stage property to
UsernamePassword.You can configure the node properties by selecting a node and altering properties in the right-hand panel. One of the samples uses this specific value to determine the custom UI to display.
-
Click Save.
Task 3. Register a public OAuth 2.0 client
Public clients do not use a client secret to obtain tokens because they are unable to keep them hidden. The Ping SDKs commonly use this type of client to obtain tokens, as they cannot guarantee safekeeping of the client credentials in a browser or on a mobile device.
To register a public OAuth 2.0 client application for use with the SDKs in AM, follow these steps:
-
Log in to the PingAM admin UI as an administrator.
-
Navigate to Applications > OAuth 2.0 > Clients, and then click Add Client.
-
In Client ID, enter
sdkPublicClient. -
Leave Client secret empty.
-
In Redirection URIs, enter the following values:
org.forgerock.demo://oauth2redirectAlso add any other domains where you will be hosting SDK applications. -
In Scopes, enter the following values:
openid profile email address -
Click Create.
PingAM creates the new OAuth 2.0 client, and displays the properties for further configuration.
-
On the Core tab:
-
In Client type, select
Public. -
Disable Allow wildcard ports in redirect URIs.
-
Click Save Changes.
-
-
On the Advanced tab:
-
In Grant Types, enter the following values:
Authorization Code Refresh Token -
In Token Endpoint Authentication Method, select
None. -
Enable the Implied consent property.
-
-
Click Save Changes.
Task 4. Configure the OAuth 2.0 provider
The provider specifies the supported OAuth 2.0 configuration options for a realm.
To ensure the PingAM OAuth 2.0 provider service is configured for use with the Ping SDKs, follow these steps:
-
Log in to the PingAM admin UI as an administrator.
-
In the left panel, click Services.
-
In the list of services, click OAuth2 Provider.
-
On the Core tab, ensure Issue Refresh Tokens is enabled.
-
On the Consent tab, ensure Allow Clients to Skip Consent is enabled.
-
Click Save Changes.
Step 1. Download the samples
To start this tutorial, you need to download the ForgeRock SDK sample apps repo, which contains the projects you will use.
-
In a web browser, navigate to the SDK Sample Apps repository.
-
Download the source code using one of the following methods:
- Download a ZIP file
-
-
Click Code, and then click Download ZIP.
-
Extract the contents of the downloaded ZIP file to a suitable location.
-
- Use a Git-compatible tool to clone the repo locally
-
-
Click Code, and then copy the HTTPS URL.
-
Use the URL to clone the repository to a suitable location.
For example, from the command-line you could run:
git clone https://github.com/ForgeRock/sdk-sample-apps.git
-
The result of these steps is a local folder named sdk-sample-apps.
Step 2. Configure connection properties
In this step, you configure the "swiftui-oidc" app to connect to the OAuth 2.0 application you created in PingAM, and display the login UI of the server.
-
In Xcode, on the File menu, click Open.
-
Navigate to the
sdk-sample-appsfolder you cloned in the previous step, navigate toiOS>swiftui-oidc>PingExample>PingExample.xcodeproj, and then click Open. -
In the Project Navigator pane, navigate to PingExample > PingExample > Utilities, and open the
ConfigurationManagerfile. -
Locate the
ConfigurationViewModelfunction which contains placeholder configuration properties.The function is commented with //TODO:in the source to make it easier to locate.return ConfigurationViewModel( clientId: "[CLIENT ID]", scopes: ["openid", "email", "address", "phone", "profile"], redirectUri: "[REDIRECT URI]", signOutUri: "[SIGN OUT URI]", discoveryEndpoint: "[DISCOVERY ENDPOINT URL]", environment: "[ENVIRONMENT - EITHER AIC OR PingOne]", cookieName: "[COOKIE NAME - OPTIONAL (Applicable for AIC only)]", browserSeletorType: .authSession ) -
In the
ConfigurationViewModelfunction, update the following properties with the values you obtained when preparing your environment.- clientId
-
The client ID from your OAuth 2.0 application in PingAM.
For example,
sdkPublicClient - scopes
-
The scopes you added to your OAuth 2.0 application in PingAM.
For example,
address email openid phone profile - redirectUri
-
The
redirect_urito return to after logging in with the server UI, for example the URI to your client app.This value must exactly match a value configured in your OAuth 2.0 client. For example,
org.forgerock.demo://oauth2redirect. - signOutUri
-
The URI to redirect to after logging out of the authorization server, for example the URI to your client app.
This value must exactly match a value configured in your OAuth 2.0 client. For example,
org.forgerock.demo://oauth2redirect. - discoveryEndpoint
-
The
.well-knownendpoint from your PingAM server.For example,
https://openam.example.com:8443/openam/oauth2/.well-known/openid-configuration - environment
-
Ensures the sample app uses the correct behavior for the different servers it supports, for example what logout parameters to use.
For PingAM servers, specify
AIC. - cookieName
-
The name of the cookie your PingAM server uses to store SSO tokens in client browsers.
For example,
iPlanetDirectoryPro - browserSeletorType
-
You can specify what type of browser the client iOS device opens to handle centralized login.
Each browser has slightly different characteristics, which make them suitable to different scenarios, as outlined in this table:
Browser type Characteristics .authSessionOpens a web authentication session browser.
Designed specifically for authentication sessions, however it prompts the user before opening the browser with a modal that asks them to confirm the domain is allowed to authenticate them.
This is the default option in the Ping SDK for iOS.
.ephemeralAuthSessionOpens a web authentication session browser, but enables the
prefersEphemeralWebBrowserSessionparameter.This browser type does not prompt the user before opening the browser with a modal.
The difference between this and
.authSessionis that the browser does not include any existing data such as cookies in the request, and also discards any data obtained during the browser session, including any session tokens.When is
ephemeralAuthSessionsuitable:-
ephemeralAuthSessionis not suitable when you require single sign-on (SSO) between your iOS apps, as the browser will not maintain session tokens. -
ephemeralAuthSessionis not suitable when you require a session token to log a user out of the server, for example for logging out of PingOne, as the browser will not maintain session tokens. -
Use
ephemeralAuthSessionwhen you do not want the user’s existing sessions to affect the authentication.
.nativeBrowserAppOpens the installed browser that is marked as the default by the user. Often Safari.
The browser opens without any interaction from the user. However, the browser does display a modal when returning to your application.
.sfViewControllerOpens a Safari view controller browser.
Your client app is not able to interact with the pages in the
sfViewControlleror access the data or browsing history.The view controller opens within your app without any interaction from the user. As the user does not leave your app, the view controller does not need to display a warning modal when authentication is complete and control returns to your application.
-
The result resembles the following:
return ConfigurationViewModel( clientId: "sdkPublicClient", scopes: ["openid", "email", "address", "phone", "profile"], redirectUri: "org.forgerock.demo://oauth2redirect", signOutUri: "org.forgerock.demo://oauth2redirect", discoveryEndpoint: "https://openam.example.com:8443/openam/oauth2/.well-known/openid-configuration", environment: "AIC", cookieName: "iPlanetDirectoryPro", browserSeletorType: .authSession ) -
Optionally, specify ACR values to choose which authentication journey the server uses.
-
Navigate to PingExample > PingExample > ViewModels, and open the
OIDCViewModelfile. -
In the
startOIDC()function, add anacr_valuesparameter to the authorization request by using thesetCustomParam()method:public func startOIDC() async throws → FRUser { return try await withCheckedThrowingContinuation({ (continuation: CheckedContinuation<FRUser, Error>) in Task { @MainActor in FRUser.browser()? .set(presentingViewController: self.topViewController!) .set(browserType: ConfigurationManager.shared.currentConfigurationViewModel?.getBrowserType() ?? .authSession) .setCustomParam(key: "acr_values", value: "sdkUsernamePasswordJourney") .build().login { (user, error) in if let frUser = user { Task { @MainActor in self.status = "User is authenticated" } continuation.resume(returning: frUser) } else { Task { @MainActor in self.status = error?.localizedDescription ?? "Error was nil" } continuation.resume(throwing: error!) } } } }) }Enter one or more of the ACR mapping keys as configured in the OAuth 2.0 provider service.
To learn more, refer to Choose journeys with ACR values.
You can list the available keys by inspecting the acr_values_supportedproperty in the output of your/oauth2/.well-known/openid-configurationendpoint.
-
Step 3. Test the app
In this step, run the sample app that you configured in the previous step. The app performs OIDC login to your PingAM server.
-
In Xcode, select .
Xcode launches the sample app in the iPhone simulator.
Figure 33. iOS OIDC login sample home screen -
In the sample app on the iPhone simulator, tap Edit configuration, and verify or edit the configuration you entered in the previous step.
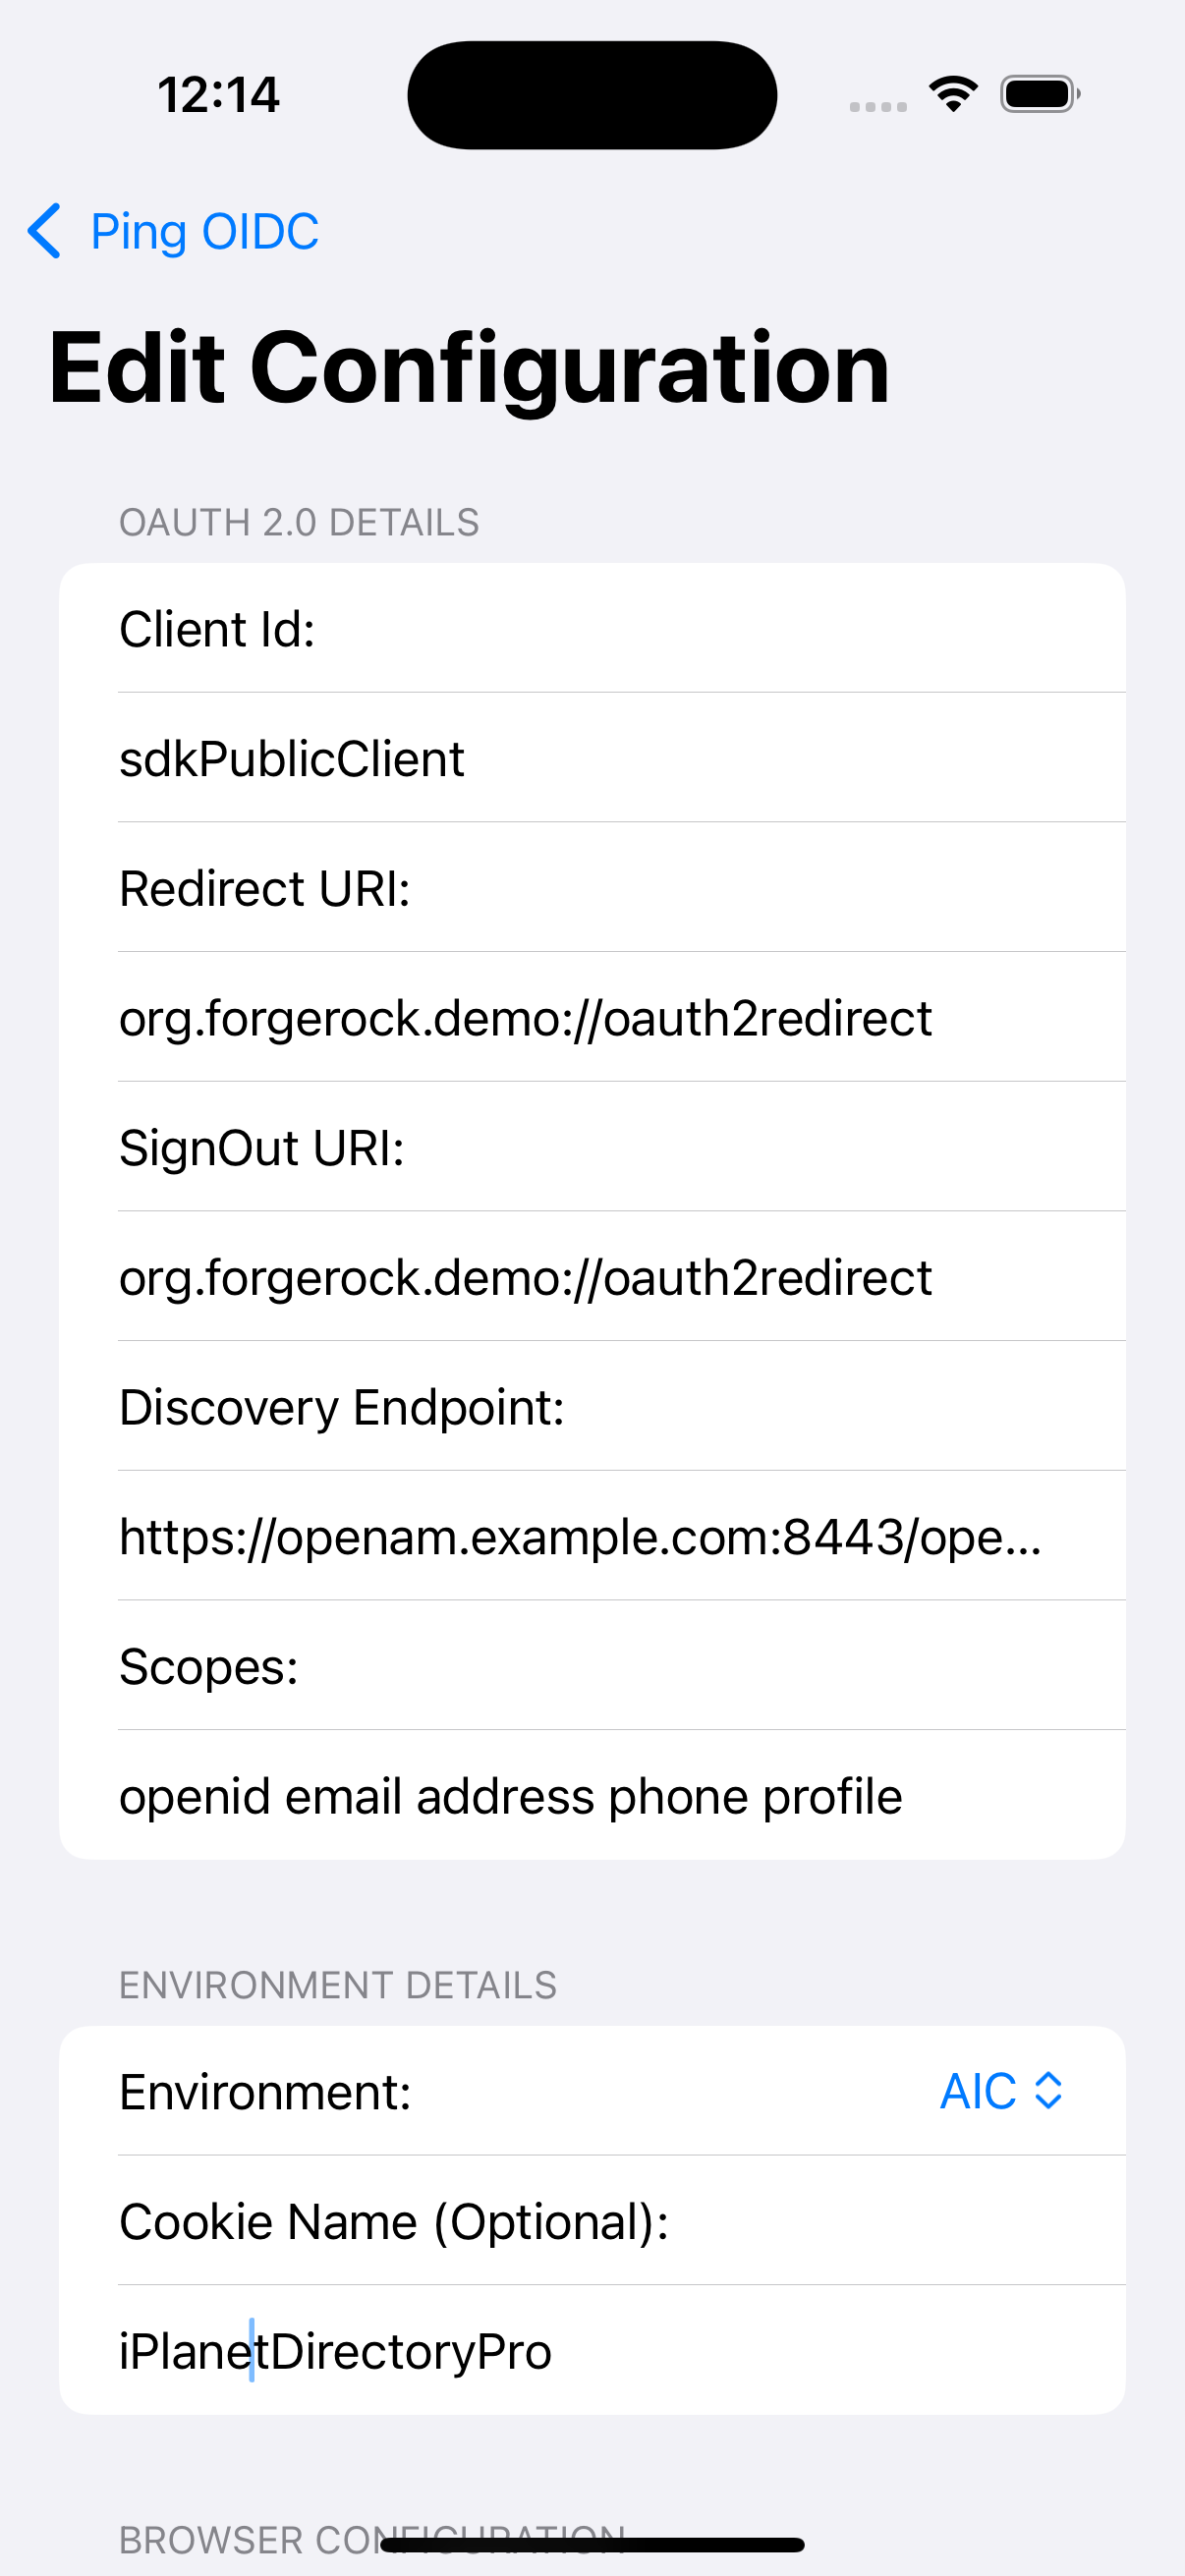 Figure 34. Verify the configuration settings
 -
Tap Ping OIDC to go back to the main menu, and then tap Launch OIDC.
You might see a dialog asking if you want to open a browser. If you do, tap Continue. The app launches a web browser and redirects to your PingAM login UI:
 Figure 35. Browser launched and redirected to PingAM
 -
Sign on as a demo user:
-
Name:
demo -
Password:
Ch4ng3it!
If authentication is successful, the application displays the access token issued by PingAM.
Figure 36. Access token after successful authentication -
-
Tap Ping OIDC to go back to the main menu, and then tap User Info.
The app displays the information relating to the access token:
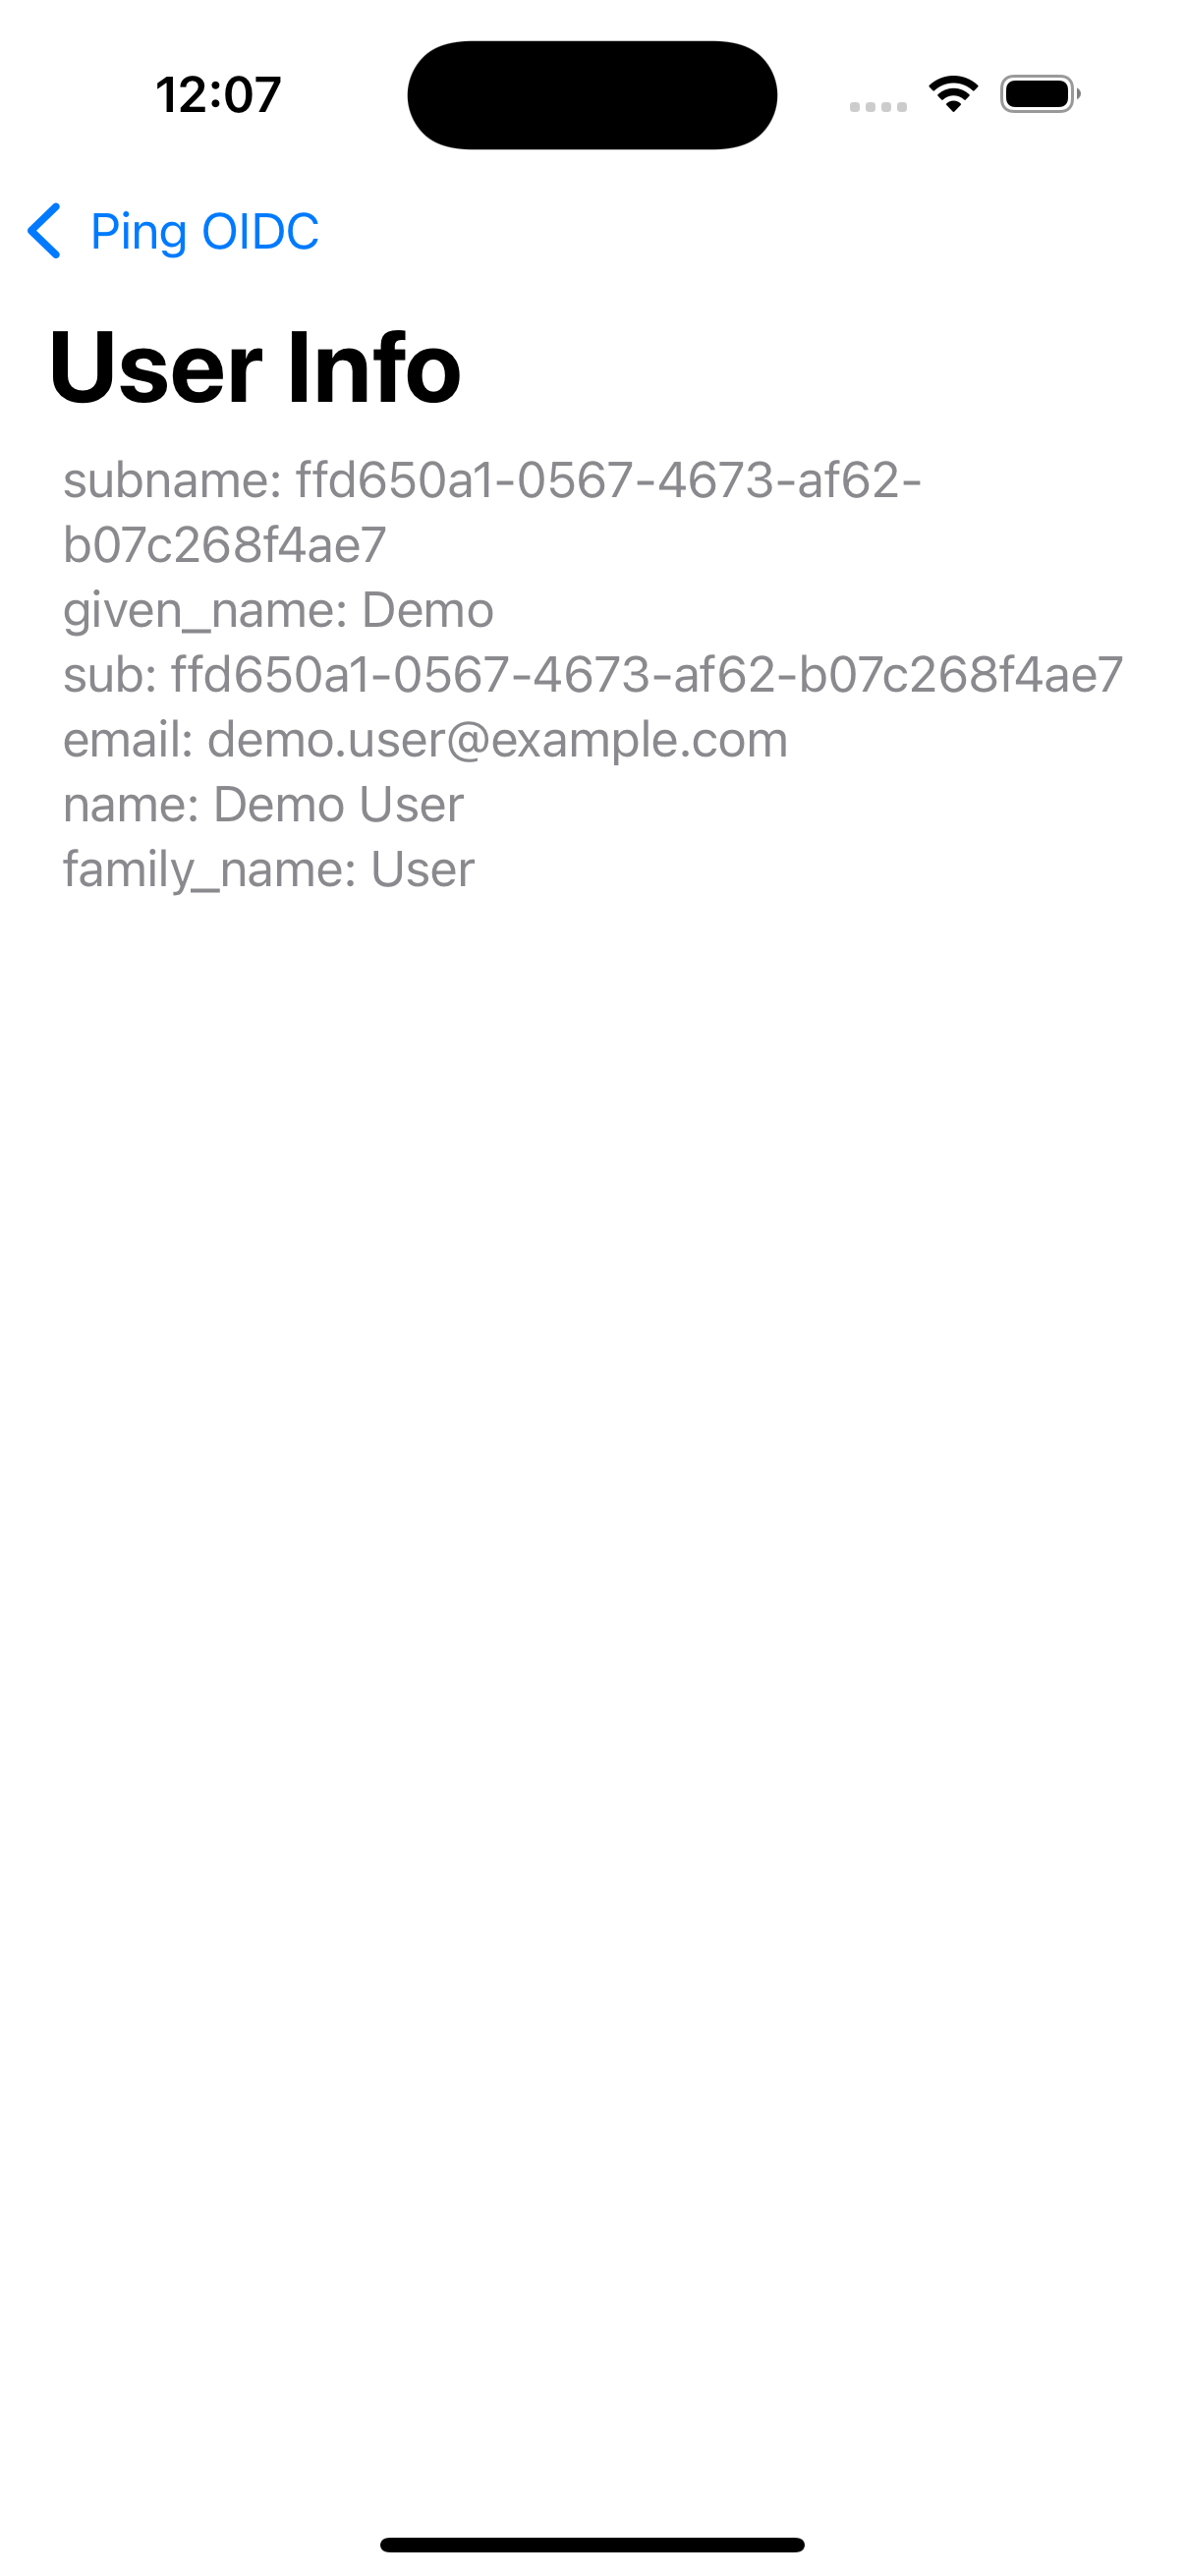 Figure 37. User info relating to the access token
 -
Tap Ping OIDC to go back to the main menu, and then tap Logout.
The app logs the user out of the authorization server and prints a message to the Xcode console:
[FRCore][4.7.0] [🌐 - Network] Response | [✅ 204] :
  https://openam.example.com:443/am/oauth2/connect/endSession?id_token_hint=eyJ0...sbrA&client_id=sdkPublicClient in 34 ms
[FRAuth][4.7.0] [FRUser.swift:211 : logout()] [Verbose]
  Invalidating OIDC Session successful
Authentication journey tutorial for iOS
In this tutorial you update a sample app that uses OIDC-based login to obtain tokens by redirecting to the PingFederate UI for authentication.
The sample connects to the .well-known endpoint of your PingFederate server to obtain the correct URIs to authenticate the user, and redirects to your PingFederate server’s login UI.
After authentication, PingFederate redirects the browser back to your application, which then obtains an OAuth 2.0 access token and displays the related user information.
Before you begin
To successfully complete this tutorial refer to the prerequisites and compatibility requirements in this section.
The tutorial also requires a configured PingFederate server.
Prerequisites
- Xcode
-
You can download the latest version for free from https://developer.apple.com/xcode/.
Server configuration
This tutorial requires you to configure your PingFederate server as follows:
Task 1. Register a public OAuth 2.0 client
OAuth 2.0 client application profiles define how applications connect to PingFederate and obtain OAuth 2.0 tokens.
To allow the Ping SDKs to connect to PingFederate and obtain OAuth 2.0 tokens, you must register an OAuth 2.0 client application:
-
Log in to the PingFederate administration console as an administrator.
-
Navigate to .
-
Click Add Client.
PingFederate displays the Clients | Client page.
-
In Client ID and Name, enter a name for the profile, for example
sdkPublicClientMake a note of the Client ID value, you will need it when you configure the sample code.
-
In Client Authentication, select
None. -
In Redirect URIs, add the following values:
org.forgerock.demo://oauth2redirectAlso add any other URLs where you host SDK applications.
Failure to add redirect URLs that exactly match your client app’s values can cause PingFederate to display an error message such as
Redirect URI mismatchwhen attempting to end a session by redirecting from the SDK. -
In Allowed Grant Types, select the following values:
Authorization CodeRefresh Token -
In the OpenID Connect section:
-
In Logout Mode, select Ping Front-Channel
-
In Front-Channel Logout URIs, add the following values:
org.forgerock.demo://oauth2redirectAlso add any other URLs that redirect users to PingFederate to end their session.
Failure to add sign off URLs that exactly match your client app’s values can cause PingFederate to display an error message such as
invalid post logout redirect URIwhen attempting to end a session by redirecting from the SDK. -
In Post-Logout Redirect URIs, add the following values:
org.forgerock.demo://oauth2redirect
-
-
Click Save.
After changing PingFederate configuration using the administration console, you must replicate the changes to each server node in the cluster before they take effect.
In the PingFederate administration console, navigate to System > Server > Cluster Management, and click Replicate.
The application is now configured to accept client connections from and issue OAuth 2.0 tokens to the Ping SDK PingFederate example applications and tutorials covered by this documentation.
Task 2. Configure CORS
Cross-origin resource sharing (CORS) lets user agents make cross-domain server requests. In PingFederate, you can configure CORS to allow browsers or apps from trusted domains to access protected resources.
To configure CORS in PingFederate follow these steps:
-
Log in to the PingFederate administration console as an administrator.
-
Navigate to .
-
In the Cross-Origin Resource Sharing Settings section, in the Allowed Origin field, enter any DNS aliases you use for your SDK apps.
This documentation assumes the following configuration:
Property Values Allowed Originorg.forgerock.demo://oauth2redirect -
Click Save.
After changing PingFederate configuration using the administration console, you must replicate the changes to each server node in the cluster before they take effect.
In the PingFederate administration console, navigate to System > Server > Cluster Management, and click Replicate.
Your PingFederate server is now able to accept connections from origins hosting apps built with the Ping SDKs.
Step 1. Download the samples
To start this tutorial, you need to download the ForgeRock SDK sample apps repo, which contains the projects you will use.
-
In a web browser, navigate to the SDK Sample Apps repository.
-
Download the source code using one of the following methods:
- Download a ZIP file
-
-
Click Code, and then click Download ZIP.
-
Extract the contents of the downloaded ZIP file to a suitable location.
-
- Use a Git-compatible tool to clone the repo locally
-
-
Click Code, and then copy the HTTPS URL.
-
Use the URL to clone the repository to a suitable location.
For example, from the command-line you could run:
git clone https://github.com/ForgeRock/sdk-sample-apps.git
-
The result of these steps is a local folder named sdk-sample-apps.
Step 2. Configure connection properties
In this step, you configure the "FRExample" app to connect to the OAuth 2.0 application you created in PingFederate, using OIC login method.
-
In Xcode, on the File menu, click Open.
-
Navigate to the
sdk-sample-appsfolder you cloned in the previous step, navigate toiOS>uikit-frexamples>FrExample>FrExample>FRExample.xcodeproj, and then click Open. -
In the Project Navigator pane, navigate to FRExample > FRExample, and open the
ViewControllerfile. -
In the
ViewControllerfile:-
Change the
useDiscoveryURLvariable totrue:let useDiscoveryURL = trueChanging the variable causes the sample to use the
discovermethod to get many of the required configuration values from your PingFederate OIDC.well-knownendpoint. -
Replace
CLIENT_ID_PLACEHOLDERwith the ID of the OAuth 2.0 client application you created previously in PingFederate:let config = ["forgerock_oauth_client_id": "sdkPublicClient", "forgerock_oauth_redirect_uri": "org.forgerock.demo://oauth2redirect", "forgerock_oauth_scope" : "openid profile email address", "forgerock_ssl_pinning_public_key_hashes": ["SSL_PINNING_HASH_PLACEHOLDER"]] -
Remove or comment out the
forgerock_ssl_pinning_public_key_hashesline.For information on SSL pinning, refer to Enable SSL pinning.
-
Replace
DISCOVERY_URL_PLACEHOLDERwith the.well-knownendpoint from your PingFederate server.The
.well-knownendpoint is the base URL of your PingFederate server, with/.well-known/openid-configurationappended.How do I find my PingFederate Base URL?
To verify the base URL of your PingFederate server:
-
Log in to your PingFederate administration console.
-
Navigate to .
-
Make a note of the Base URL value.
For example,
https://pingfed.example.comDo not use the admin console URL.
For example:
let discoveryURL = "https://pingfed.example.com/as/.well-known/openid-configuration" -
-
For more information, refer to Editing an application - OIDC.
With the sample configured, you can proceed to Step 3. Test the app.
Step 3. Test the app
In the following procedure, you run the sample app that you configured in the previous step. The app performs a centralized login on your PingFederate server.
Log in as a demo user
-
In Xcode, select .
Xcode launches the sample app in the iPhone simulator.
-
In the sample app on the iPhone simulator, in the Select an action menu, select Login with Browser, and then click Perform Action.
Figure 38. Select the PingFederate environmentYou might see a dialog asking if you want to open a browser. If you do, tap Continue. The app launches a web browser and redirects to your PingFederate environment:
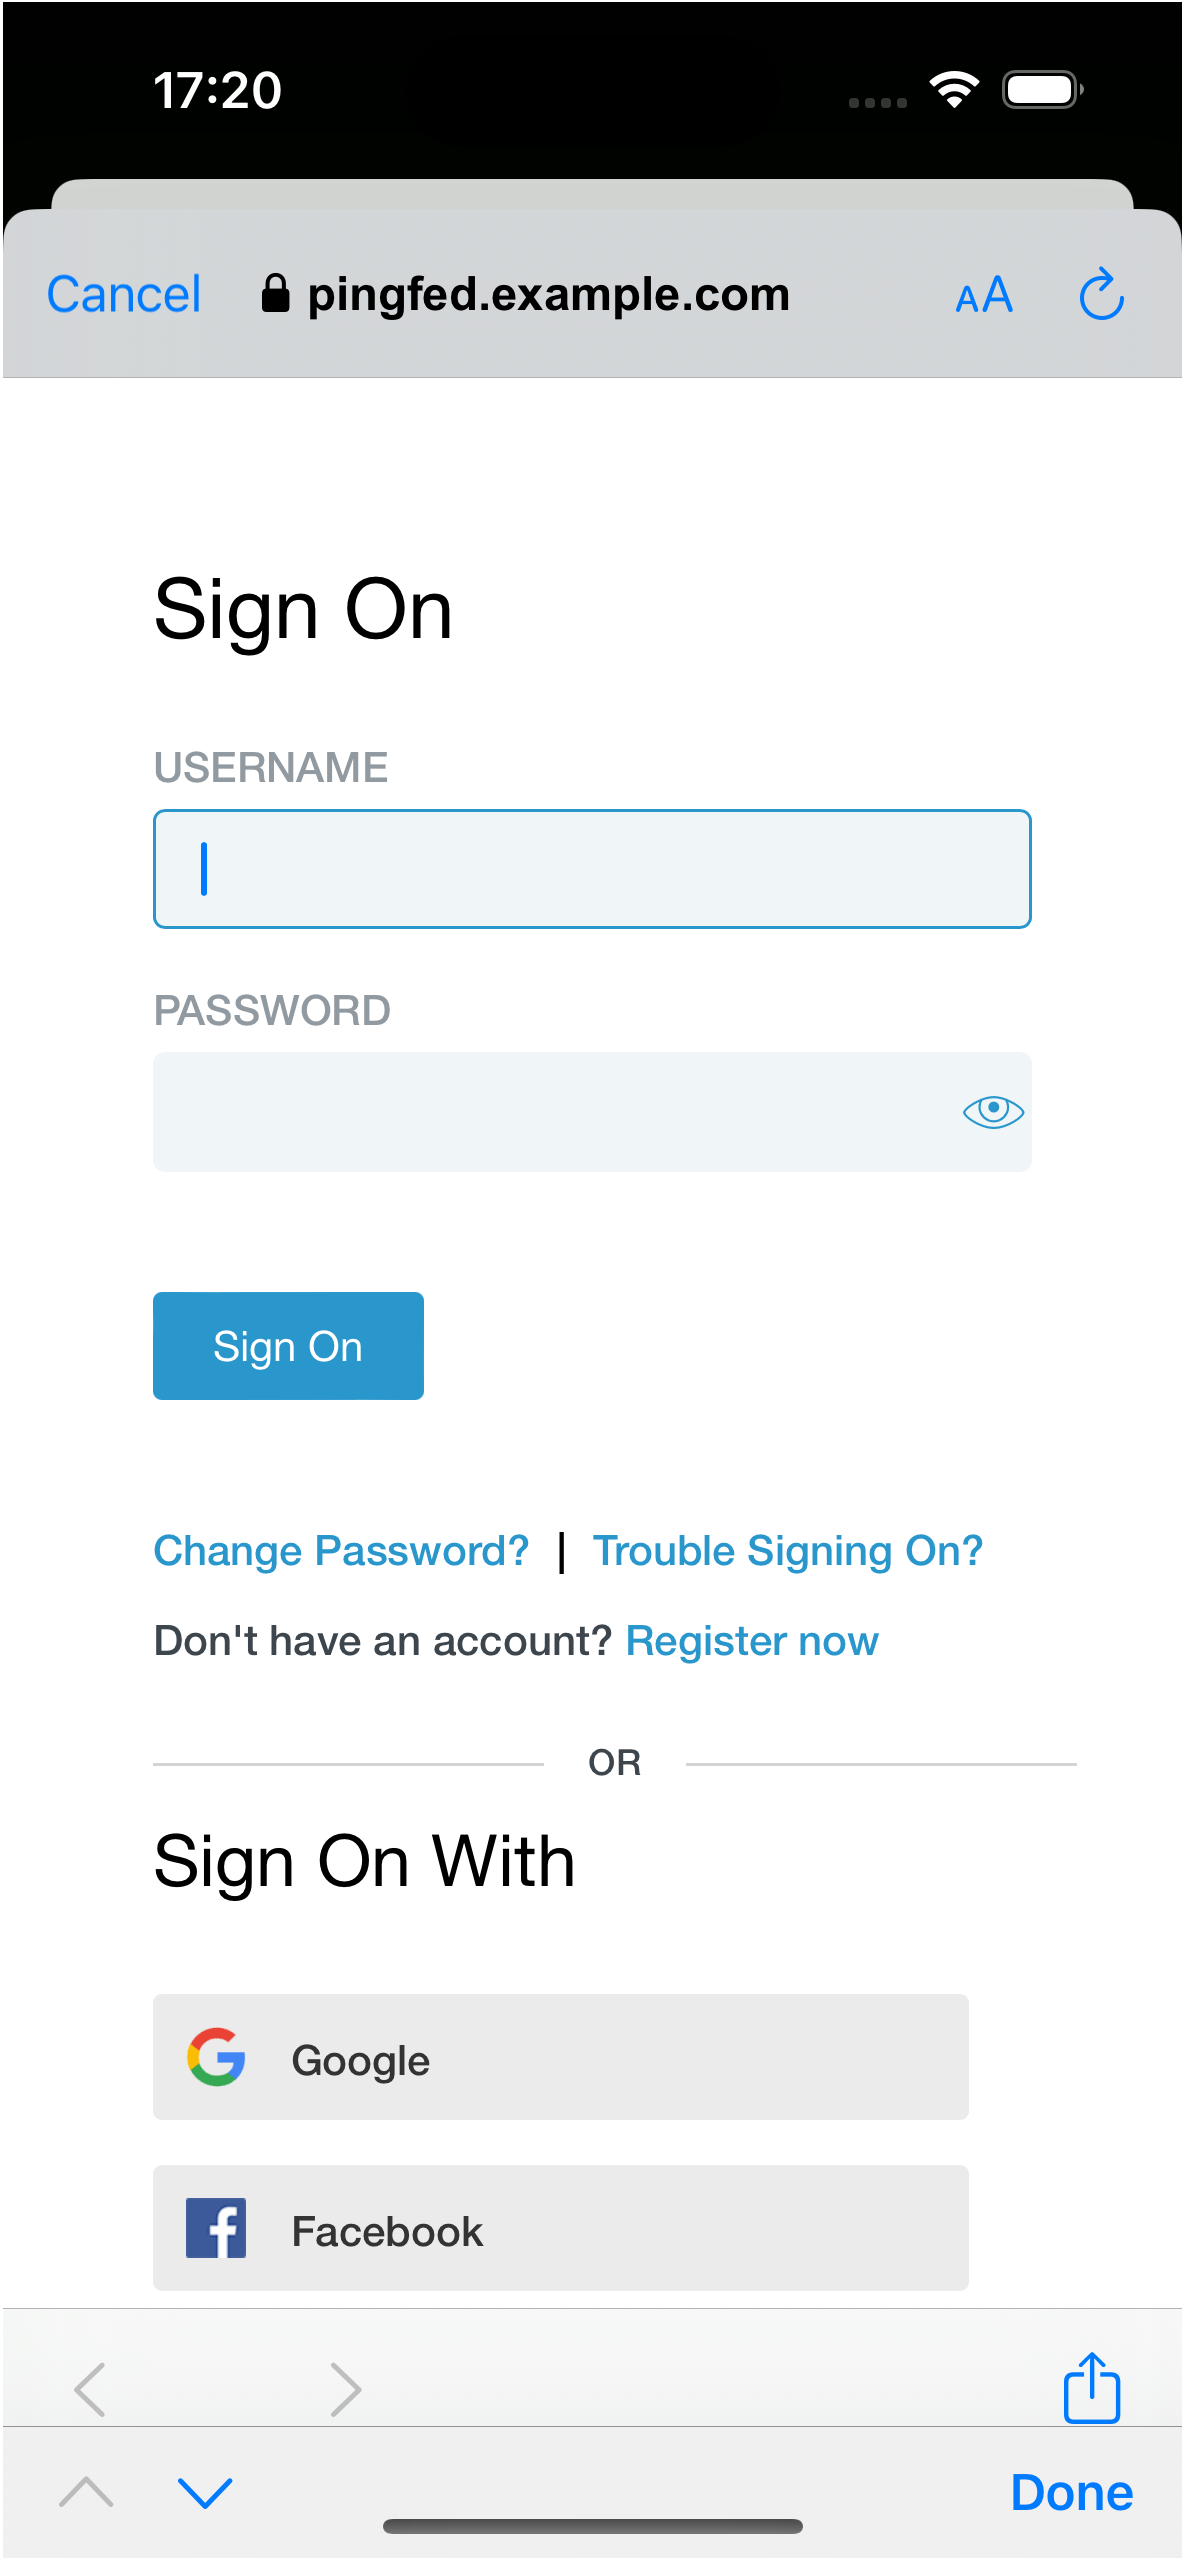 Figure 39. Browser launched and redirected to PingFederate
 -
Sign on using your PingFederate credentials
If authentication is successful, the application displays the token issued by PingFederate:
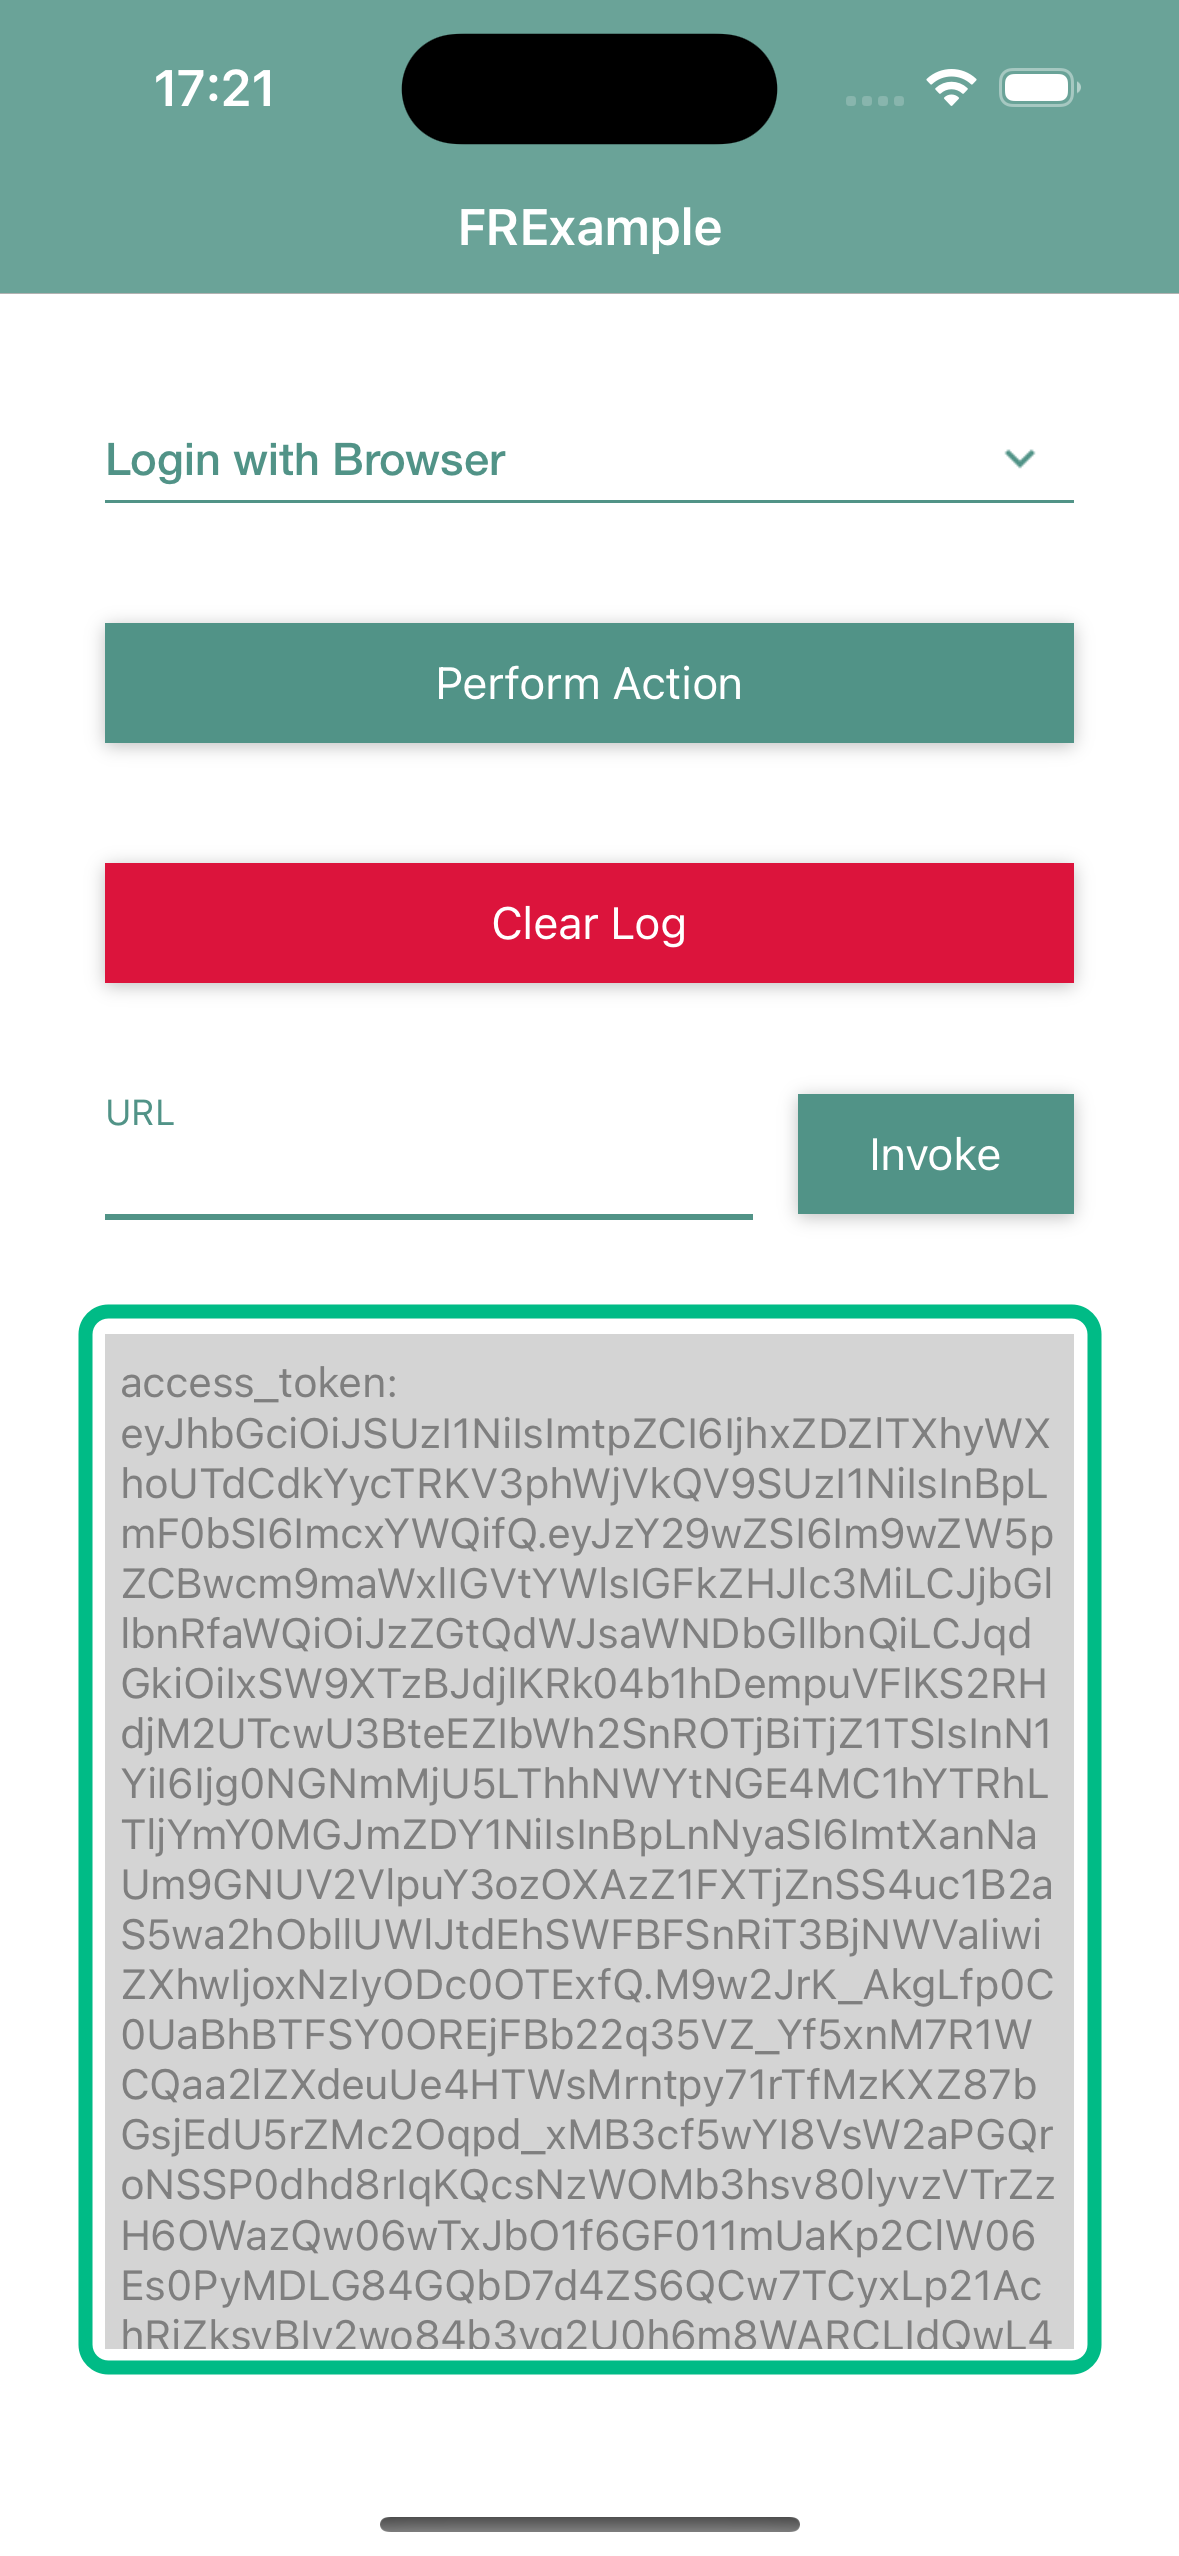 Figure 40. Sample app showing the token returned from PingFederate
 -
Tap Login with Browser to open the drop-down menu, select User Logout, and then tap Perform Action.
The app briefly opens a browser to sign the user out of PingFederate, and revoke the tokens.
JavaScript OIDC login tutorials
Follow these JavaScript tutorials to integrate your apps using OpenID Connect login to the following servers:
OIDC login to PingOne tutorial for JavaScript
In this tutorial you update a sample app that uses OIDC-based login to obtain tokens by redirecting to the PingOne UI for authentication.
The sample connects to the .well-known endpoint of your PingOne server to obtain the correct URIs to authenticate the user, and redirects to your PingOne server’s login UI.
After authentication, PingOne redirects the browser back to your application, which then obtains an OAuth 2.0 access token and displays the related user information.
Before you begin
To successfully complete this tutorial refer to the prerequisites in this section.
The tutorial also requires a configured PingOne instance.
Prerequisites
- Node and NPM
-
This sample requires a minimum Node.js version of
18, and is tested on versions18and20. To get a supported version of Node.js, refer to the Node.js download page.You will also need
npmto build the code and run the samples.
Server configuration
This tutorial requires you to configure your PingOne server as follows:
Task 1. Create a demo user
The samples and tutorials in this documentation often require that you have an identity set up so that you can test authentication.
To create a demo user in PingOne, follow these steps:
-
Log in to your PingOne administration console.
-
In the left panel, navigate to Directory > Users.
-
Next to the Users label, click the plus icon ().
PingOne displays the Add User panel.
-
Enter the following details:
-
Given Name =
Demo -
Family Name =
User -
Username =
demo -
Email =
demo.user@example.com -
Population =
Default -
Password =
Ch4ng3it!
-
-
Click Save.
Task 2. Create a revoke resource
To allow the Ping SDKs to revoke access tokens issued by PingOne, you must create a custom resource that is assigned the revoke scope in your PingOne tenant.
To create a custom resource and assign the revoke scope, follow these steps:
-
Log in to your PingOne administration console.
-
In the left panel, navigate to Applications > Resources.
-
Next to the Resources label, click the plus icon ().
PingOne displays the Add Custom Resource panel.
-
In Resource Name, enter a name for the custom resource, for example
SDK Revoke Resource, and then click Next. -
On the Attributes page, click Next.
-
On the Scopes page, click Add Scope.
-
In Scope Name, enter
revoke, and then click Save.
When you have created the custom resource in your PingOne instance, continue with the next step.
For more information on resources in PingOne, refer to Adding a custom resource.
Task 3. Register a public OAuth 2.0 client
To register a public OAuth 2.0 client application in PingOne for use with the Ping SDK for JavaScript, follow these steps:
-
Log in to your PingOne administration console.
-
In the left panel, navigate to Applications > Applications.
-
Next to the Applications label, click the plus icon ().
PingOne displays the Add Application panel.
-
In Application Name, enter a name for the profile, for example
sdkPublicClient -
Select OIDC Web App as the Application Type, and then click Save.
-
On the Configuration tab, click the pencil icon ().
-
In Grant Type, select the following values:
Authorization CodeRefresh Token -
In Redirect URIs, enter the following value:
org.forgerock.demo://oauth2redirecthttps://localhost:8443
Also add any other URLs where you host SDK applications.
Failure to add redirect URLs that exactly match your client app’s values can cause PingOne to display an error message such as
Redirect URI mismatchwhen attempting to end a session by redirecting from the SDK.-
In Token Endpoint Authentication Method, select
None. -
In Signoff URLs, enter the following value:
org.forgerock.demo://oauth2redirecthttps://localhost:8443Also add any other URLs that redirect users to PingOne to end their session.
Failure to add sign off URLs that exactly match your client app’s values can cause PingOne to display an error message such as
invalid post logout redirect URIwhen attempting to end a session by redirecting from the SDK. -
In CORS Settings, in the drop-down select Allow specific origins, and in the Allowed Origins field, enter the URL where you will be running the sample app.
For example:
https://localhost:8443 -
Click Save.
-
-
On the Resources tab, next to Allowed Scopes, click the pencil icon ().
-
In Scopes, select the following values:
emailphoneprofileSDK Revoke ResourceThe openidscope is selected by default.The result resembles the following:
 Figure 41. Adding scopes, including the custom "revoke" scope to an application.
-
-
Optionally, on the Policies tab, click the pencil icon () to select the authentication policies for the application.
Applications that have no authentication policy assignments use the environment’s default authentication policy to authenticate users.
If you have a DaVinci license, you can select PingOne policies or DaVinci Flow policies, but not both. If you do not have a DaVinci license, the page only displays PingOne policies.
To use a PingOne policy:
-
Click Add policies and then select the policies that you want to apply to the application.
-
Click Save.
PingOne applies the policies in the order in which they appear in the list. PingOne evaluates the first policy in the list first. If the requirements are not met, PingOne moves to the next one.
For more information, see Authentication policies for applications.
To use a DaVinci Flow policy:
-
You must clear all PingOne policies. Click Deselect all PingOne Policies.
-
In the confirmation message, click Continue.
-
On the DaVinci Policies tab, select the policies that you want to apply to the application.
-
Click Save.
PingOne applies the first policy in the list.
-
-
Click Save.
-
Enable the OAuth 2.0 client application by using the toggle next to its name:
 Figure 42. Enable the application using the toggle.
The application is now configured to accept client connections from and issue OAuth 2.0 tokens to the JavaScript example PingOne applications and tutorials covered by this documentation.
Step 1. Download the samples
To start this tutorial, you need to download the Ping SDK sample apps repo, which contains the projects you will use.
-
In a web browser, navigate to the Ping SDK sample apps repository.
-
Download the source code using one of the following methods:
- Download a ZIP file
-
-
Click Code, and then click Download ZIP.
-
Extract the contents of the downloaded ZIP file to a suitable location.
-
- Use a Git-compatible tool to clone the repo locally
-
-
Click Code, and then copy the HTTPS URL.
-
Use the URL to clone the repository to a suitable location.
For example, from the command-line you could run:
git clone https://github.com/ForgeRock/sdk-sample-apps.git
-
The result of these steps is a local folder named sdk-sample-apps.
Step 2. Install the Ping SDK
In the following procedure, you install the Ping SDK for JavaScript.
-
In a terminal window, navigate to the
sdk-sample-appsfolder. -
To install the required packages, enter the following:
npm installThe
npmtool downloads the required packages, and places them inside anode_modulesfolder.
Step 3. Configure connection properties
In this step, you configure the sample app to connect to the OAuth 2.0 application you created in PingOne.
-
In the IDE of your choice, open the
sdk-sample-appsfolder you cloned in the previous step. -
Open the
/central-login/src/main.jsfile. -
Replace the
forgerock.Config.setmethod with this code:await Config.setAsync({ clientId: "<PingOne Client ID>", redirectUri: `${window.location.origin}`, scope: "openid profile email address revoke", serverConfig: { wellknown: "<OIDC Discovery Endpoint>", }, });Replace the following strings with the values you obtained when you registered an OAuth 2.0 application in PingOne.
- <PingOne Client ID>
-
The client ID from your OAuth 2.0 application in PingOne.
For example,
6c7eb89a-66e9-ab12-cd34-eeaf795650b2 - <OIDC Discovery Endpoint>
-
The
.well-knownendpoint from your OAuth 2.0 application in PingOne.How do I find my PingOne .well-known URL?
To find the
.well-knownendpoint for an OAuth 2.0 client in PingOne:-
Log in to your PingOne administration console.
-
Go to Applications > Applications, and then select the OAuth 2.0 client you created earlier.
For example, sdkPublicClient.
-
On the Configuration tab, expand the URLs section, and then copy the OIDC Discovery Endpoint value.
For example,
https://auth.pingone.com/3072206d-c6ce-ch15-m0nd-f87e972c7cc3/as/.well-known/openid-configuration -
The result resembles the following:
await Config.setAsync({ clientId: "6c7eb89a-66e9-ab12-cd34-eeaf795650b2", redirectUri: `${window.location.origin}`, scope: "openid profile email address revoke", serverConfig: { wellknown: "https://auth.pingone.com/3072206d-c6ce-ch15-m0nd-f87e972c7cc3/as/.well-known/openid-configuration", }, }); -
Alter the
logoutobject as follows:-
In the
forgerock.FRUser.logout()method, add the following parameter:{logoutRedirectUri: `${window.location.origin}`}The presence of this parameter causes the SDK to use a redirect flow for ending the session and revoking the tokens, which PingOne servers require.
-
Remove or comment out the following line:
location.assign(`${document.location.origin}/`);
The result resembles the following:
const logout = async () => { try { await FRUser.logout({ logoutRedirectUri: `${window.location.origin}` }); // location.assign(`${document.location.origin}/`); } catch (error) { console.error(error); } }; -
-
Optionally, specify which of the configured policies PingOne uses to authenticate users.
In the
/central-login/src/main.jsfile, on line80, add anacr_valuesquery parameter to thegetTokens()call:await TokenManager.getTokens({ login: 'redirect', query: { acr_values: "<Policy IDs>" } });Replace <Policy IDs> with either a single DaVinci policy, by using its flow policy ID, or one or more PingOne policies by specifying the policy names, separated by spaces or the encoded space character
%20.Examples:
- DaVinci flow policy ID
-
acr_values: "d1210a6b0b2665dbaa5b652221badba2" - PingOne policy names
-
acr_values: "Single_Factor%20Multi_Factor"
For more information, refer to Authentication policies.
Step 4. Test the app
In the following procedure, you run the sample app that you configured in the previous step.
The sample connects to your PingOne server to obtain the correct URIs to authenticate the user, and redirects the browser to your PingOne server.
After authentication, PingOne redirects the browser back to your application, which then obtains an OAuth 2.0 access token and displays the related user information.
Run the sample
-
In a terminal window, navigate to the
/javascriptfolder in yoursdk-sample-appsproject. -
To run the embedded login sample, enter the following:
npm run start:central-login -
In a web browser, navigate to the following URL:
https://localhost:8443The sample displays a page with two buttons:

-
Click Login.
The sample app redirects the browser to your PingOne instance.
To see the application calling the authorizeendpoint, and the redirect back from PingOne with thecodeandstateOAuth 2.0 parameters, open the Network tab of your browser’s developer tools. -
Authenticate as a known user in your PingOne system.
After successful authentication, PingOne redirects the browser to the client application.
If the app displays the user information, authentication was successful:
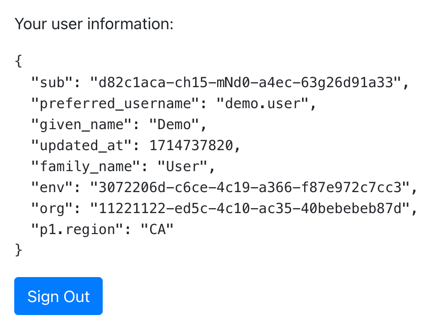
-
To revoke the OAuth 2.0 token, click the Sign Out button.
The application redirects to the PingOne server to revoke the OAuth 2.0 token and end the session, and then returns to the URI specified by the
logoutRedirectUriparameter of thelogoutmethod.In this tutorial, PingOne redirects users back to the client application, ready to authenticate again.
Recap
Congratulations!
You have now used the Ping SDK for JavaScript to obtain an OAuth 2.0 access token on behalf of a user from your PingOne server.
You have seen how to obtain OAuth 2.0 tokens, and view the related user information.
OIDC login to PingOne Advanced Identity Cloud tutorial for Android
In this tutorial you update a sample app that uses OIDC-based login to obtain tokens by redirecting to the PingOne Advanced Identity Cloud UI for authentication.
The sample connects to the .well-known endpoint of your PingOne Advanced Identity Cloud tenant to obtain the correct URIs to authenticate the user, and redirects to your PingOne Advanced Identity Cloud tenant’s login UI.
After authentication, PingOne Advanced Identity Cloud redirects the browser back to your application, which then obtains an OAuth 2.0 access token and displays the related user information.
Before you begin
To successfully complete this tutorial refer to the prerequisites in this section.
The tutorial also requires a configured PingOne Advanced Identity Cloud tenant.
- Node and NPM
-
This sample requires a minimum Node.js version of
18, and is tested on versions18and20. To get a supported version of Node.js, refer to the Node.js download page.You will also need
npmto build the code and run the samples.
Server configuration
This tutorial requires you to configure your PingOne Advanced Identity Cloud tenant as follows:
Task 1. Create a demo user
The samples and tutorials in this documentation often require that you have an identity set up so that you can test authentication.
To create a demo user in PingOne Advanced Identity Cloud, follow these steps:
-
Log in to your PingOne Advanced Identity Cloud tenant.
-
In the left panel, click Identities > Manage.
-
Click New Alpha realm - User.
-
Enter the following details:
-
Username =
demo -
First Name =
Demo -
Last Name =
User -
Email Address =
demo.user@example.com -
Password =
Ch4ng3it!
-
-
Click Save.
Task 2. Create an authentication journey
Authentication journeys provide fine-grained authentication by allowing multiple paths and decision points throughout the flow. Authentication journeys are made up of nodes that define actions taken during authentication.
Each node performs a single task, such as collecting a username or making a simple decision. Nodes can have multiple outcomes rather than just success or failure. For details, see the Authentication nodes configuration reference in the PingAM documentation.
To create a simple journey for use when testing the Ping SDKs, follow these steps:
-
In your PingOne Advanced Identity Cloud tenant, navigate to Journeys, and click New Journey.
-
Enter a name, such as
sdkUsernamePasswordJourneyand click Save.The authentication journey designer appears.
-
Drag the following nodes into the designer area:
-
Page Node
-
Platform Username
-
Platform Password
-
Data Store Decision
-
-
Drag and drop the Platform Username and Platform Password nodes onto the Page Node, so that they both appear on the same page when logging in.
-
Connect the nodes as follows:
Figure 43. Example username and password authentication journey -
Click Save.
Task 3. Register a public OAuth 2.0 client
Public clients do not use a client secret to obtain tokens because they are unable to keep them hidden. The Ping SDKs commonly use this type of client to obtain tokens, as they cannot guarantee safekeeping of the client credentials in a browser or on a mobile device.
To register a public OAuth 2.0 client application for use with the SDKs in PingOne Advanced Identity Cloud, follow these steps:
-
Log in to your PingOne Advanced Identity Cloud tenant.
-
In the left panel, click Applications.
-
Click Custom Application.
-
Select OIDC - OpenId Connect as the sign-in method, and then click Next.
-
Select Native / SPA as the application type, and then click Next.
-
In Name, enter a name for the application, such as
Public SDK Client. -
In Owners, select a user that is responsible for maintaining the application, and then click Next.
When trying out the SDKs, you could select the demouser you created previously. -
In Client ID, enter
sdkPublicClient, and then click Create Application.PingOne Advanced Identity Cloud creates the application and displays the details screen.
-
On the Sign On tab:
-
In Sign-In URLs, enter the following values:
https://localhost:8443/callback.htmlorg.forgerock.demo://oauth2redirectAlso add any other domains where you host SDK applications. -
In Grant Types, enter the following values:
Authorization CodeRefresh Token -
In Scopes, enter the following values:
openid profile email address
-
-
Click Show advanced settings, and on the Authentication tab:
-
In Token Endpoint Authentication Method, select
none. -
In Client Type, select
Public. -
Enable the Implied Consent property.
-
-
Click Save.
The application is now configured to accept client connections from and issue OAuth 2.0 tokens to the example applications and tutorials covered by this documentation.
Task 4. Configure the OAuth 2.0 provider
The provider specifies the supported OAuth 2.0 configuration options for a realm.
To ensure the PingOne Advanced Identity Cloud OAuth 2.0 provider service is configured for use with the Ping SDKs, follow these steps:
-
In your PingOne Advanced Identity Cloud tenant, navigate to Native Consoles > Access Management.
-
In the left panel, click Services.
-
In the list of services, click OAuth2 Provider.
-
On the Core tab, ensure Issue Refresh Tokens is enabled.
-
On the Consent tab, ensure Allow Clients to Skip Consent is enabled.
-
Click Save Changes.
Task 5. Configure CORS
Cross-origin resource sharing (CORS) lets user agents make cross-domain server requests. In PingOne Advanced Identity Cloud, you can configure CORS to allow browsers from trusted domains to access PingOne Advanced Identity Cloud protected resources. For example, you might want a custom web application running on your own domain to get an end-user’s profile information using the PingOne Advanced Identity Cloud REST API.
The Ping SDK for JavaScript samples and tutorials use https://localhost:8443 as the host domain, which you should add to your CORS configuration.
If you are using a different domain for hosting SDK applications, ensure you add them to the CORS configuration as accepted origin domains.
To update the CORS configuration in PingOne Advanced Identity Cloud, follow these steps:
-
Log in to your PingOne Advanced Identity Cloud tenant.
-
At the top right of the screen, click your name, and then select Tenant settings.
-
On the Global Settings tab, click Cross-Origin Resource Sharing (CORS).
-
Perform one of the following actions:
-
If available, click ForgeRockSDK.
-
If you haven’t added any CORS configurations to the tenant, click Add a CORS Configuration, select Ping SDK, and then click Next.
-
-
Add
https://localhost:8443and any DNS aliases you use to host your Ping SDK for JavaScript applications to the Accepted Origins property. -
Complete the remaining fields to suit your environment.
This documentation assumes the following configuration, required for the tutorials and sample applications:
Property Values Accepted Originshttps://localhost:8443Accepted MethodsGETPOSTAccepted Headersaccept-api-versionx-requested-withcontent-typeauthorizationif-matchx-requested-platformiPlanetDirectoryPro[1]ch15fefc5407912[2]Exposed Headersauthorizationcontent-typeEnable CachingTrueMax Age600Allow CredentialsTrueClick Show advanced settings to be able to edit all available fields.
-
Click Save CORS Configuration.
Step 1. Download the samples
To start this tutorial, you need to download the Ping SDK sample apps repo, which contains the projects you will use.
-
In a web browser, navigate to the Ping SDK sample apps repository.
-
Download the source code using one of the following methods:
- Download a ZIP file
-
-
Click Code, and then click Download ZIP.
-
Extract the contents of the downloaded ZIP file to a suitable location.
-
- Use a Git-compatible tool to clone the repo locally
-
-
Click Code, and then copy the HTTPS URL.
-
Use the URL to clone the repository to a suitable location.
For example, from the command-line you could run:
-
The result of these steps is a local folder named sdk-sample-apps.
Step 2. Install the Ping SDK
In the following procedure, you install the Ping SDK for JavaScript.
-
In a terminal window, navigate to the
sdk-sample-appsfolder. -
To install the required packages, enter the following:
npm installThe
npmtool downloads the required packages, and places them inside anode_modulesfolder.
Step 3. Configure connection properties
In this step, you configure the sample app to connect to the OAuth 2.0 application you created in PingOne Advanced Identity Cloud.
-
In the IDE of your choice, open the
sdk-sample-appsfolder you cloned in the previous step. -
Make a copy of the
/javascript/central-login-oidc/.env.examplefile, and name it.env.The
.envfile provides the values used by theforgerock.Config.setAsync()method injavascript/central-login-oidc/src/main.js. -
Update the
.envfile with the details of your PingOne Advanced Identity Cloud instance.SCOPE="$SCOPE" TIMEOUT=$TIMEOUT WEB_OAUTH_CLIENT="$WEB_OAUTH_CLIENT" WELL_KNOWN="$WELL_KNOWN" SERVER_TYPE="$SERVER_TYPE"Replace the following strings with the values you obtained when preparing your environment.
- $SCOPE
-
The scopes you added to your OAuth 2.0 application in PingOne Advanced Identity Cloud.
For example,
address email openid phone profile - $TIMEOUT
-
How long to wait for OAuth 2.0 timeouts, in milliseconds.
For example,
3000 - $WEB_OAUTH_CLIENT
-
The client ID from your OAuth 2.0 application in PingOne Advanced Identity Cloud.
For example,
sdkPublicClient - $WELL_KNOWN
-
The
.well-knownendpoint from your PingOne Advanced Identity Cloud tenant.How do I find my PingOne Advanced Identity Cloud .well-known URL?
You can view the
.well-knownendpoint for an OAuth 2.0 client in the PingOne Advanced Identity Cloud admin console:-
Log in to your PingOne Advanced Identity Cloud administration console.
-
Click Applications, and then select the OAuth 2.0 client you created earlier. For example, sdkPublicClient.
-
On the Sign On tab, in the Client Credentials section, copy the Discovery URI value.
For example,
https://openam-forgerock-sdks.forgeblocks.com/am/oauth2/alpha/.well-known/openid-configuration -
- $SERVER_TYPE
-
Ensures the sample app uses the correct behavior for the different servers it supports, for example what logout parameters to use.
For PingOne Advanced Identity Cloud and PingAM servers, specify
AIC.
The result resembles the following:
.envSCOPE="address email openid phone profile" TIMEOUT=3000 WEB_OAUTH_CLIENT="sdkPublicClient" WELL_KNOWN="https://openam-forgerock-sdks.forgeblocks.com/am/oauth2/alpha/.well-known/openid-configuration" SERVER_TYPE="AIC"
Step 4. Test the app
In the following procedure, you run the sample app that you configured in the previous step.
The sample connects to your PingOne Advanced Identity Cloud tenant to obtain the correct URIs to authenticate the user, and redirects the browser to your PingOne Advanced Identity Cloud tenant.
After authentication, PingOne Advanced Identity Cloud redirects the browser back to your application, which then obtains an OAuth 2.0 access token and displays the related user information.
Run the sample
-
In a terminal window, navigate to the
/javascriptfolder in yoursdk-sample-appsproject. -
To run the embedded login sample, enter the following:
npm run start:central-login-oidc -
In a web browser, navigate to the following URL:
https://localhost:8443The sample displays a page with two buttons:
-
Click Login.
The sample app redirects the browser to your PingOne Advanced Identity Cloud instance.
To see the application calling the authorizeendpoint, and the redirect back from PingOne Advanced Identity Cloud with thecodeandstateOAuth 2.0 parameters, open the Network tab of your browser’s developer tools. -
Authenticate as a known user in your PingOne Advanced Identity Cloud tenant.
After successful authentication, PingOne Advanced Identity Cloud redirects the browser to the client application.
If the app displays the user information, authentication was successful:

-
To revoke the OAuth 2.0 token, click the Sign Out button.
In this tutorial, PingOne Advanced Identity Cloud redirects users back to the client application, ready to authenticate again.
Recap
Congratulations!
You have now used the Ping SDK for JavaScript to obtain an OAuth 2.0 access token on behalf of a user from your PingOne Advanced Identity Cloud tenant.
You have seen how to obtain OAuth 2.0 tokens, and view the related user information.
OIDC login to PingAM tutorial for Android
In this tutorial you update a sample app that uses OIDC-based login to obtain tokens by redirecting to the PingAM UI for authentication.
The sample connects to the .well-known endpoint of your PingAM server to obtain the correct URIs to authenticate the user, and redirects to your PingAM server’s login UI.
After authentication, PingAM redirects the browser back to your application, which then obtains an OAuth 2.0 access token and displays the related user information.
Before you begin
To successfully complete this tutorial refer to the prerequisites in this section.
The tutorial also requires a configured PingAM server.
- Node and NPM
-
This sample requires a minimum Node.js version of
18, and is tested on versions18and20. To get a supported version of Node.js, refer to the Node.js download page.You will also need
npmto build the code and run the samples.
Server configuration
This tutorial requires you to configure your PingAM server as follows:
Task 1. Create a demo user
The samples and tutorials in this documentation often require that you have an identity set up so that you can test authentication.
To create a demo user in PingAM, follow these steps:
-
Log in to the PingAM admin UI as an administrator.
-
Navigate to Identities, and then click Add Identity.
-
Enter the following details:
-
User ID =
demo -
Password =
Ch4ng3it! -
Email Address =
demo.user@example.com
-
-
Click Create.
Task 2. Create an authentication journey
Authentication trees provide fine-grained authentication by allowing multiple paths and decision points throughout the authentication flow. Authentication trees are made up of nodes that define actions taken during authentication.
Each node performs a single task, such as collecting a username or making a simple decision. Nodes can have multiple outcomes rather than just success or failure. For details, see the Authentication nodes configuration reference in the PingAM documentation.
To create a simple tree for use when testing the Ping SDKs, follow these steps:
-
Under Realm Overview, click Authentication Trees, then click Create Tree.
-
Enter a tree name, for example
sdkUsernamePasswordJourney, and then click Create.The authentication tree designer appears, showing the Start entry point connected to the Failure exit point.
-
Drag the following nodes from the Components panel on the left side into the designer area:
-
Page Node
-
Username Collector
-
Password Collector
-
Data Store Decision
-
-
Drag and drop the Username Collector and Password Collector nodes onto the Page Node, so that they both appear on the same page when logging in.
-
Connect the nodes as follows:
Figure 44. Example username and password authentication tree -
Select the Page Node, and in the Properties pane, set the Stage property to
UsernamePassword.You can configure the node properties by selecting a node and altering properties in the right-hand panel. One of the samples uses this specific value to determine the custom UI to display.
-
Click Save.
Task 3. Register a public OAuth 2.0 client
Public clients do not use a client secret to obtain tokens because they are unable to keep them hidden. The Ping SDKs commonly use this type of client to obtain tokens, as they cannot guarantee safekeeping of the client credentials in a browser or on a mobile device.
To register a public OAuth 2.0 client application for use with the SDKs in AM, follow these steps:
-
Log in to the PingAM admin UI as an administrator.
-
Navigate to Applications > OAuth 2.0 > Clients, and then click Add Client.
-
In Client ID, enter
sdkPublicClient. -
Leave Client secret empty.
-
In Redirection URIs, enter the following values:
org.forgerock.demo://oauth2redirecthttps://localhost:8443/callback.html
|
The Ping SDK for JavaScript attempts to load the redirect page to capture the OAuth 2.0 If the page you redirect to does not exist, takes a long time to load, or runs any JavaScript you might get a timeout, delayed authentication, or unexpected errors. To ensure the best user experience, we highly recommend that you redirect to a static HTML page with minimal HTML and no JavaScript when obtaining OAuth 2.0 tokens. |
+
| Also add any other domains where you will be hosting SDK applications. . In Scopes, enter the following values: |
+
openid profile email address
. Click Create.
+
PingAM creates the new OAuth 2.0 client, and displays the properties for further configuration.
. On the Core tab:
.. In Client type, select Public.
.. Disable Allow wildcard ports in redirect URIs.
.. Click Save Changes.
. On the Advanced tab:
.. In Grant Types, enter the following values:
+
Authorization Code
Refresh Token-
In Token Endpoint Authentication Method, select
None. -
Enable the Implied consent property.
-
Click Save Changes.
-
Task 4. Configure the OAuth 2.0 provider
The provider specifies the supported OAuth 2.0 configuration options for a realm.
To ensure the PingAM OAuth 2.0 provider service is configured for use with the Ping SDKs, follow these steps:
-
Log in to the PingAM admin UI as an administrator.
-
In the left panel, click Services.
-
In the list of services, click OAuth2 Provider.
-
On the Core tab, ensure Issue Refresh Tokens is enabled.
-
On the Consent tab, ensure Allow Clients to Skip Consent is enabled.
-
Click Save Changes.
Task 5. Configure CORS
Cross-origin resource sharing (CORS) lets user agents make cross-domain server requests. In PingAM, you can configure CORS to allow browsers from trusted domains to access PingAM protected resources. For example, you might want a custom web application running on your own domain to get an end-user’s profile information using the PingAM REST API.
The Ping SDK for JavaScript samples and tutorials all use https://localhost:8443 as the host domain, which you should add to your CORS configuration.
If you are using a different URL for hosting SDK applications, ensure you add them to the CORS configuration as accepted origin domains.
To enable CORS in PingAM, and create a CORS filter to allow requests from your configured domain names, follow these steps:
-
Log in to the PingAM admin UI as an administrator.
-
Navigate to Configure > Global Services > CORS Service > Configuration, and set the Enable the CORS filter property to
true.If this property is not enabled, CORS headers are not added to responses from PingAM, and CORS is disabled entirely. -
On the Secondary Configurations tab, click Click Add a Secondary Configuration.
-
In the Name field, enter
ForgeRockSDK. -
in the Accepted Origins field, enter any DNS aliases you use for your SDK apps.
This documentation assumes the following configuration:
Property Values Accepted Originshttps://localhost:8443Accepted MethodsGETPOSTAccepted Headersaccept-api-versionx-requested-withcontent-typeauthorizationif-matchx-requested-platformiPlanetDirectoryPro[1]ch15fefc5407912[2]Exposed Headersauthorizationcontent-type -
Click Create.
PingAM displays the configuration of your new CORS filter.
-
On the CORS filter configuration page:
-
Ensure Enable the CORS filter is enabled.
-
Set the Max Age property to
600 -
Ensure Allow Credentials is enabled.
-
-
Click Save Changes.
Step 1. Download the samples
To start this tutorial, you need to download the Ping SDK sample apps repo, which contains the projects you will use.
-
In a web browser, navigate to the Ping SDK sample apps repository.
-
Download the source code using one of the following methods:
- Download a ZIP file
-
-
Click Code, and then click Download ZIP.
-
Extract the contents of the downloaded ZIP file to a suitable location.
-
- Use a Git-compatible tool to clone the repo locally
-
-
Click Code, and then copy the HTTPS URL.
-
Use the URL to clone the repository to a suitable location.
For example, from the command-line you could run:
-
The result of these steps is a local folder named sdk-sample-apps.
Step 2. Install the Ping SDK
In the following procedure, you install the Ping SDK for JavaScript.
-
In a terminal window, navigate to the
sdk-sample-appsfolder. -
To install the required packages, enter the following:
npm installThe
npmtool downloads the required packages, and places them inside anode_modulesfolder.
Step 3. Configure connection properties
In this step, you configure the sample app to connect to the OAuth 2.0 application you created in PingOne Advanced Identity Cloud.
-
In the IDE of your choice, open the
sdk-sample-appsfolder you cloned in the previous step. -
Make a copy of the
/javascript/central-login-oidc/.env.examplefile, and name it.env.The
.envfile provides the values used by theforgerock.Config.setAsync()method injavascript/central-login-oidc/src/main.js. -
Update the
.envfile with the details of your PingAM server.SCOPE="$SCOPE" TIMEOUT=$TIMEOUT WEB_OAUTH_CLIENT="$WEB_OAUTH_CLIENT" WELL_KNOWN="$WELL_KNOWN" SERVER_TYPE="$SERVER_TYPE"Replace the following strings with the values you obtained when preparing your environment.
- $SCOPE
-
The scopes you added to your OAuth 2.0 application in PingOne Advanced Identity Cloud.
For example,
address email openid phone profile - $TIMEOUT
-
How long to wait for OAuth 2.0 timeouts, in milliseconds.
For example,
3000 - $WEB_OAUTH_CLIENT
-
The client ID from your OAuth 2.0 application in PingAM.
For example,
sdkPublicClient - $WELL_KNOWN
-
The
.well-knownendpoint from your PingAM tenant.For example,
https://openam.example.com:8443/openam/oauth2/.well-known/openid-configuration - $SERVER_TYPE
-
Ensures the sample app uses the correct behavior for the different servers it supports, for example what logout parameters to use.
For PingOne Advanced Identity Cloud and PingAM servers, specify
AIC.
The result resembles the following:
.envSCOPE="address email openid phone profile" TIMEOUT=3000 WEB_OAUTH_CLIENT="sdkPublicClient" WELL_KNOWN="https://openam.example.com:8443/openam/oauth2/.well-known/openid-configuration" SERVER_TYPE="AIC"
Step 4. Test the app
In the following procedure, you run the sample app that you configured in the previous step.
The sample connects to your PingAM server to obtain the correct URIs to authenticate the user, and redirects the browser to your PingAM server.
After authentication, PingAM redirects the browser back to your application, which then obtains an OAuth 2.0 access token and displays the related user information.
Run the sample
-
In a terminal window, navigate to
sdk-sample-apps/javascriptin your project. -
To run the embedded login sample, enter the following:
npm run start:central-login-oidc -
In a web browser, navigate to the following URL:
https://localhost:8443The sample displays a page with two buttons:
-
Click Login.
The sample app redirects the browser to your PingAM instance.
To see the application calling the authorizeendpoint, and the redirect back from PingAM with thecodeandstateOAuth 2.0 parameters, open the Network tab of your browser’s developer tools. -
Authenticate as a known user in your PingAM system.
After successful authentication, PingAM redirects the browser to the client application.
If the app displays the user information, authentication was successful:
-
To revoke the OAuth 2.0 token, click the Sign Out button.
In this tutorial, PingAM redirects users back to the client application, ready to authenticate again.
Recap
Congratulations!
You have now used the Ping SDK for JavaScript to obtain an OAuth 2.0 access token on behalf of a user from your PingAM server.
You have seen how to obtain OAuth 2.0 tokens, and view the related user information.
OIDC login to PingFederate tutorial for JavaScript
In this tutorial you update a sample app that uses OIDC-based login to obtain tokens by redirecting to the PingFederate UI for authentication.
The sample connects to the .well-known endpoint of your PingFederate server to obtain the correct URIs to authenticate the user, and redirects to your PingFederate server’s login UI.
After authentication, PingFederate redirects the browser back to your application, which then obtains an OAuth 2.0 access token and displays the related user information.
Before you begin
To successfully complete this tutorial refer to the prerequisites in this section.
The tutorial also requires a configured PingFederate server.
Prerequisites
- Node and NPM
-
This sample requires a minimum Node.js version of
18, and is tested on versions18and20. To get a supported version of Node.js, refer to the Node.js download page.You will also need
npmto build the code and run the samples.
Server configuration
This tutorial requires you to configure your PingFederate server as follows:
Task 1. Register a public OAuth 2.0 client
OAuth 2.0 client application profiles define how applications connect to PingFederate and obtain OAuth 2.0 tokens.
To allow the Ping SDKs to connect to PingFederate and obtain OAuth 2.0 tokens, you must register an OAuth 2.0 client application:
-
Log in to the PingFederate administration console as an administrator.
-
Navigate to .
-
Click Add Client.
PingFederate displays the Clients | Client page.
-
In Client ID and Name, enter a name for the profile, for example
sdkPublicClientMake a note of the Client ID value, you will need it when you configure the sample code.
-
In Client Authentication, select
None. -
In Redirect URIs, add the following values:
org.forgerock.demo://oauth2redirecthttps://localhost:8443Also add any other URLs where you host SDK applications.
Failure to add redirect URLs that exactly match your client app’s values can cause PingFederate to display an error message such as
Redirect URI mismatchwhen attempting to end a session by redirecting from the SDK. -
In Allowed Grant Types, select the following values:
Authorization CodeRefresh Token -
In the OpenID Connect section:
-
In Logout Mode, select Ping Front-Channel
-
In Front-Channel Logout URIs, add the following values:
org.forgerock.demo://oauth2redirecthttps://localhost:8443Also add any other URLs that redirect users to PingFederate to end their session.
Failure to add sign off URLs that exactly match your client app’s values can cause PingFederate to display an error message such as
invalid post logout redirect URIwhen attempting to end a session by redirecting from the SDK. -
In Post-Logout Redirect URIs, add the following values:
org.forgerock.demo://oauth2redirecthttps://localhost:8443
-
-
Click Save.
After changing PingFederate configuration using the administration console, you must replicate the changes to each server node in the cluster before they take effect.
In the PingFederate administration console, navigate to System > Server > Cluster Management, and click Replicate.
The application is now configured to accept client connections from and issue OAuth 2.0 tokens to the Ping SDK PingFederate example applications and tutorials covered by this documentation.
Task 2. Configure CORS
Cross-origin resource sharing (CORS) lets user agents make cross-domain server requests. In PingFederate, you can configure CORS to allow browsers or apps from trusted domains to access protected resources.
To configure CORS in PingFederate follow these steps:
-
Log in to the PingFederate administration console as an administrator.
-
Navigate to .
-
In the Cross-Origin Resource Sharing Settings section, in the Allowed Origin field, enter any DNS aliases you use for your SDK apps.
This documentation assumes the following configuration:
Property Values Allowed Originorg.forgerock.demo://oauth2redirecthttps://localhost:8443 -
Click Save.
After changing PingFederate configuration using the administration console, you must replicate the changes to each server node in the cluster before they take effect.
In the PingFederate administration console, navigate to System > Server > Cluster Management, and click Replicate.
Your PingFederate server is now able to accept connections from origins hosting apps built with the Ping SDKs.
Step 1. Download the samples
To start this tutorial, you need to download the Ping SDK sample apps repo, which contains the projects you will use.
-
In a web browser, navigate to the Ping SDK sample apps repository.
-
Download the source code using one of the following methods:
- Download a ZIP file
-
-
Click Code, and then click Download ZIP.
-
Extract the contents of the downloaded ZIP file to a suitable location.
-
- Use a Git-compatible tool to clone the repo locally
-
-
Click Code, and then copy the HTTPS URL.
-
Use the URL to clone the repository to a suitable location.
For example, from the command-line you could run:
-
The result of these steps is a local folder named sdk-sample-apps.
Step 2. Install the Ping SDK
In the following procedure, you install the Ping SDK for JavaScript.
-
In a terminal window, navigate to the
sdk-sample-appsfolder. -
To install the required packages, enter the following:
npm installThe
npmtool downloads the required packages, and places them inside anode_modulesfolder.
Step 3. Configure connection properties
In this step, you configure the sample app to connect to the OAuth 2.0 application you created in PingFederate.
-
In the IDE of your choice, open the
sdk-sample-appsfolder you cloned in the previous step. -
Open the
/central-login/src/main.jsfile. -
Replace the
forgerock.Config.setmethod with this code:await Config.setAsync({ clientId: "<PingFederate Client ID>", redirectUri: `${window.location.origin}`, scope: "address email openid phone profile", serverConfig: { wellknown: "<PingFederate .well-known URL>", }, });Replace the following strings with the values you obtained when you registered an OAuth 2.0 application in PingFederate.
- <PingFederate Client ID>
-
The client ID from your OAuth 2.0 application in PingFederate.
For example,
sdkPublicClient - <PingFederate .well-known URL>
-
The
.well-knownendpoint of your PingFederate server.How do I find my PingFederate .well-known URL?
You can form your
.well-knownendpoint by adding/.well-known/openid-configurationto your server’s base URL.To view the base URL of your PingFederate server:
-
Log in to your PingFederate administration console.
-
Navigate to .
-
Make a note of the Base URL value.
For example,
https://pingfed.example.comDo not use the admin console URL. -
Append `/.well-known/openid-configuration ` to your base URL.
For example,
https://pingfed.example.com/.well-known/openid-configuration -
The result resembles the following:
await Config.setAsync({
  clientId: "sdkPublicClient",
  redirectUri: `${window.location.origin}`,
  scope: "address email openid phone profile",
  serverConfig: {
    wellknown: "https://pingfed.example.com/.well-known/openid-configuration",
  },
});
Step 4. Test the app
In the following procedure, you run the sample app that you configured in the previous step.
The sample connects to your PingFederate server to obtain the correct URIs to authenticate the user, and redirects the browser to your PingFederate server.
After authentication, PingFederate redirects the browser back to your application, which then obtains an OAuth 2.0 access token and displays the related user information.
Run the sample
-
In a terminal window, navigate to the
/javascriptfolder in yoursdk-sample-appsproject. -
To run the embedded login sample, enter the following:
npm run start:central-login -
In a web browser, navigate to the following URL:
https://localhost:8443The sample displays a page with two buttons:
-
Click Login.
The sample app redirects the browser to your PingFederate instance.
To see the application calling the authorizeendpoint, and the redirect back from PingFederate with thecodeandstateOAuth 2.0 parameters, open the Network tab of your browser’s developer tools. -
Authenticate as a known user in your PingFederate system.
After successful authentication, PingFederate redirects the browser to the client application.
If the app displays the user information, authentication was successful:
-
To revoke the OAuth 2.0 token, click the Sign Out button.
In this tutorial, PingFederate redirects users back to the client application, ready to authenticate again.
Recap
Congratulations!
You have now used the Ping SDK for JavaScript to obtain an OAuth 2.0 access token on behalf of a user from your PingFederate server.
You have seen how to obtain OAuth 2.0 tokens, and view the related user information.
Implement your use cases with the Ping SDKs
The SDKs enable you to implement many authentication, registration, and self-service use cases into your mobile and web apps.
Visit the following pages for more information on implementing different OIDC login use cases using the Ping SDKs:
Applies to: Android | iOS | JavaScript
Learn how to replace the default PingAM or PingOne Advanced Identity Cloud user interface for authentication with your own custom user interface.
You’ll use an existing JavaScript sample application to act as your custom UI. This app will step through your authentication journeys, and act as the central UI for one or more sample client apps.
Creating a custom UI app to share across OIDC apps
In this tutorial you replace the default PingAM or PingOne Advanced Identity Cloud user interface for authentication with your own custom user interface.
You’ll use an existing JavaScript sample application to act as your custom UI. This app will step through your authentication journeys, and act as the central UI for one or more sample client apps.
Understanding the custom UI flow
When the Ping SDKs perform OIDC login they initiate the OAuth 2.0 Authorization Code flow on your PingOne Advanced Identity Cloud tenant or PingAM server.
Your server would usually use its built-in user interface to authenticate the user, before returning to the client app with the authorization code.
For this tutorial you’ll configure your server to use your custom UI app to authenticate users instead.

The overall authentication flow is as follows:
-
In the client app, when the user initiates sign on the client app calls the
/authorizeendpoint to start the OAuth 2.0 flow. -
The OAuth 2.0 client you configure in the server needs to authenticate the user, and redirects users to your custom UI.
It appends a
gotoquery parameter to the URL, so that the custom UI app can redirect to the server after successful authentication. -
The custom UI starts the authentication journey, and steps through each node, handling the callbacks as necessary.
Note that the custom UI app does not perform any OAuth 2.0 operations itself. Its only role is to authenticate the user by stepping through the journey, and then returning back to the server with the session token, so that the server can continue the OAuth 2.0 flow.
-
The custom UI app renders the UI to handle any interactive callbacks in the journey. For example, to capture the username and password credentials.
-
When authentication is successful, the server issues a session token on behalf of the user to the custom UI app.
The following snippet shows how the custom sample app handles the successful authentication, and uses the
gotoparameter:Excerpt from/javascript/embedded-login/src/main.js// Check URL for query parameters const url = new URL(document.location); const params = url.searchParams; const goto = params.get('goto'); const handleStep = async (step) => { switch (step.type) { case 'LoginSuccess': { if (goto != null) { // Journey complete // Return to server to issue auth code window.location.replace(goto); return; } ... } ... }For security reasons your custom UI must validate that the URL in the
gotoparameter matches a domain you trust before redirecting to it.Failure to validate the domain of the
gotoURL before redirecting could result in link hijacking or other security-related problems. -
Due to the presence of the
gotoparameter, the custom UI app can now redirect to the OAuth 2.0/authorizeendpoint, using the session token to authenticate the request.To authenticate the user the browser attaches the session token as a cookie in the request to the
/authorizeendpoint.Your server issues session token cookies for use on the same domain you have assigned to it. That domain will be one of the following:
-
The original URL for the server, for example:
-
openam-forgerock-sdks.forgeblocks.com(PingOne Advanced Identity Cloud tenants) -
openam.example.com(PingAM servers)
-
-
A custom domain assigned to the server, for example:
-
id.mycompany.com
-
If the custom UI app is running on a different domain than your server then browsers consider the cookie to be from a third party.
Some browsers, such as Safari block access to third-party cookies, so the requests that use them appear to not be authenticated.
For this tutorial you can disable third-party cookie checks in the browser, but for production you must ensure your custom UI and your server are sharing the same domain.
-
-
The OAuth 2.0 client accepts the request, and returns the authorization code to the client application.
The URL of the client app must match one of the redirect URIs listed in the OAuth 2.0 client configuration.
-
The client application recognizes that an authorization code is present and that authentication was a success, and can now exchange the authorization code by calling the
/access_tokenOAuth 2.0 endpoint. -
The server validates the authorization code and issues the access token, an ID token, and if enabled, refresh tokens.
The client app can now call the
userinfoendpoint, using the access token as a bearer token for authentication, and retrieve information about the user.
Tutorial steps
Complete the following tasks to try out this tutorial:
Before you begin
Step 1. Downloading the samples
You need to download the SDK sample apps repo, which contains the projects you will use for this tutorial.
-
In a web browser, navigate to the SDK Sample Apps repository.
-
Download the source code using one of the following methods:
- Download a ZIP file
-
-
Click Code, and then click Download ZIP.
-
Extract the contents of the downloaded ZIP file to a suitable location.
-
- Use a Git-compatible tool to clone the repo locally
-
-
Click Code, and then copy the HTTPS URL.
-
Use the URL to clone the repository to a suitable location.
For example, from the command-line you could run:
git clone https://github.com/ForgeRock/sdk-sample-apps.git
-
The result of these steps is a local folder named sdk-sample-apps.
Step 2. Installing the dependencies
In the following procedure, you install the required modules and dependencies, including the Ping SDK for JavaScript.
-
In a terminal window, navigate to the
sdk-sample-apps/javascriptfolder. -
To install the required packages, enter the following:
npm installThe
npmtool downloads the required packages, and places them inside anode_modulesfolder.
Step 3. Hosting the sample apps
In a production scenario your custom login UI app would have its own fully-qualified domain name that your Android, iOS, and JavaScript clients could all connect to.
For simplicity, in this tutorial you will serve your custom login UI app from the local IP address of your host computer.
Using the local IP of your host computer means Android and iOS apps running on a simulator can resolve the address, and also JavaScript apps running locally.
Obtaining your local IP address
Complete the following steps to obtain your local IP address:
-
Windows
-
macOS
-
In a command prompt, enter
ipconfig /allWindows displays information about the network adapters in your computer.
Show example output
Windows IP Configuration Host Name . . . . . . . . . . . . : Windows Primary Dns Suffix . . . . . . . : Node Type . . . . . . . . . . . . : Hybrid IP Routing Enabled. . . . . . . . : No WINS Proxy Enabled. . . . . . . . : No Ethernet adapter Ethernet: Media State . . . . . . . . . . . : Media disconnected Description . . . . . . . . . . . : E3100G 2.5 Gigabit Ethernet Controller Physical Address. . . . . . . . . : 74-34-E2-2b-30-44 DHCP Enabled. . . . . . . . . . . : Yes Autoconfiguration Enabled . . . . : Yes Wireless LAN adapter Local Area Connection* 1: Media State . . . . . . . . . . . : Media disconnected Description . . . . . . . . . . . : Microsoft Wi-Fi Direct Virtual Adapter Physical Address. . . . . . . . . : 67-6C-EB-B3-46-82 DHCP Enabled. . . . . . . . . . . : Yes Autoconfiguration Enabled . . . . : Yes Wireless LAN adapter Wi-Fi: Description . . . . . . . . . . . : Wireless Network Adapter (210NGW) Physical Address. . . . . . . . . : 87-6C-DF-C9-17-90 DHCP Enabled. . . . . . . . . . . : Yes Autoconfiguration Enabled . . . . : Yes IPv6 Address. . . . . . . . . . . : 2406:3d08:2f61:1400::2d47 Lease Obtained. . . . . . . . . . : January 27, 2025 11:09:26 AM Lease Expires . . . . . . . . . . : January 28, 2025 6:09:26 AM IPv6 Address. . . . . . . . . . . : 2406:3d08:2f61:1400::2d47 Temporary IPv6 Address. . . . . . : 2604:2b08:2f93:2600:b479:b5b4:25ff:acc8 Link-local IPv6 Address . . . . . : fe54::d9e5:16ff:d9d4:e22%10 IPv4 Address. . . . . . . . . . . : 192.168.0.35 Subnet Mask . . . . . . . . . . . : 255.255.255.0 Lease Obtained. . . . . . . . . . : January 27, 2025 11:09:24 AM Lease Expires . . . . . . . . . . : January 29, 2025 11:09:26 AM Default Gateway . . . . . . . . . : fe80::bb8:c0ee:fea5:8c58%10 192.168.0.1 DHCP Server . . . . . . . . . . . : 192.168.0.1 DHCPv6 IAID . . . . . . . . . . . : 893252287 DHCPv6 Client DUID. . . . . . . . : 00-01-00-01-1b-87-59-2D-74-86-C4-3C-30-88 DNS Servers . . . . . . . . . . . : 2025:4e8:0:230b::11 2025:4e8:0:230c::11 8.8.8.8 NetBIOS over Tcpip. . . . . . . . : Enabled -
Ignoring adapters where the Media State property is listed as
Media Disconnected, locate the ethernet or wireless adapter that connects to your router. -
Make a note of the IPv4 Address field.
The address will often start with
192.168.,10.0., or172.16., which are the first digits of the commonly used reserved private IPv4 addresses.In this case, the local IPv4 IP address is
192.168.0.35.You will use this address to access your custom UI app for this tutorial.
-
In a terminal window, enter
ifconfigmacOS displays information about the network interfaces in your computer.
Show example output
lo0: flags=8049<UP,LOOPBACK,RUNNING,MULTICAST> mtu 16384
	options=1203<RXCSUM,TXCSUM,TXSTATUS,SW_TIMESTAMP>
	inet 127.0.0.1 netmask 0xff000000
	inet6 ::1 prefixlen 128
	inet6 fe80::1%lo0 prefixlen 64 scopeid 0x1
	nd6 options=201<PERFORMNUD,DAD>
gif0: flags=8010<POINTOPOINT,MULTICAST> mtu 1280
stf0: flags=0<> mtu 1280
anpi0: flags=8863<UP,BROADCAST,SMART,RUNNING,SIMPLEX,MULTICAST> mtu 1500
	options=400<CHANNEL_IO>
	ether 22:d0:cb:e5:fd:09
	media: none
	status: inactive
en3: flags=8863<UP,BROADCAST,SMART,RUNNING,SIMPLEX,MULTICAST> mtu 1500
	options=404<VLAN_MTU,CHANNEL_IO>
	ether f8:e4:3b:ad:67:c5
	inet6 fe80::ca4:9a6c:f835:80c9%en8 prefixlen 64 secured scopeid 0x7
	inet6 fd84:bb80:dd60:23b3:855:171f:3651:b7de prefixlen 64 autoconf secured
	inet 192.168.0.35 netmask 0xffffff00 broadcast 192.168.0.255
	nd6 options=201<PERFORMNUD,DAD>
	media: autoselect (1000baseT <full-duplex>)
	status: active
en1: flags=8963<UP,BROADCAST,SMART,RUNNING,PROMISC,SIMPLEX,MULTICAST> mtu 1500
	options=460<TSO4,TSO6,CHANNEL_IO>
	ether 36:e5:80:6e:d1:40
	media: autoselect <full-duplex>
	status: inactive
en2: flags=8963<UP,BROADCAST,SMART,RUNNING,PROMISC,SIMPLEX,MULTICAST> mtu 1500
	options=460<TSO4,TSO6,CHANNEL_IO>
	ether 36:e5:80:6e:d1:44
	media: autoselect <full-duplex>
	status: inactive
bridge0: flags=8863<UP,BROADCAST,SMART,RUNNING,SIMPLEX,MULTICAST> mtu 1500
	options=63<RXCSUM,TXCSUM,TSO4,TSO6>
	ether 36:e5:80:6e:d1:40
	Configuration:
		id 0:0:0:0:0:0 priority 0 hellotime 0 fwddelay 0
		maxage 0 holdcnt 0 proto stp maxaddr 100 timeout 1200
		root id 0:0:0:0:0:0 priority 0 ifcost 0 port 0
		ipfilter disabled flags 0x0
	member: en1 flags=3<LEARNING,DISCOVER>
	        ifmaxaddr 0 port 11 priority 0 path cost 0
	member: en2 flags=3<LEARNING,DISCOVER>
	        ifmaxaddr 0 port 12 priority 0 path cost 0
	member: en3 flags=3<LEARNING,DISCOVER>
	        ifmaxaddr 0 port 13 priority 0 path cost 0
	media: <unknown type>
	status: inactive
ap1: flags=8863<UP,BROADCAST,SMART,RUNNING,SIMPLEX,MULTICAST> mtu 1500
	options=6460<TSO4,TSO6,CHANNEL_IO,PARTIAL_CSUM,ZEROINVERT_CSUM>
	ether d6:0f:2c:90:e9:b6
	nd6 options=201<PERFORMNUD,DAD>
	media: autoselect (none)
	status: inactive
en0: flags=8863<UP,BROADCAST,SMART,RUNNING,SIMPLEX,MULTICAST> mtu 1500
	options=6460<TSO4,TSO6,CHANNEL_IO,PARTIAL_CSUM,ZEROINVERT_CSUM>
	ether c6:2a:06:29:ee:28
	nd6 options=201<PERFORMNUD,DAD>
	media: autoselect
	status: inactive
utun0: flags=8051<UP,POINTOPOINT,RUNNING,MULTICAST> mtu 1500
	inet6 fe80::a19f:5de6:a4ca:fd90%utun0 prefixlen 64 scopeid 0x13
	nd6 options=201<PERFORMNUD,DAD>
-
Looking at interfaces where the status property is listed as
active, locate the ethernet or wireless interface that connects to your router.Often the prefix of the interface is
en. -
Make a note of the IPv4 address in the inet field.
The address will often start with
192.168.,10.0., or172.16., which are the first digits of the commonly used reserved private IPv4 addresses.In this case, the local IPv4 IP address is
192.168.0.35.You will use this address to access your custom UI app for this tutorial.
Creating a DNS alias for the JavaScript client application
You should assign a DNS alias to your localhost address to help differentiate the client application from the custom UI application during this tutorial.
You can choose whatever host name you prefer for your client application. This tutorial uses sdkapp.example.com.
Complete the following steps to configure a DNS alias for your local IP address:
-
Windows
-
macOS
-
As an administrator, in a text editor open the
%SystemRoot%\system32\drivers\etc\hostsfile. -
Add the following:
127.0.0.1 sdkapp.example.com -
Close and save the file.
-
As an administrator, in a text editor open the
/etc/hostsfile. -
Add the following:
127.0.0.1 sdkapp.example.com -
Close and save the file.
Part 1. Configuring your PingAM server or PingOne Advanced Identity Cloud tenant
In this section you configure your PingAM server or PingOne Advanced Identity Cloud tenant with an OAuth 2.0 client to accept connections from the sample client apps.
The OAuth 2.0 client also contains the configuration to redirect your users to authenticate using the custom UI sample app running on your local IP address.
Lastly, you configure Cross-origin Resource Sharing (CORS) to allow the sample UI app, and the client JavaScript app to connect to protected endpoints.
Step 1. Configure an OAuth 2.0 client
The initial request to authenticate a user from your client application requires an OAuth 2.0 client is setup.
This client also contains the configuration for your custom UI application. This means that you can have different UI applications for different clients, allowing you to apply different branding to each.
In this step you configure a suitable OAuth 2.0 client in either your PingAM server of PingOne Advanced Identity Cloud tenant, by using the Access Management native console.
How to open the native console in an PingOne Advanced Identity Cloud tenant
If you are using an PingOne Advanced Identity Cloud tenant, follow these steps to open the Access Management native console:
-
Log in to your PingOne Advanced Identity Cloud tenant.
-
Navigate to Native Consoles > Access Management.
In the Access Management native console, complete these steps to register an OAuth 2.0 client for this tutorial:
-
Navigate to Applications > OAuth 2.0 > Clients, and then click Add Client
-
On the New OAuth 2.0 Client page:
-
In Client ID, enter an identifier for the client.
For example,
sdkCustomUI -
In Redirection URIs, enter the URIs that will be hosting your client applications.
-
Add the DNS alias you created earlier for the JavaScript sample client app:
https://sdkapp.example.com:8443
-
If you want to test your setup with the Android or iOS sample apps, also add the following:
org.forgerock.demo://oauth2redirect
-
-
-
In Scopes, enter each of the following:
-
openid -
profile -
email -
phone -
address
-
-
Click Create.
The authorization server creates the client and navigates to the edit page for it.
-
On the Core tab:
-
In Client type, select
Public. -
Click Save Changes.
You must click Save Changes before changing tabs otherwise the page discards any changes you made on the tab.
-
-
On the Advanced tab:
-
In Token Endpoint Authentication Method, select
none. -
Set Implied Consent to Enabled.
-
Click Save Changes.
-
-
On the OAuth2 Provider Overrides tab:
-
Set Enable OAuth2 Provider Overrides to Enabled.
-
In Custom Login URL Template, enter the URL of the custom UI application, followed by the query parameters required to navigate between the client, custom UI, and authorization server.
For this tutorial, use the local IP address of your computer that you obtained earlier, and the port number you configured for the custom UI sample app (
9443):https://192.168.0.35:9443?goto=${goto}<#if acrValues??>&acr_values=${acrValues}</#if><#if realm??>&realm=${realm}</#if><#if module??>&module=${module}</#if><#if service??>&service=${service}</#if><#if locale??>&locale=${locale}</#if> -
Set Use Client-Side Access & Refresh Tokens to Enabled.
-
Set Allow Clients to Skip Consent to Enabled
-
Click Save Changes.
-
You have now configured the OAuth 2.0 client to issue tokens to your client applications, and redirect login requests to your custom UI application.
Step 2. Configure CORS
Cross-origin resource sharing (CORS) lets user agents make cross-domain server requests. Configure CORS to allow browsers from trusted addresses to access your protected resources.
For this tutorial you configure CORS to allow the client JavaScript application to access OAuth 2.0 endpoints, and the custom UI application to access your authentication journeys.
To configure CORS, select your authorization server:
-
PingOne Advanced Identity Cloud
-
PingAM
To update the CORS configuration in PingOne Advanced Identity Cloud, follow these steps:
-
Log in to your PingOne Advanced Identity Cloud tenant.
-
At the top right of the screen, click your name, and then select Tenant settings.
-
On the Global Settings tab, click Cross-Origin Resource Sharing (CORS).
-
Perform one of the following actions:
-
If available, click ForgeRockSDK.
-
If you haven’t added any CORS configurations to the tenant, click Add a CORS Configuration, select Ping SDK, and then click Next.
-
-
Add the IP addresses and port numbers of where you are hosting the custom UI app and the client sample app to the Accepted Origins property.
-
Complete the remaining fields to suit your environment.
An example configuration for this tutorial is as follows:
Property
Values
https://sdkapp.example.com:8443https://192.168.0.35:9443Accepted MethodsGETPOSTAccepted Headersaccept-api-versionx-requested-withcontent-typeauthorizationif-matchx-requested-platformiPlanetDirectoryPro[1]ch15fefc5407912[2]Exposed Headersauthorizationcontent-typeEnable CachingTrueMax Age600Allow CredentialsTrueClick Show advanced settings to be able to edit all available fields.
-
Click Save CORS Configuration.
To enable CORS in PingAM, and create a CORS filter to allow requests from your configured domain names, follow these steps:
-
Log in to the PingAM admin UI as an administrator.
-
Navigate to Configure > Global Services > CORS Service > Configuration, and set the Enable the CORS filter property to
true.If this property is not enabled, CORS headers are not added to responses from PingAM, and CORS is disabled entirely. -
On the Secondary Configurations tab, click Click Add a Secondary Configuration.
-
In the Name field, enter
ForgeRockSDK. -
In the Accepted Origins field, enter the IP addresses and port numbers of where you are hosting the custom UI app and the client sample app.
An example configuration for this tutorial is as follows:
Property
Values
https://sdkapp.example.com:8443https://192.168.0.35:9443Accepted MethodsGETPOSTAccepted Headersaccept-api-versionx-requested-withcontent-typeauthorizationif-matchx-requested-platformiPlanetDirectoryPro[1]ch15fefc5407912[2]Exposed Headersauthorizationcontent-typeEnable CachingTrueMax Age600Allow CredentialsTrue -
Click Create.
PingAM displays the configuration of your new CORS filter.
-
On the CORS filter configuration page:
-
Ensure Enable the CORS filter is enabled.
-
Set the Max Age property to
600 -
Ensure Allow Credentials is enabled.
-
-
Click Save Changes.
You are now ready to configure and run the sample JavaScript app to act as the custom UI.
Part 2. Running the JavaScript custom UI sample app
In this section you configure the embedded login sample JavaScript app to act as your custom UI.
This app walks your users through the authentication tree to obtain a session, which it returns to your client app via the authentication server.
-
In a JavaScript-capable IDE, open the
sdk-sample-appsfolder you downloaded earlier. -
Navigate to the
/javascript/embedded-loginfolder, and open the.env.examplefile. -
Edit the values in the file to match your environment:
-
In SERVER_URL, enter the base URL of the PingAM component of your deployment, including the deployment path.
- PingAM example:
-
https://openam.example.com:8443/openam - PingOne Advanced Identity Cloud example:
-
https://openam-forgerock-sdks.forgeblocks.com/am
-
In REALM_PATH, enter the realm that contains the authentication journey you will use.
- PingAM example:
-
root - PingOne Advanced Identity Cloud example:
-
alpha
-
In TREE, enter the name of the authentication journey to sign on end users.
Note that the sample custom UI app only supports a limited number of callbacks by default, so choose a simple authentication tree that authenticates with only username and password.
For example, you can use the default
Loginauthentication tree.
As the custom UI does not perform any OAuth 2.0 interactions you can leave the
SCOPEandWEB_OAUTH_CLIENTproperties blank.The result will resemble the following:
Example.env.examplefileSERVER_URL=https://openam-docs-regular.forgeblocks.com/am REALM_PATH=alpha SCOPE= TIMEOUT=$TIMEOUT TREE=Login WEB_OAUTH_CLIENT= -
-
Save the file as
.envin the same folder. -
Update the
webpack.config.jsfile:-
Change the
portvalue to9443so that it does not clash with the client sample app. -
Change the
hostvalue to0.0.0.0, so that the app is made available on your local IP address, rather than justlocalhost.
The result resembles the following:
devServer: { port: 9443, host: '0.0.0.0', ... } -
-
From the
/javascriptfolder, run the embedded login custom UI app as follows:cd javascript npm run start:embedded-loginWebpack compiles the code and serves it on the local IP address of your computer.
-
In a browser, open the local IP address of your computer, with the port number you edited earlier.
For example,
https://192.168.0.35:9443Webpack outputs links to the locations it is serving in the console, that you can click or copy and paste into a browser.
Look for the line that includes the text
On Your Network (IPv4):[webpack-dev-server] Project is running at: [webpack-dev-server] Loopback: https://localhost:9443/ [webpack-dev-server] On Your Network (IPv4): https://192.168.0.35:9443/ [webpack-dev-server] On Your Network (IPv6): https://[fe80::1]:9443/ -
As the custom UI sample app is running on a self-signed SSL certificate on your local IP address, your browser might display a warning message.
You can ignore this warning for this tutorial:
-
In Chrome, click Advanced and then click Proceed to 192.168.0.35 (unsafe).
-
In Firefox, click Advanced and then click Accept the risk and continue.
-
In Safari, click Show Details and then click visit this website.
The custom UI app displays the first interactive node of the configured authentication journey:
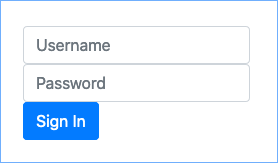 Figure 46. Custom UI app showing the first interactive node of the configured journey.
 -
With the custom UI sample app running, and your server configured, you can now proceed to test the setup by using one of the OIDC sample apps as a client.
Part 3. Running a client sample app
In this section you configure one of the OIDC (centralized login) sample apps to test out your custom UI.
Running the JavaScript sample OIDC client app
-
In a JavaScript-capable IDE, open the
sdk-sample-appsfolder you downloaded earlier. -
Open the
/javascript/central-login-oidcsample. -
Edit the values in the
.env.samplefile to match your environment:-
In SCOPE, enter the list of scopes to request are present in the issued OAuth 2.0 token.
For example,
"openid profile email phone address" -
In WEB_OAUTH_CLIENT, enter the client ID of the OAuth 2.0 client you configured earlier.
For example,
sdkCustomUI -
In WELL_KNOWN, enter the
.well-knownURL of the realm in which you created the OAuth 2.0 client.How do I find my PingOne Advanced Identity Cloud
.well-knownURL?You can view the
.well-knownendpoint for an OAuth 2.0 client in the PingOne Advanced Identity Cloud admin console:-
Log in to your PingOne Advanced Identity Cloud administration console.
-
Click Applications, and then select the OAuth 2.0 client you created earlier. For example, sdkPublicClient.
-
On the Sign On tab, in the Client Credentials section, copy the Discovery URI value.
How do I find my PingAM
.well-knownURL?To form the
.well-knownURL for an PingAM server, concatenate the following information into a single URL:-
The base URL of the PingAM component of your deployment, including the port number and deployment path.
For example,
https://openam.example.com:8443/openam -
The string
/oauth2 -
The hierarchy of the realm that contains the OAuth 2.0 client.
You must specify the entire hierarchy of the realm, starting at the Top Level Realm. Prefix each realm in the hierarchy with the
realms/keyword.For example,
/realms/root/realms/customersIf you omit the realm hierarchy, the top level
ROOTrealm is used by default. -
The string
/.well-known/openid-configuration
-
The result will resemble the following:
Example.env.examplefileSCOPE="openid profile email phone address" TIMEOUT=1000 WEB_OAUTH_CLIENT=sdkCustomUI WELL_KNOWN=https://openam-docs-regular.forgeblocks.com/am/oauth2/alpha/.well-known/openid-configuration SERVER_TYPE=AIC -
-
Save the file as
.envin the same folder. -
Edit the
webpack.config.jsfile.-
In the
devServersection, add the DNS alias you created earlier, for examplesdkapp.example.comin a newallowedHostsproperty:devServer: { port: 8443, host: 'localhost', allowedHosts: 'sdkapp.example.com', … }
-
-
From the
/javascriptfolder, run the central login OIDC sample app as follows:cd javascript npm run start:central-login-oidcWebpack compiles the code and serves it on the local IP address of your computer.
Try it out
To test that your custom UI app is acting as the centralized login pages, perform the following steps.
-
In a browser, open the local IP address of your computer, with the port number you edited earlier.
For example,
https://sdkapp.example.com:8443 -
As the custom UI sample app is running on a self-signed SSL certificate on your local IP address, your browser might display a warning message.
You can ignore this warning for this tutorial:
-
In Chrome, click Advanced and then click Proceed to sdkapp.example.com (unsafe).
-
In Firefox, click Advanced and then click Accept the risk and continue.
-
In Safari, click Show Details and then click visit this website.
The sample OIDC login app displays Login and Force Renew buttons:
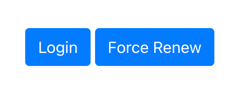 Figure 47. JavaScript OIDC sample app showing Login and Force Renew buttons.
 -
-
Click the Login button.
The client app connects to the OAuth 2.0 client you created earlier, and is redirected to the custom UI sample running on your local computer.
The URL contains a
gotoparameter that contains the URL that the UI sample app redirects to after successful authentication. That URL will be theauthorizeendpoint of your authorization server. -
Enter the credentials of a known user, and then click Sign In.
-
If authentication is successful, the custom UI app redirects the browser to the
gotoURL, which points to your authorization server. The authorization server redirects back to your client app with the necessarycodeparameter. -
The sample client app uses the
codeparameter to contact the authorization serveraccess_tokenendpoint to obtain the OAuth 2.0 access and ID tokens. -
Using the access token as a bearer token, the sample app calls the
userinfoendpoint and displays them on the page: Figure 48. Userinfo of the authenticated user.
-
Running the Android sample OIDC client app
-
In Android Studio, open the
/android/kotlin-central-login-oidcsample from the repo you downloaded earlier. -
Edit the app > kotlin+java >
Config.ktfile to match your environment:-
In discoveryEndpoint, enter the
.well-knownURI of the realm in which you created the OAuth 2.0 client.How do I find my PingOne Advanced Identity Cloud
.well-knownURL?You can view the
.well-knownendpoint for an OAuth 2.0 client in the PingOne Advanced Identity Cloud admin console:-
Log in to your PingAM administration console.
-
Click Applications, and then select the OAuth 2.0 client you created earlier. For example, sdkPublicClient.
-
On the Sign On tab, in the Client Credentials section, copy the Discovery URI value.
How do I find my PingAM
.well-knownURL?To form the
.well-knownURL for an PingAM server, concatenate the following information into a single URL:-
The base URL of the PingAM component of your deployment, including the port number and deployment path.
For example,
https://openam.example.com:8443/openam -
The string
/oauth2 -
The hierarchy of the realm that contains the OAuth 2.0 client.
You must specify the entire hierarchy of the realm, starting at the Top Level Realm. Prefix each realm in the hierarchy with the
realms/keyword.For example,
/realms/root/realms/customersIf you omit the realm hierarchy, the top level
ROOTrealm is used by default. -
The string
/.well-known/openid-configuration
-
-
In oauthClientId, enter the client ID of the OAuth 2.0 client you configured earlier.
For example,
sdkCustomUI -
In oauthRedirectUri, enter the redirect URI you configured in the OAuth 2.0 client.
For example,
org.forgerock.demo://oauth2redirect -
In cookieName, enter the name of the cookie your authorization server uses to store session tokens on the client.
For example, PingAM servers use
iPlanetDirectoryProHow do I find my PingOne Advanced Identity Cloud cookie name?
To locate the cookie name in an PingOne Advanced Identity Cloud tenant:
-
Navigate to Tenant settings > Global Settings
-
Copy the value of the Cookie property.
-
-
In oauthScope, enter the list of scopes to request are present in the issued OAuth 2.0 token.
For example,
openid profile email phone address
The result will resemble the following:
data class PingConfig( var discoveryEndpoint: String = "https://openam-forgerock-sdks.forgeblocks.com/am/oauth2/realms/alpha/.well-known/openid-configuration", var oauthClientId: String = "sdkCustomUI", var oauthRedirectUri: String = "org.forgerock.demo://oauth2redirect", var oauthSignOutRedirectUri: String = "", var cookieName: String = "ch15fefc5407912", var oauthScope: String = "openid profile email phone address" ) -
-
Save your changes.
Try it out
To test that your custom UI app is acting as the centralized login pages, perform the following steps.
-
In Android Studio, on the Run menu, select Run 'ping-oidc.app'.
Android Studio compiles and launches the app in either your connected device or a simulator, and displays the configuration you entered earlier:
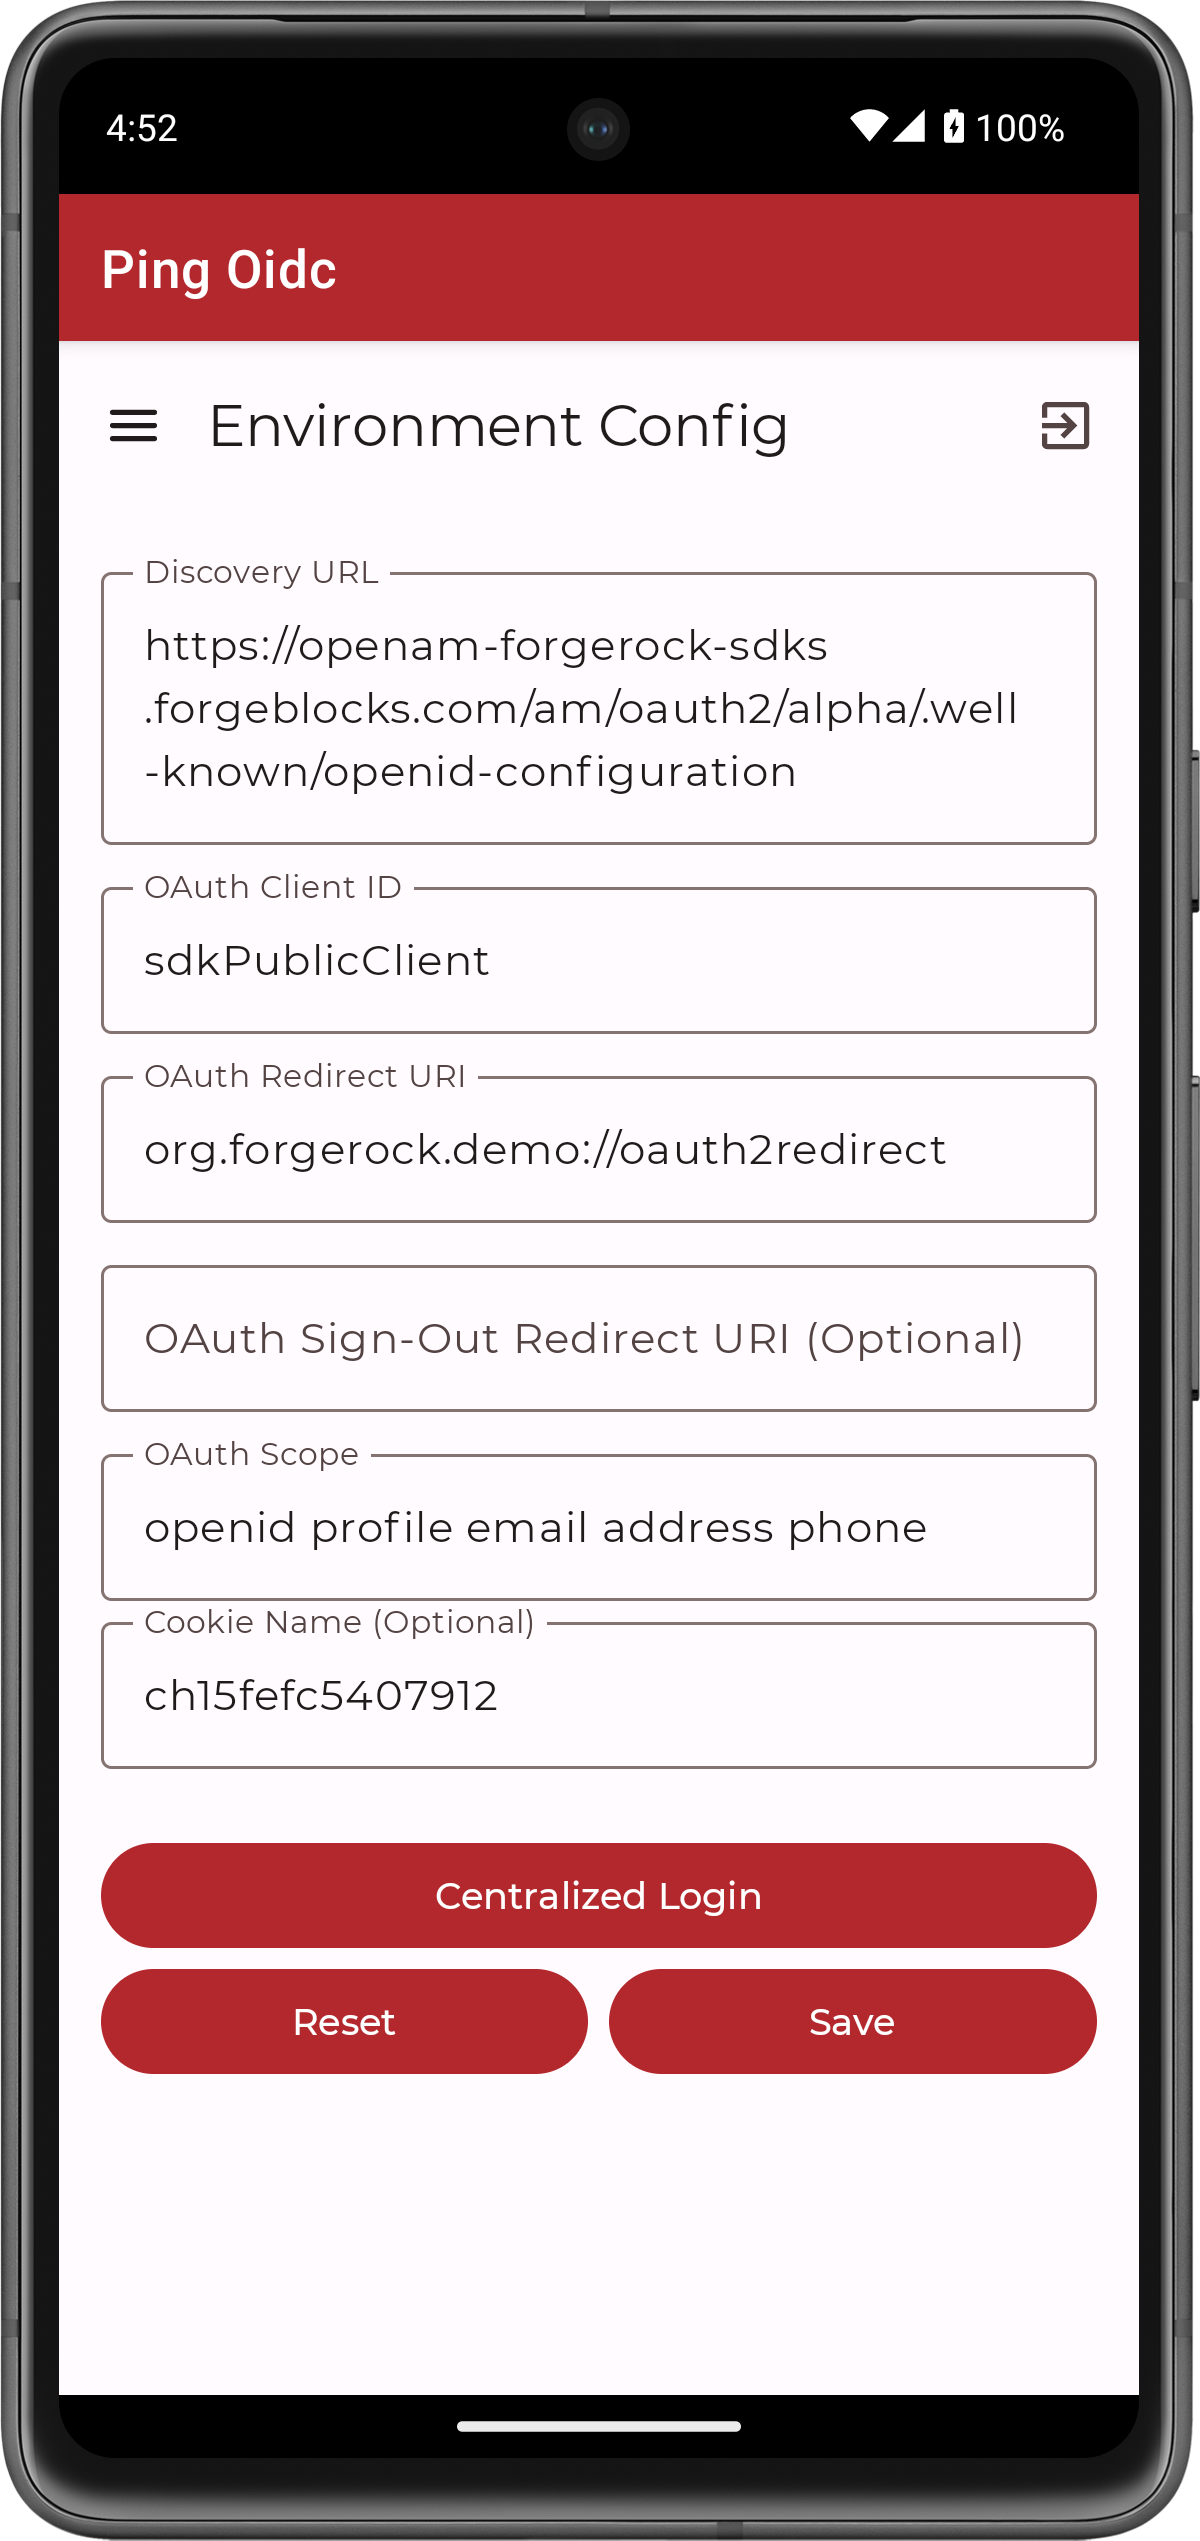 Figure 49. Android sample app showing the configuration.
You can alter the values in the app if required.
-
Click Centralized Login.
-
As the custom UI sample app is running on a self-signed SSL certificate on your local IP address, your browser might display a warning message.
You can ignore this warning for this tutorial:
-
In Chrome, click Advanced and then click Proceed to 192.168.0.35 (unsafe).
-
In Firefox, click Advanced and then click Accept the risk and continue.
The client app connects to the OAuth 2.0 client you created earlier, and is redirected to the custom UI sample running on your local computer.
The URL contains a
gotoparameter that contains the URL that the UI sample app redirects to after successful authentication. That URL will be theauthorizeendpoint of your authorization server. -
-
Enter the credentials of a known user, and then click Sign In.
-
If authentication is successful, the custom UI app redirects the browser to the
gotoURL, which points to your authorization server. The authorization server redirects back to your client app with the necessarycodeparameter. -
The sample client app uses the
codeparameter to contact the authorization serveraccess_tokenendpoint to obtain the OAuth 2.0 access and ID tokens: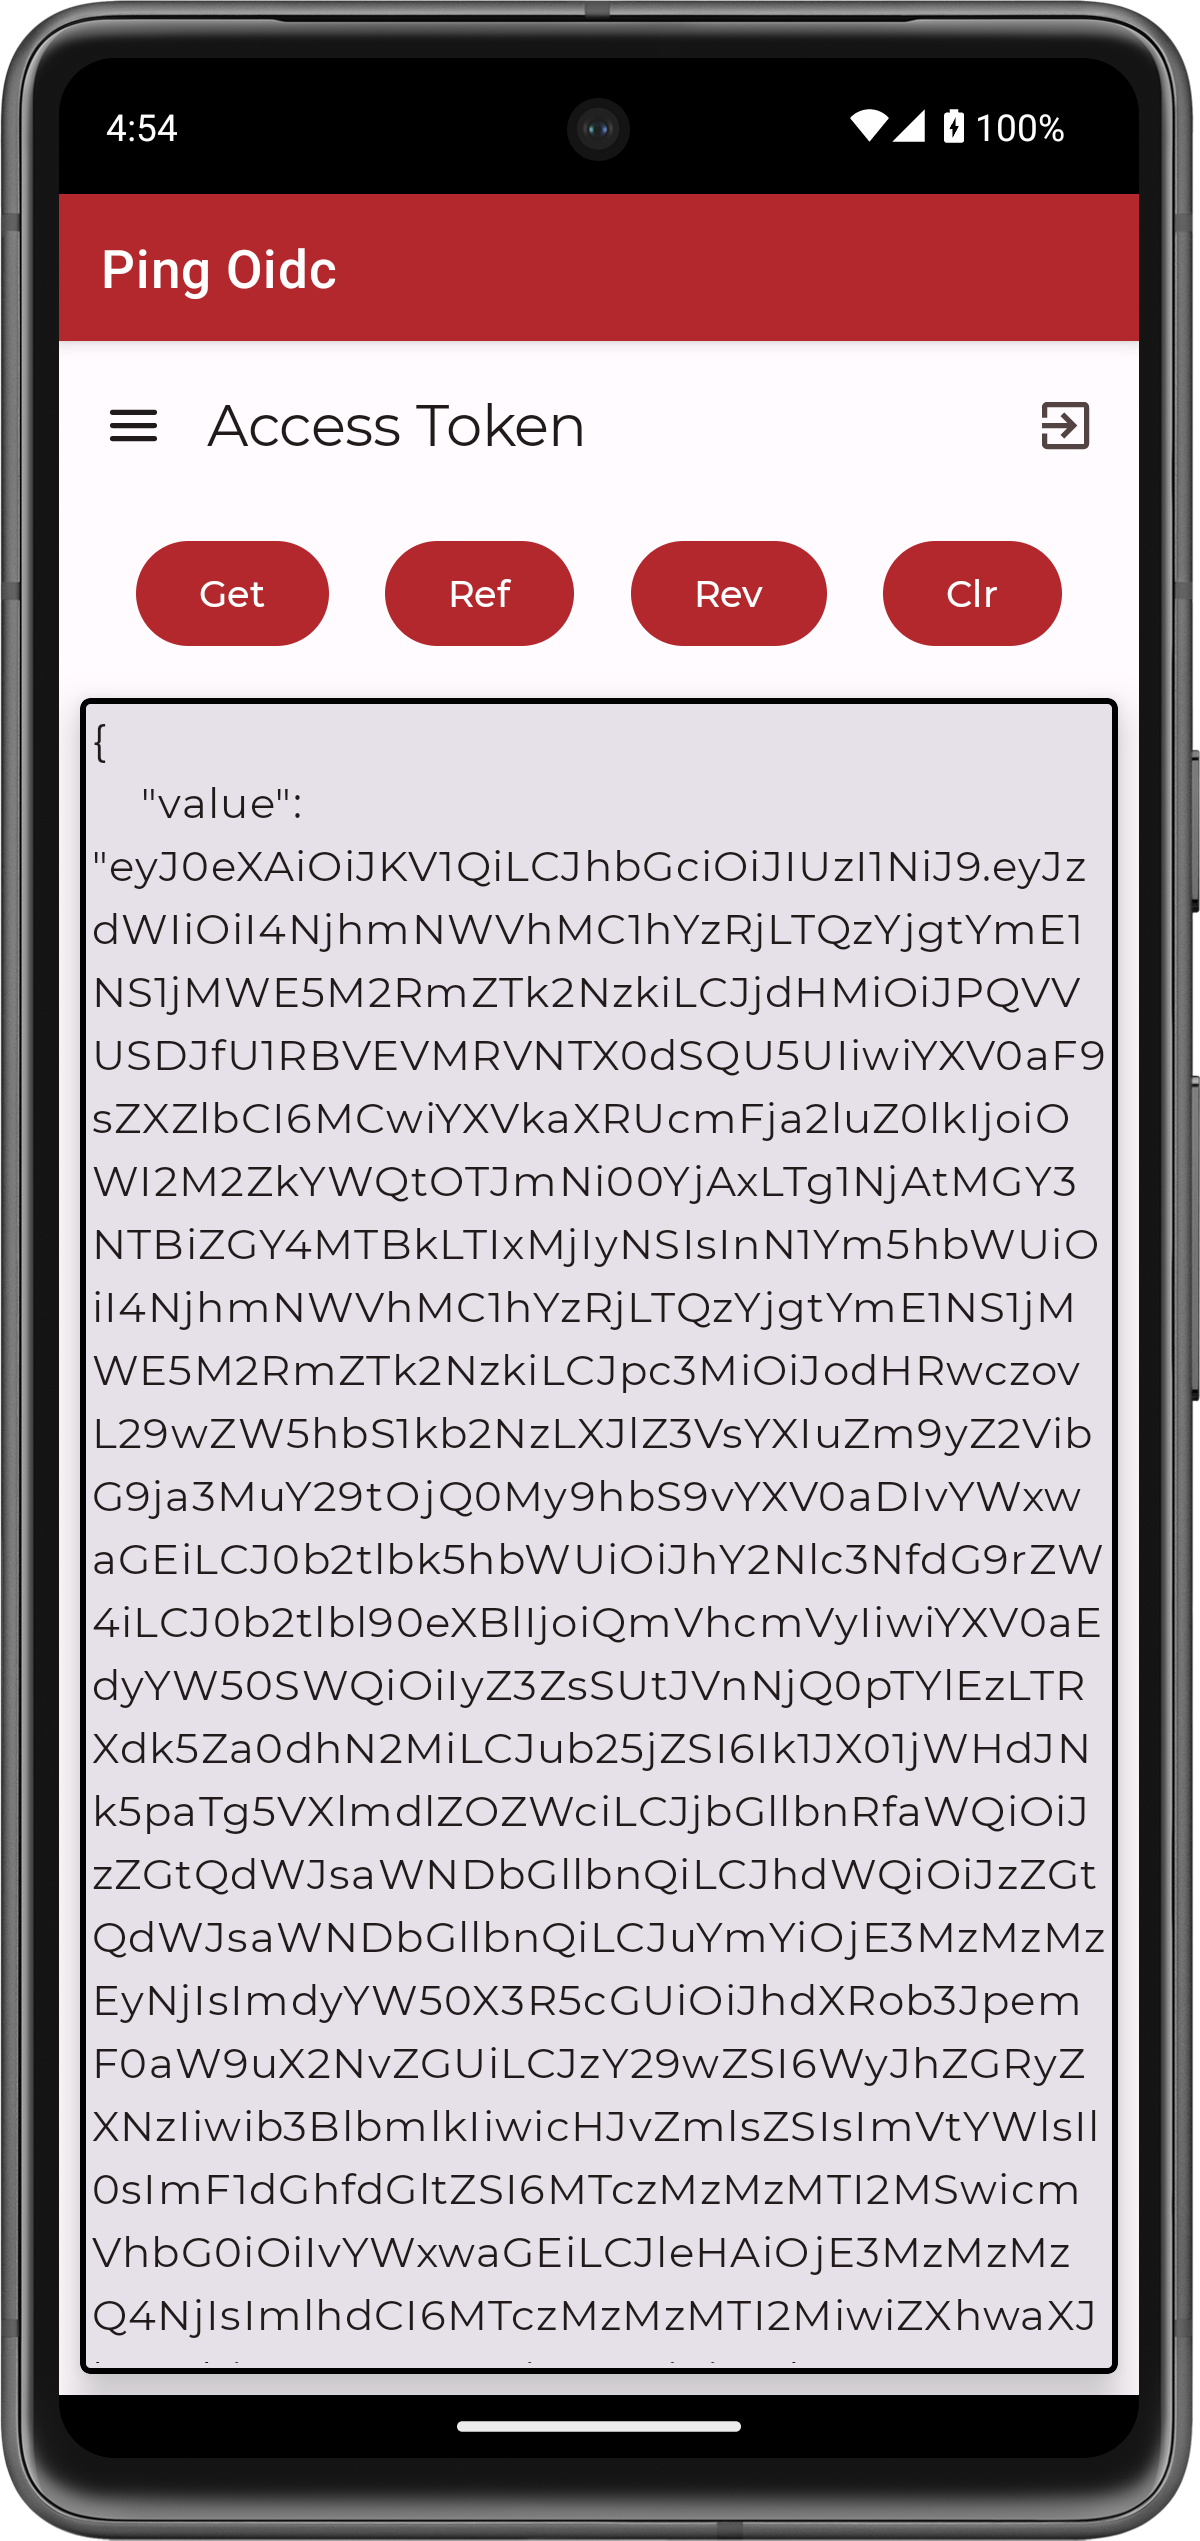 Figure 50. Android OIDC sample app showing the access and ID tokens.
 -
Tap the menu icon (), and then tap User Profile:
The OIDC sample app uses the access token as a bearer token and calls the
userinfoendpoint, displaying the result: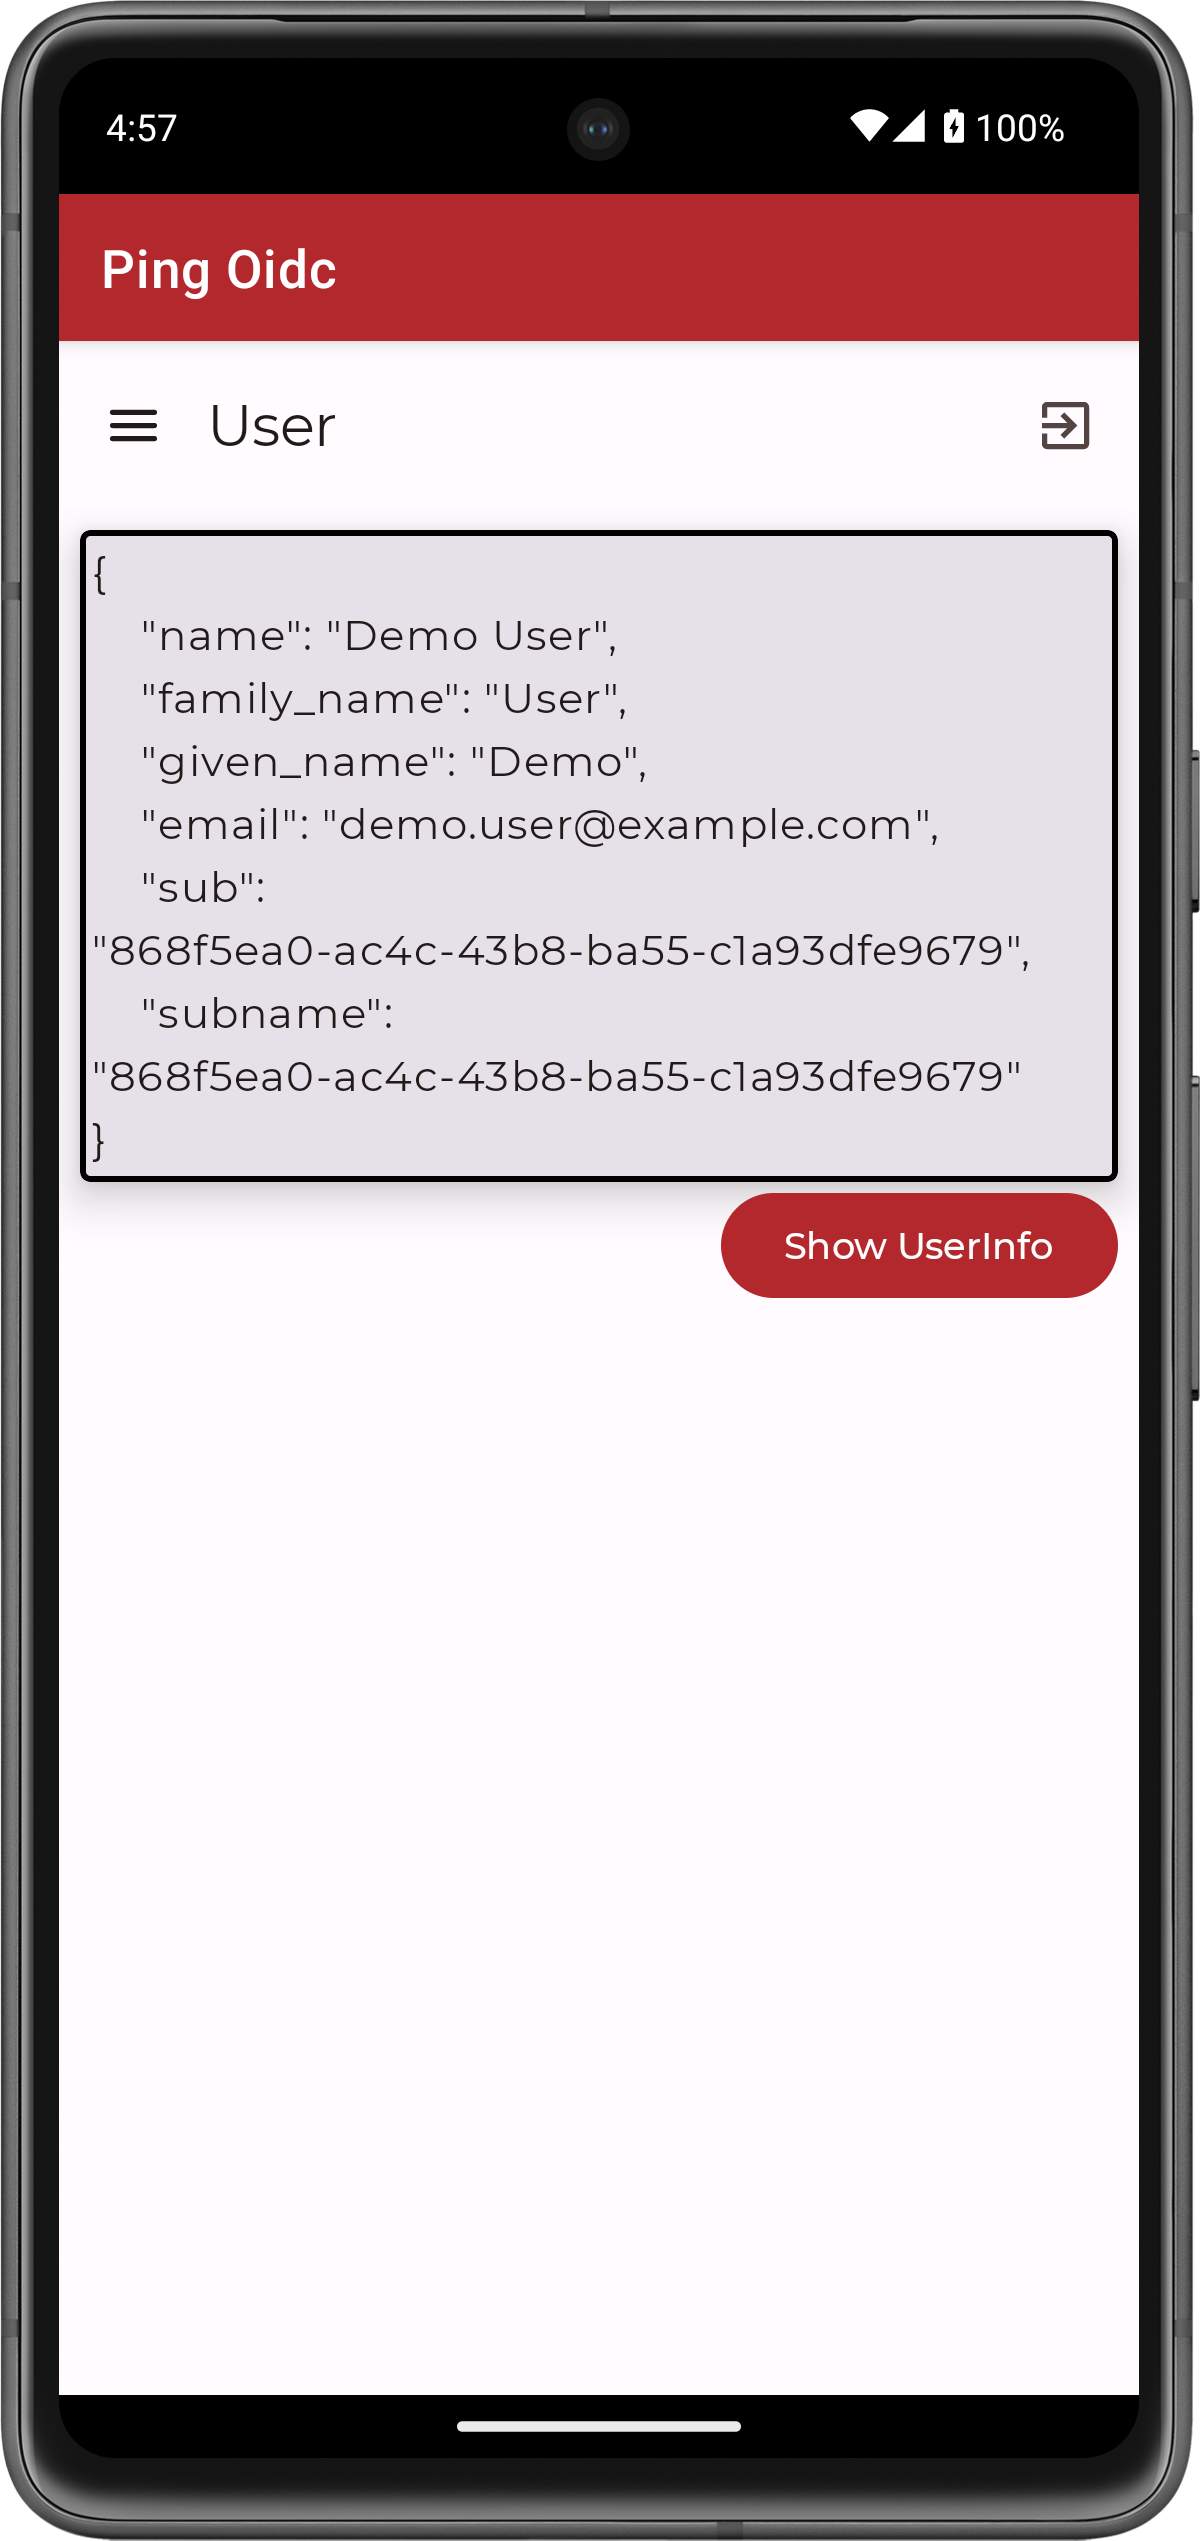 Figure 51. Userinfo of the authenticated user.
-
Running the iOS sample OIDC client app
-
In Xcode, in the
sdk-sample-appsfolder you cloned in the previous step, open theiOS>swiftui-oidc>PingExample>PingExample.xcodeprojfile. -
Locate the
ConfigurationViewModelfunction which contains placeholder configuration properties.The function is commented with //TODO:in the source to make it easier to locate.return ConfigurationViewModel( clientId: "[CLIENT ID]", scopes: ["openid", "email", "address", "phone", "profile"], redirectUri: "[REDIRECT URI]", signOutUri: "[SIGN OUT URI]", discoveryEndpoint: "[DISCOVERY ENDPOINT URL]", environment: "[ENVIRONMENT - EITHER AIC OR PingOne]", cookieName: "[COOKIE NAME - OPTIONAL (Applicable for AIC only)]", browserSeletorType: .authSession )-
In clientId, enter the client ID of the OAuth 2.0 client you configured earlier.
For example,
sdkCustomUI -
In scopes, enter an array of scopes to request are present in the issued OAuth 2.0 token.
For example,
["openid","profile","email","address","phone"] -
In redirectUri and signOutUri, enter the redirect URI you configured in the OAuth 2.0 client.
For example,
org.forgerock.demo://oauth2redirect -
In discoveryEndpoint, enter the
.well-knownURI of the realm in which you created the OAuth 2.0 client.How do I find my PingOne Advanced Identity Cloud
.well-knownURL?You can view the
.well-knownendpoint for an OAuth 2.0 client in the PingOne Advanced Identity Cloud admin console:-
Log in to your PingAM administration console.
-
Click Applications, and then select the OAuth 2.0 client you created earlier. For example, sdkPublicClient.
-
On the Sign On tab, in the Client Credentials section, copy the Discovery URI value.
How do I find my PingAM
.well-knownURL?To form the
.well-knownURL for an PingAM server, concatenate the following information into a single URL:-
The base URL of the PingAM component of your deployment, including the port number and deployment path.
For example,
https://openam.example.com:8443/openam -
The string
/oauth2 -
The hierarchy of the realm that contains the OAuth 2.0 client.
You must specify the entire hierarchy of the realm, starting at the Top Level Realm. Prefix each realm in the hierarchy with the
realms/keyword.For example,
/realms/root/realms/customersIf you omit the realm hierarchy, the top level
ROOTrealm is used by default. -
The string
/.well-known/openid-configuration
-
-
In environment, enter
AIC. -
In cookieName, enter the name of the cookie your authorization server uses to store session tokens on the client.
For example, PingAM servers use
iPlanetDirectoryProHow do I find my PingOne Advanced Identity Cloud cookie name?
To locate the cookie name in an PingOne Advanced Identity Cloud tenant:
-
Navigate to Tenant settings > Global Settings
-
Copy the value of the Cookie property.
-
-
In browserSeletorType, enter
.authSession.You can specify what type of browser the client iOS device opens to handle centralized login.
Each browser has slightly different characteristics, which make them suitable to different scenarios, as outlined in this table:
Browser type Characteristics .authSessionOpens a web authentication session browser.
Designed specifically for authentication sessions, however it prompts the user before opening the browser with a modal that asks them to confirm the domain is allowed to authenticate them.
This is the default option in the Ping SDK for iOS.
.ephemeralAuthSessionOpens a web authentication session browser, but enables the
prefersEphemeralWebBrowserSessionparameter.This browser type does not prompt the user before opening the browser with a modal.
The difference between this and
.authSessionis that the browser does not include any existing data such as cookies in the request, and also discards any data obtained during the browser session, including any session tokens.When is
ephemeralAuthSessionsuitable:-
ephemeralAuthSessionis not suitable when you require single sign-on (SSO) between your iOS apps, as the browser will not maintain session tokens. -
ephemeralAuthSessionis not suitable when you require a session token to log a user out of the server, for example for logging out of PingOne, as the browser will not maintain session tokens. -
Use
ephemeralAuthSessionwhen you do not want the user’s existing sessions to affect the authentication.
.nativeBrowserAppOpens the installed browser that is marked as the default by the user. Often Safari.
The browser opens without any interaction from the user. However, the browser does display a modal when returning to your application.
.sfViewControllerOpens a Safari view controller browser.
Your client app is not able to interact with the pages in the
sfViewControlleror access the data or browsing history.The view controller opens within your app without any interaction from the user. As the user does not leave your app, the view controller does not need to display a warning modal when authentication is complete and control returns to your application.
-
The result resembles the following:
return ConfigurationViewModel( clientId: "sdkCustomUI", scopes: ["openid", "email", "address", "phone", "profile"], redirectUri: "org.forgerock.demo://oauth2redirect", signOutUri: "org.forgerock.demo://oauth2redirect", discoveryEndpoint: "https://openam-forgerock-sdks.forgeblocks.com/am/oauth2/realms/alpha/.well-known/openid-configuration", environment: "AIC", cookieName: "ch15fefc5407912", browserSeletorType: .authSession ) -
-
Save your changes.
Try it out
To test that your custom UI app is acting as the centralized login pages, perform the following steps.
-
In Xcode, select Product > Run.
Xcode launches the sample app in the iPhone simulator.
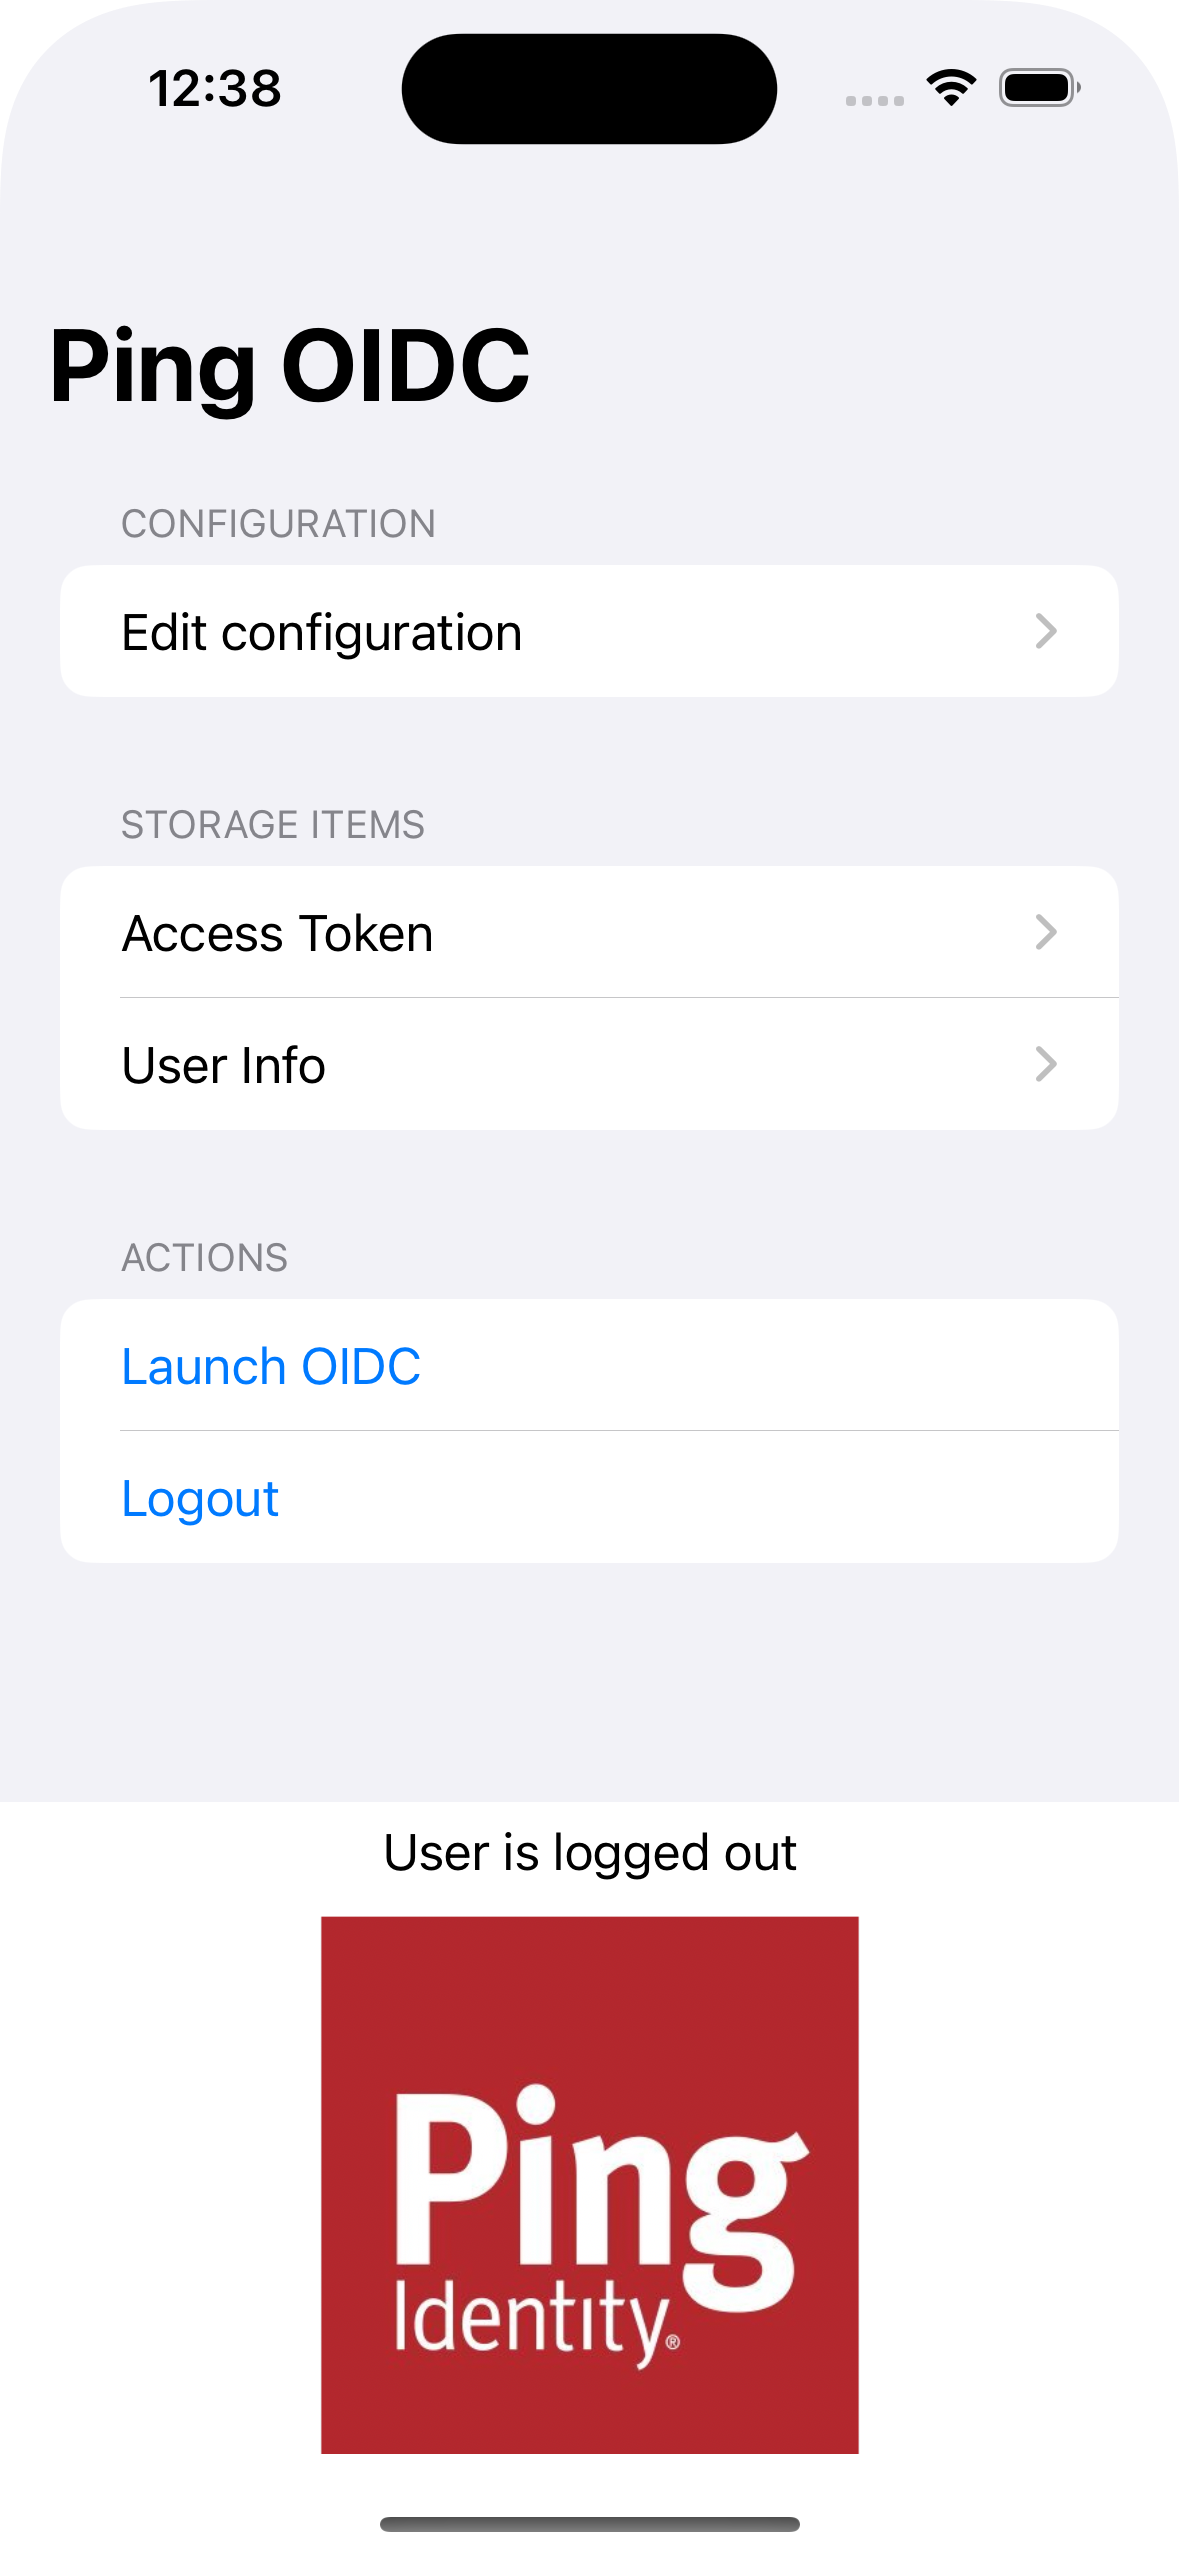 Figure 52. iOS OIDC login sample home screenThird-party cookies in the Safari browser
Safari blocks third-party cookies by default, so the custom UI app will not be able to authenticate calls to the
/authorizeendpoint if it is running on a different domain than the server.In production, ensure your custom UI app and server share the same domain.
For this tutorial disable third-party cookie checks in Safari as follows:
-
In the iPhone simulator, in the toolbar click Home. On the screen, use your mouse to swipe to the right, and then tap Settings.
-
Tap Safari, scroll to the Privacy & Security section, and disable Prevent Cross-Site Tracking.
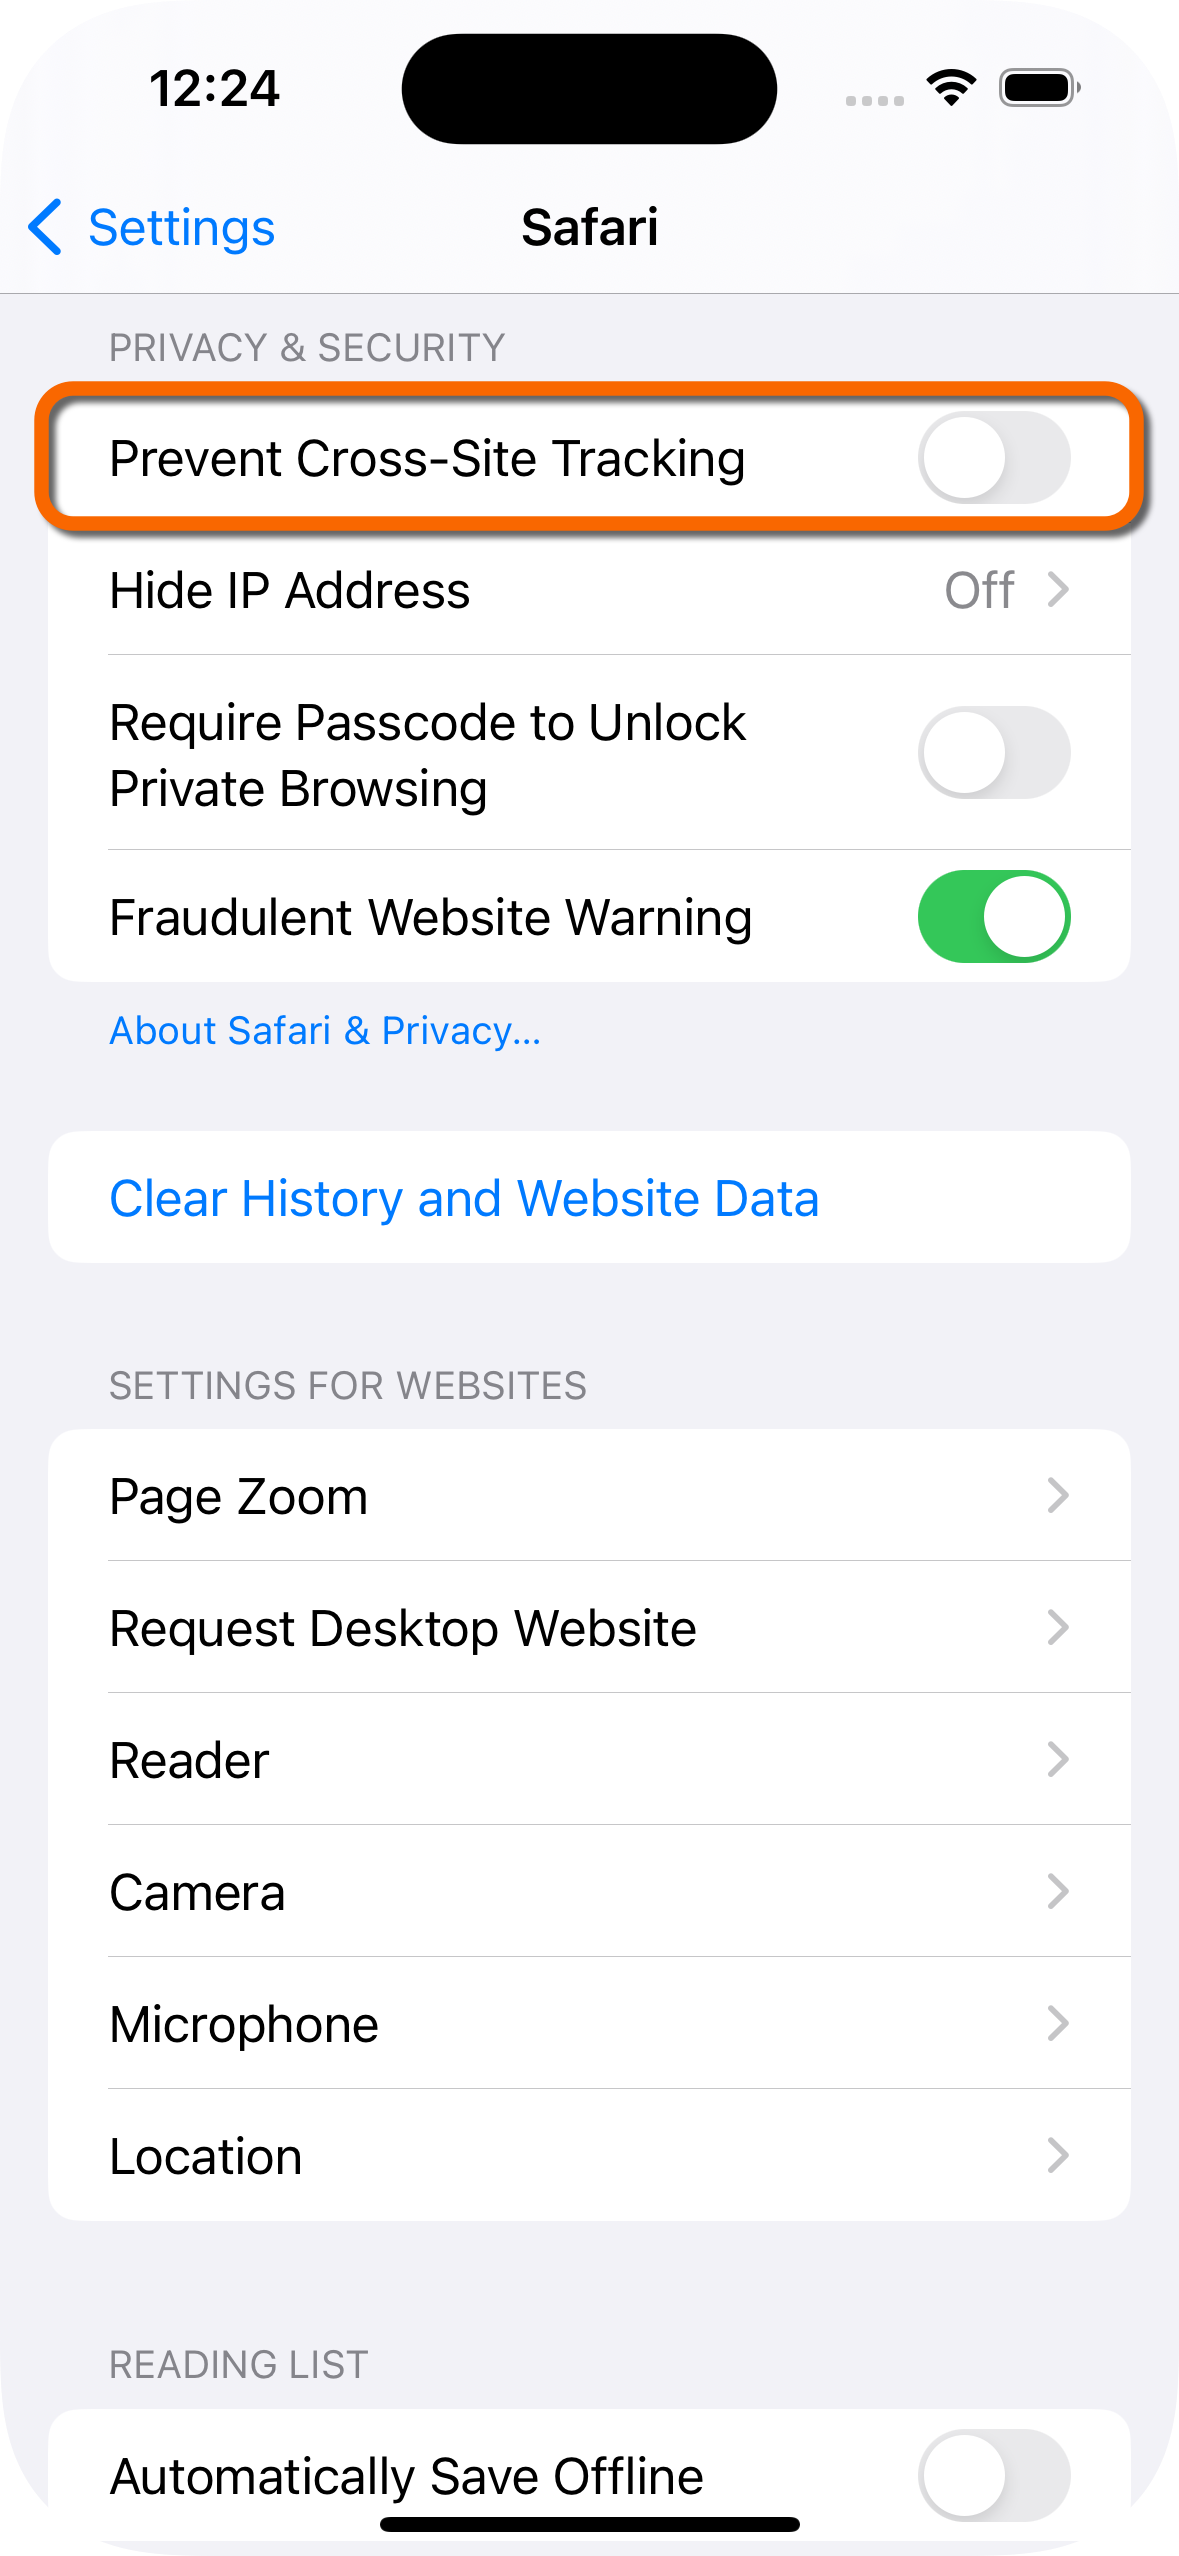 Figure 53. Allow third-party cookies in Safari
 -
To return to the sample app, in the toolbar double-click Home to show the open apps, and then tap the PingOIDC app.
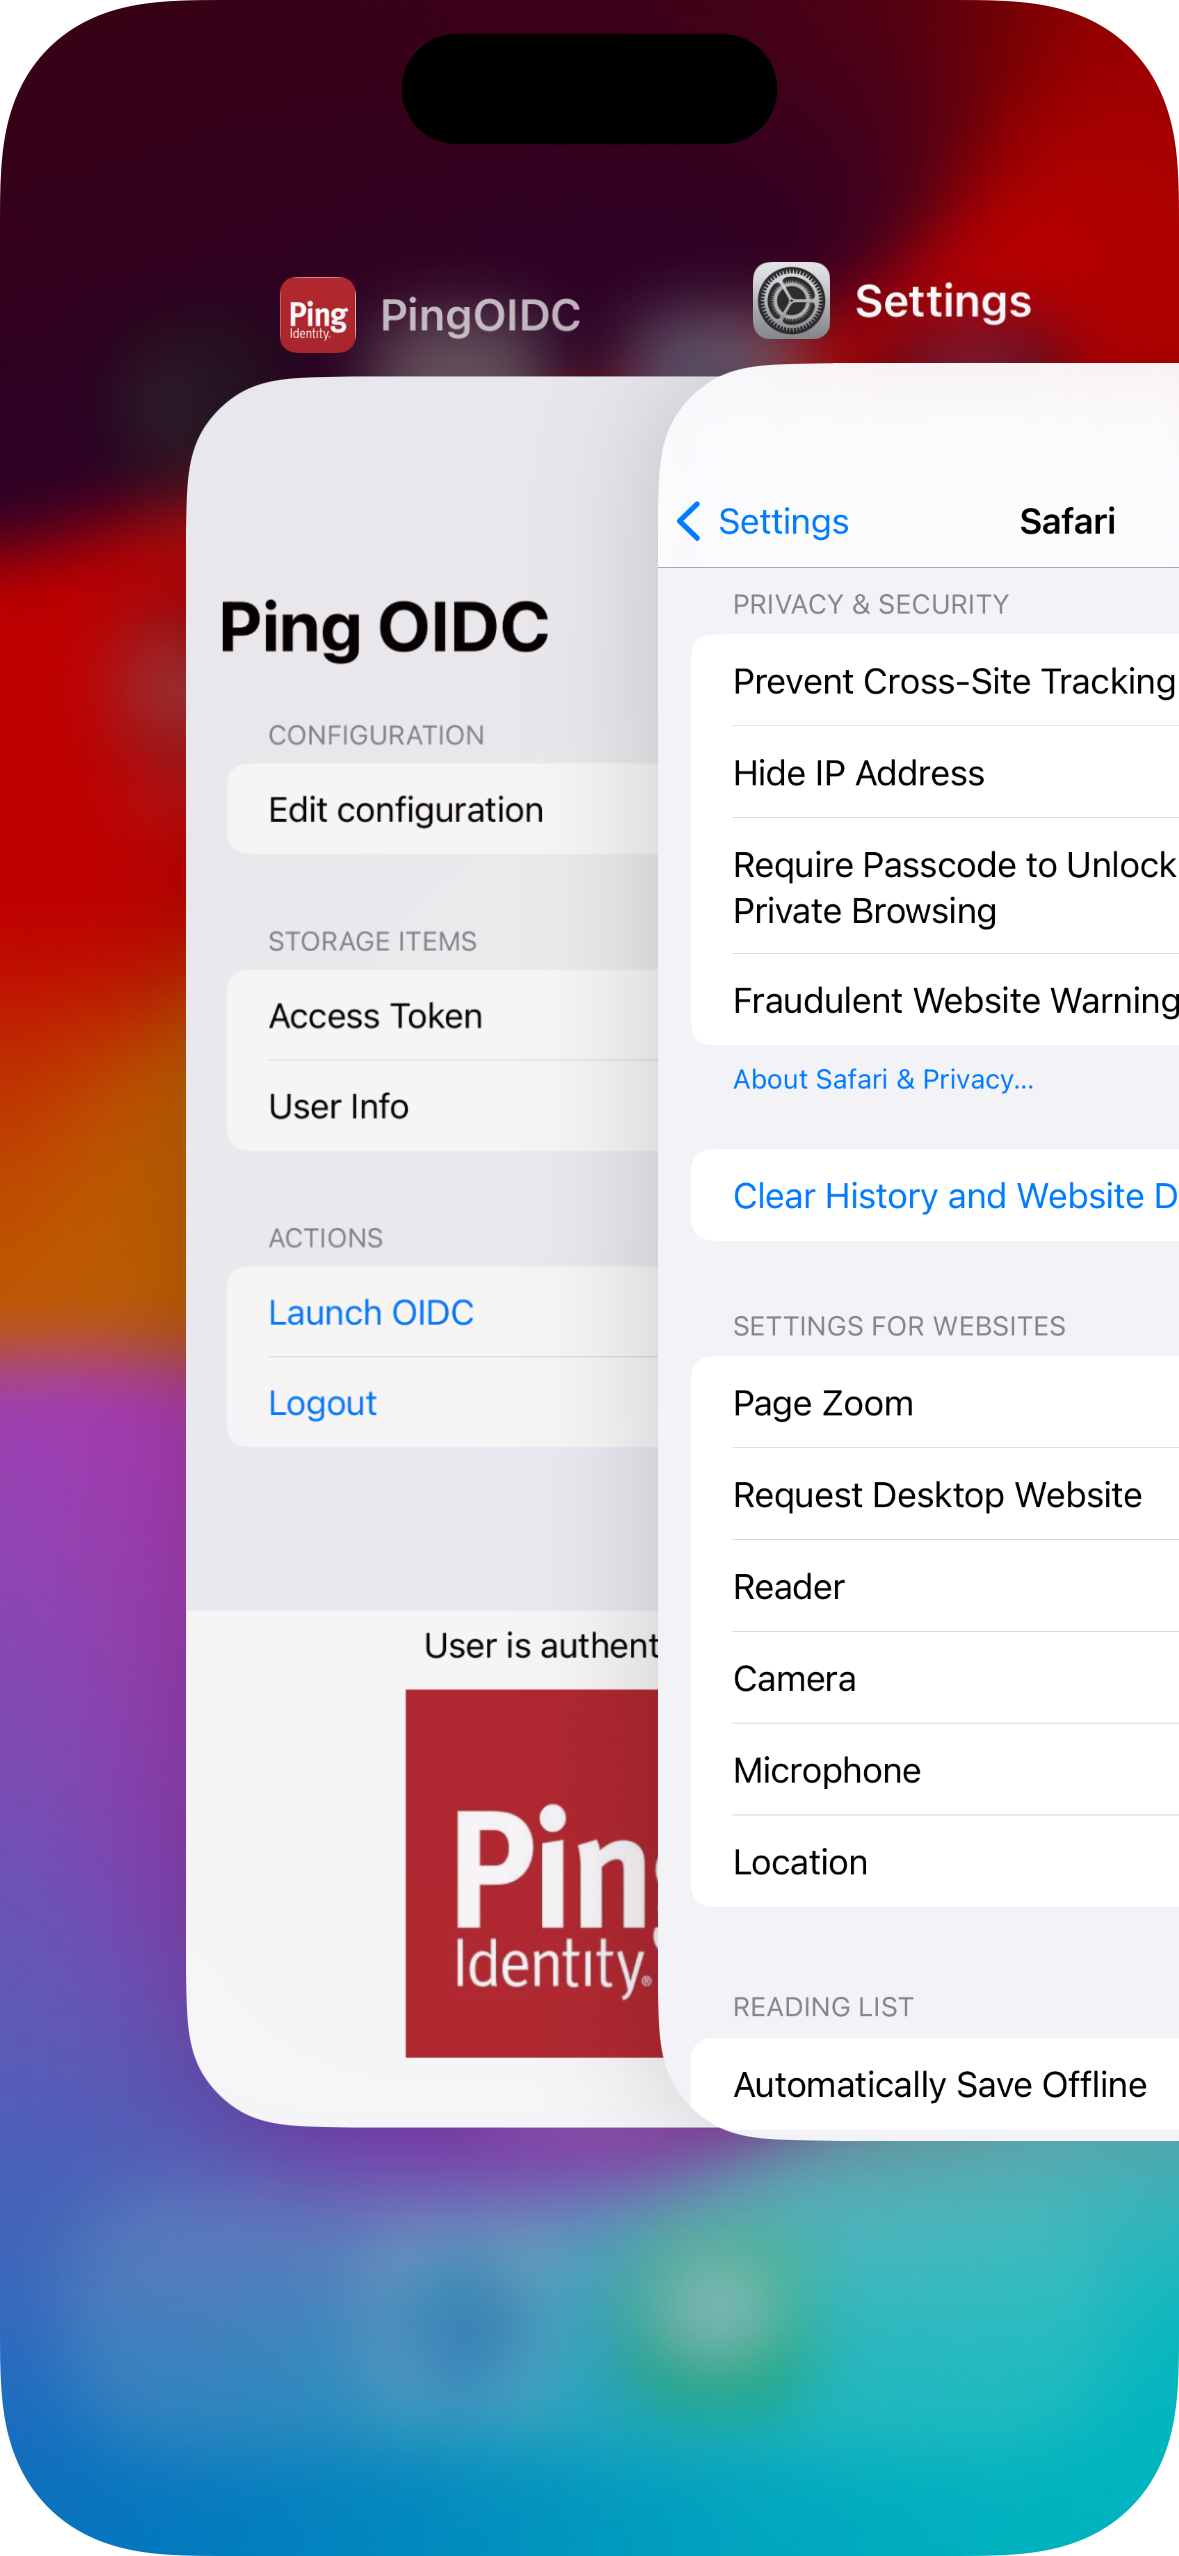 Figure 54. Return to the OIDC sample app by double-clicking the home icon.
-
-
In the sample app on the iPhone simulator, tap Edit configuration, and verify or edit the configuration you entered in the previous step.
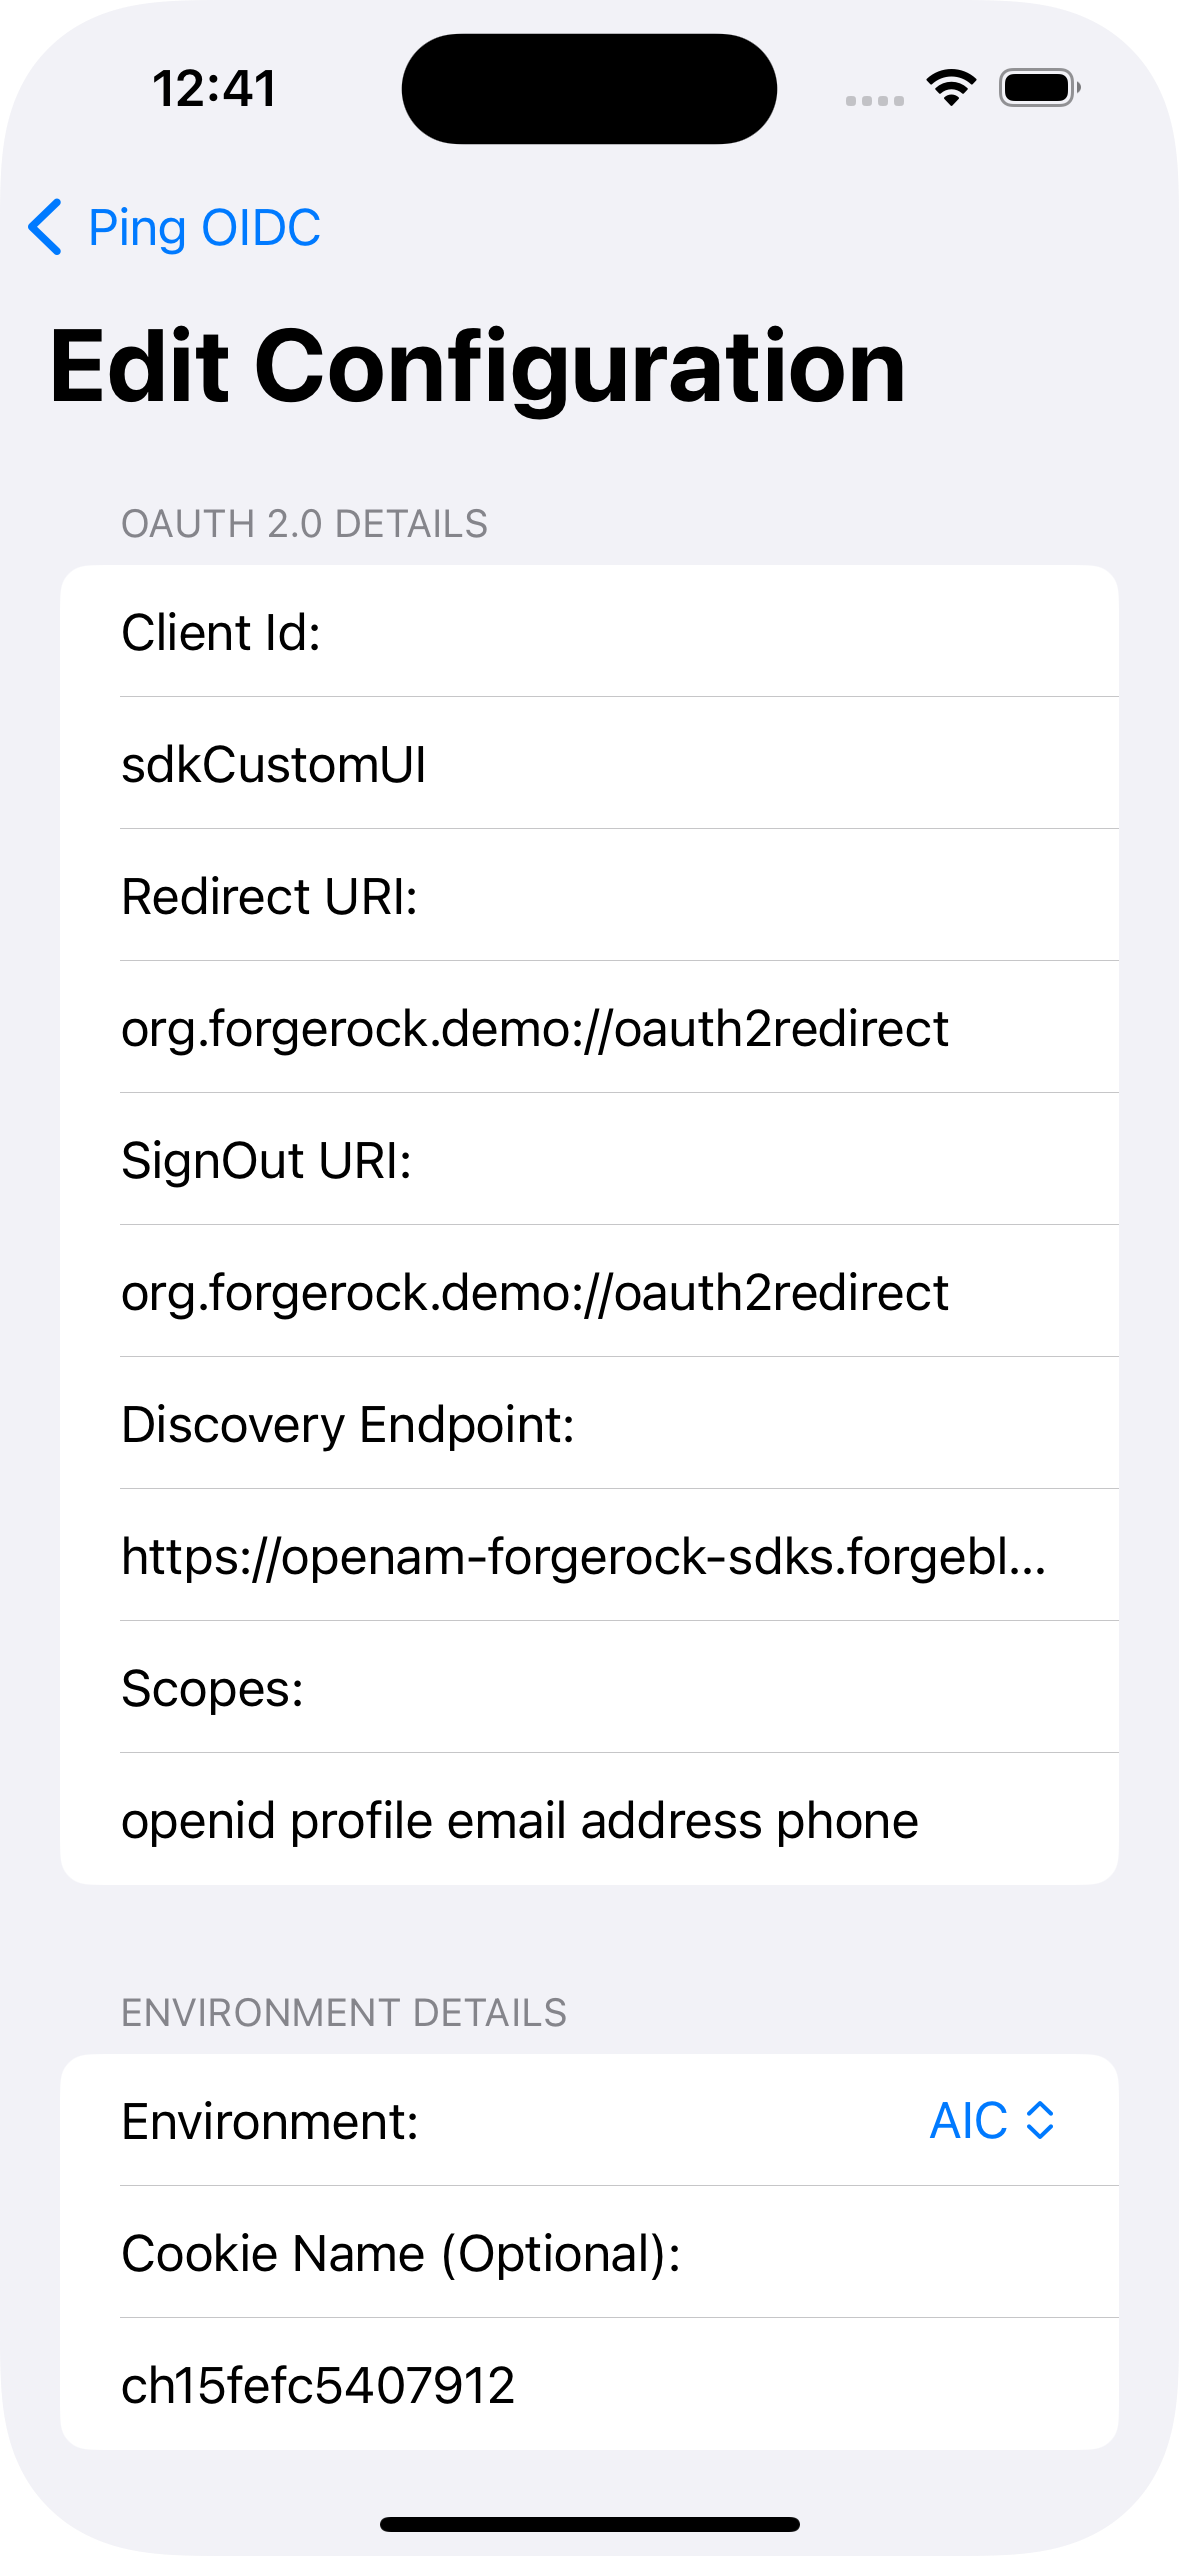 Figure 55. Verify the configuration settings
 -
Tap Ping OIDC to go back to the main menu, and then tap Launch OIDC.
You might see a dialog asking if you want to open a browser. If you do, tap Continue. The app launches a web browser and connects to your authorization server, which then redirects to the custom UI app running locally on your computer:
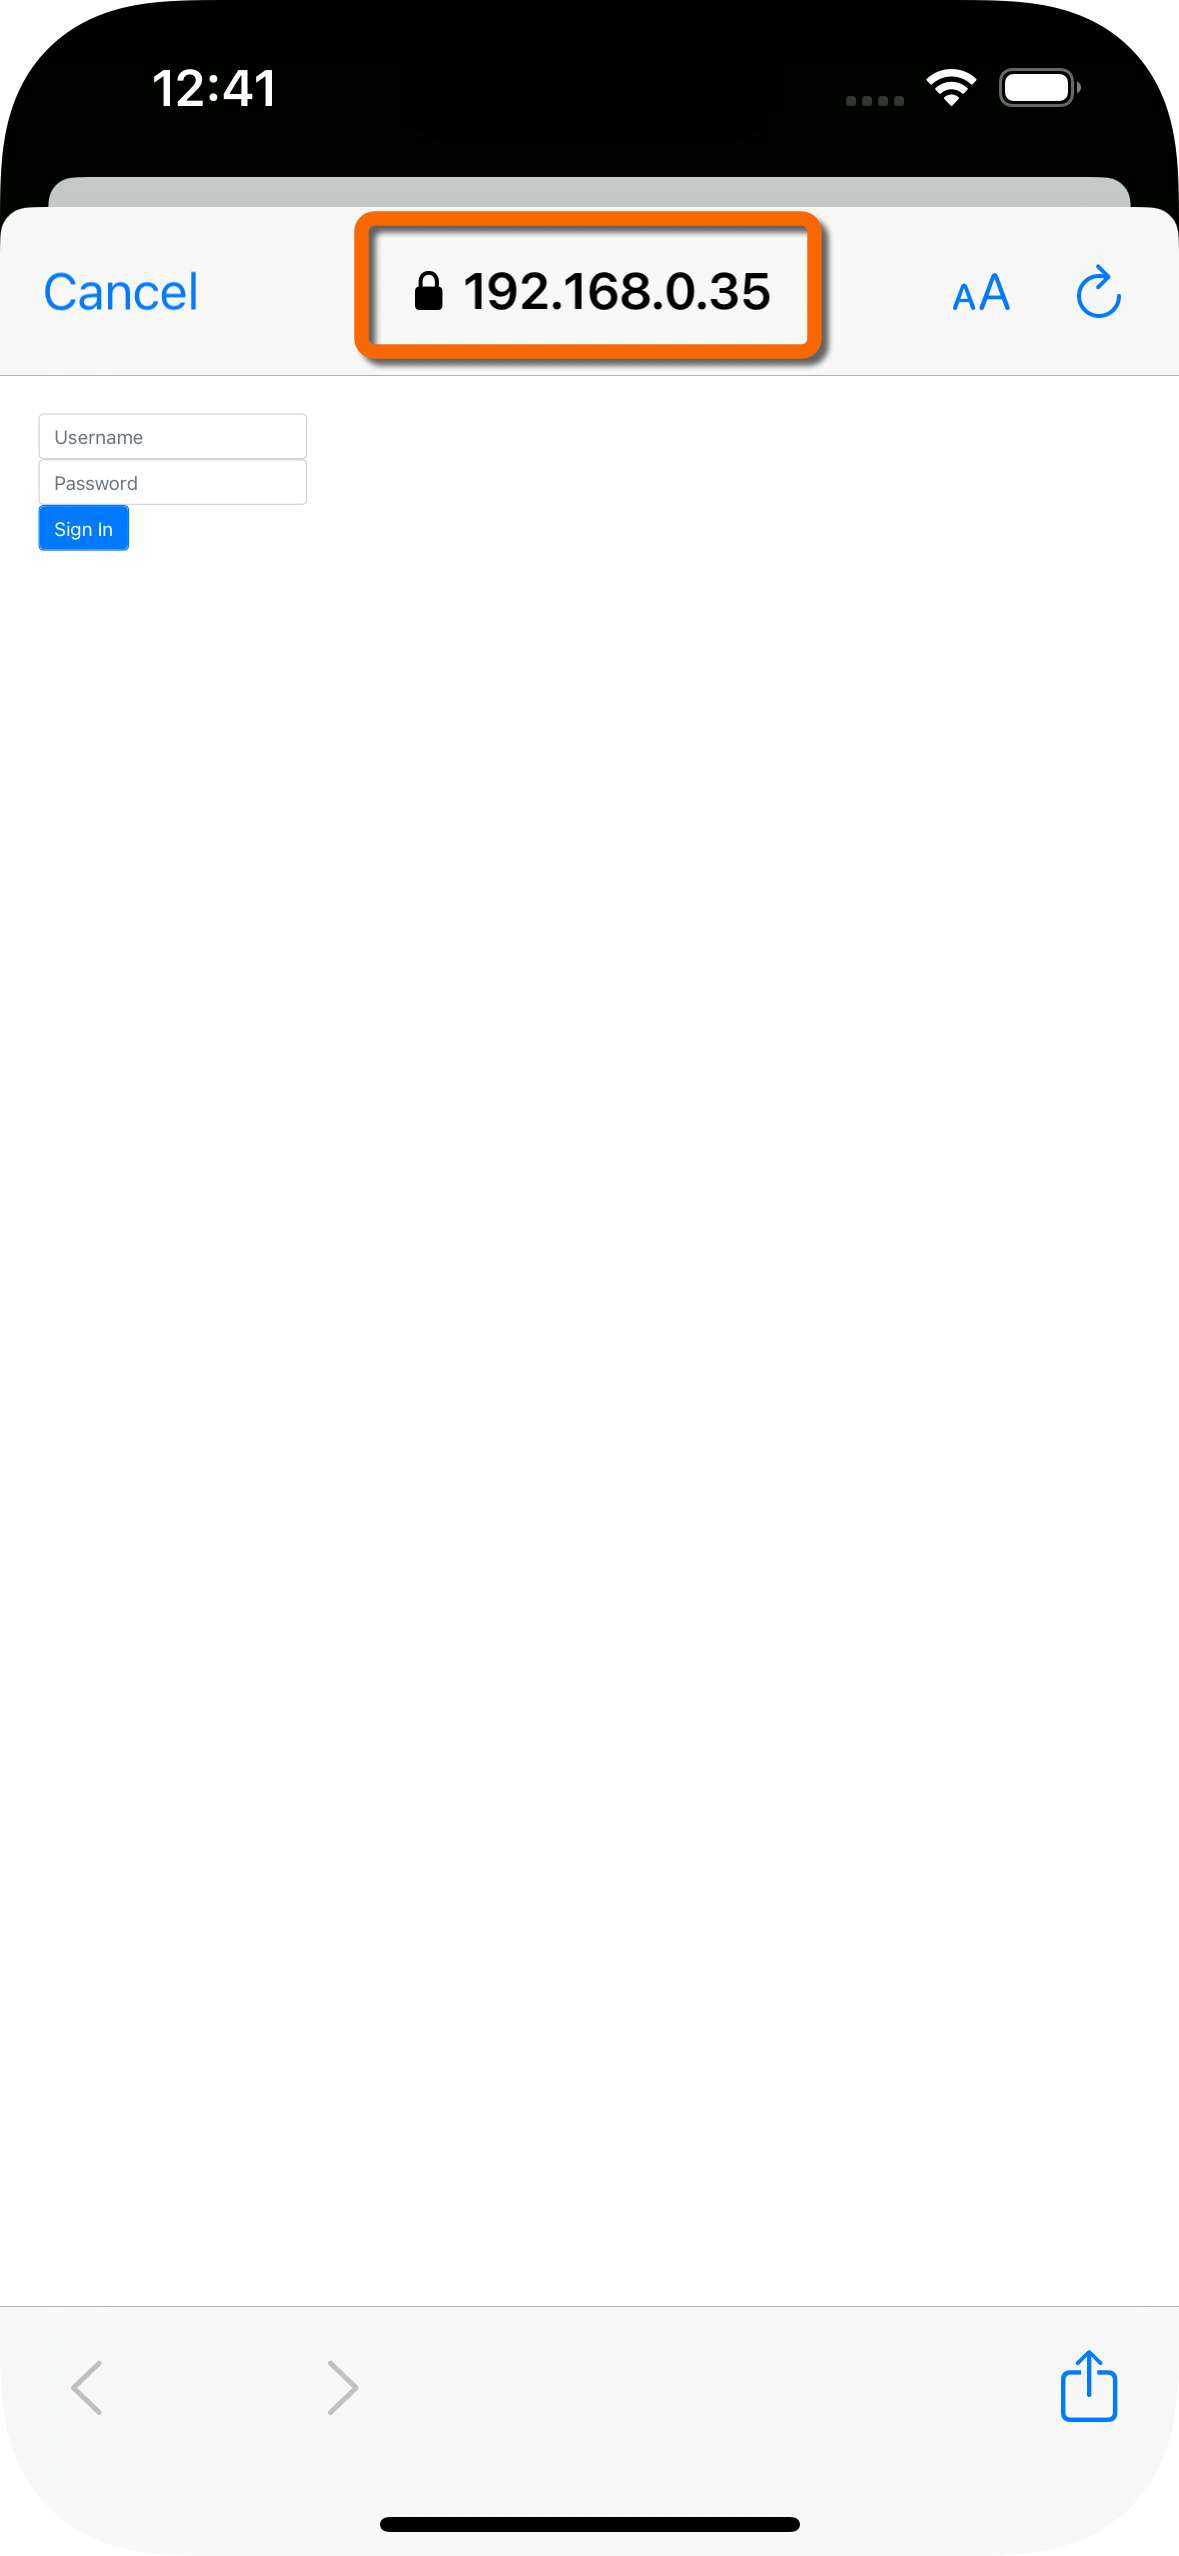 Figure 56. Browser launched and redirected to local custom UI app.
 -
Sign on as a demo user:
-
Name:
demo -
Password:
Ch4ng3it!
If authentication is successful, the application displays the access token issued by PingAM.
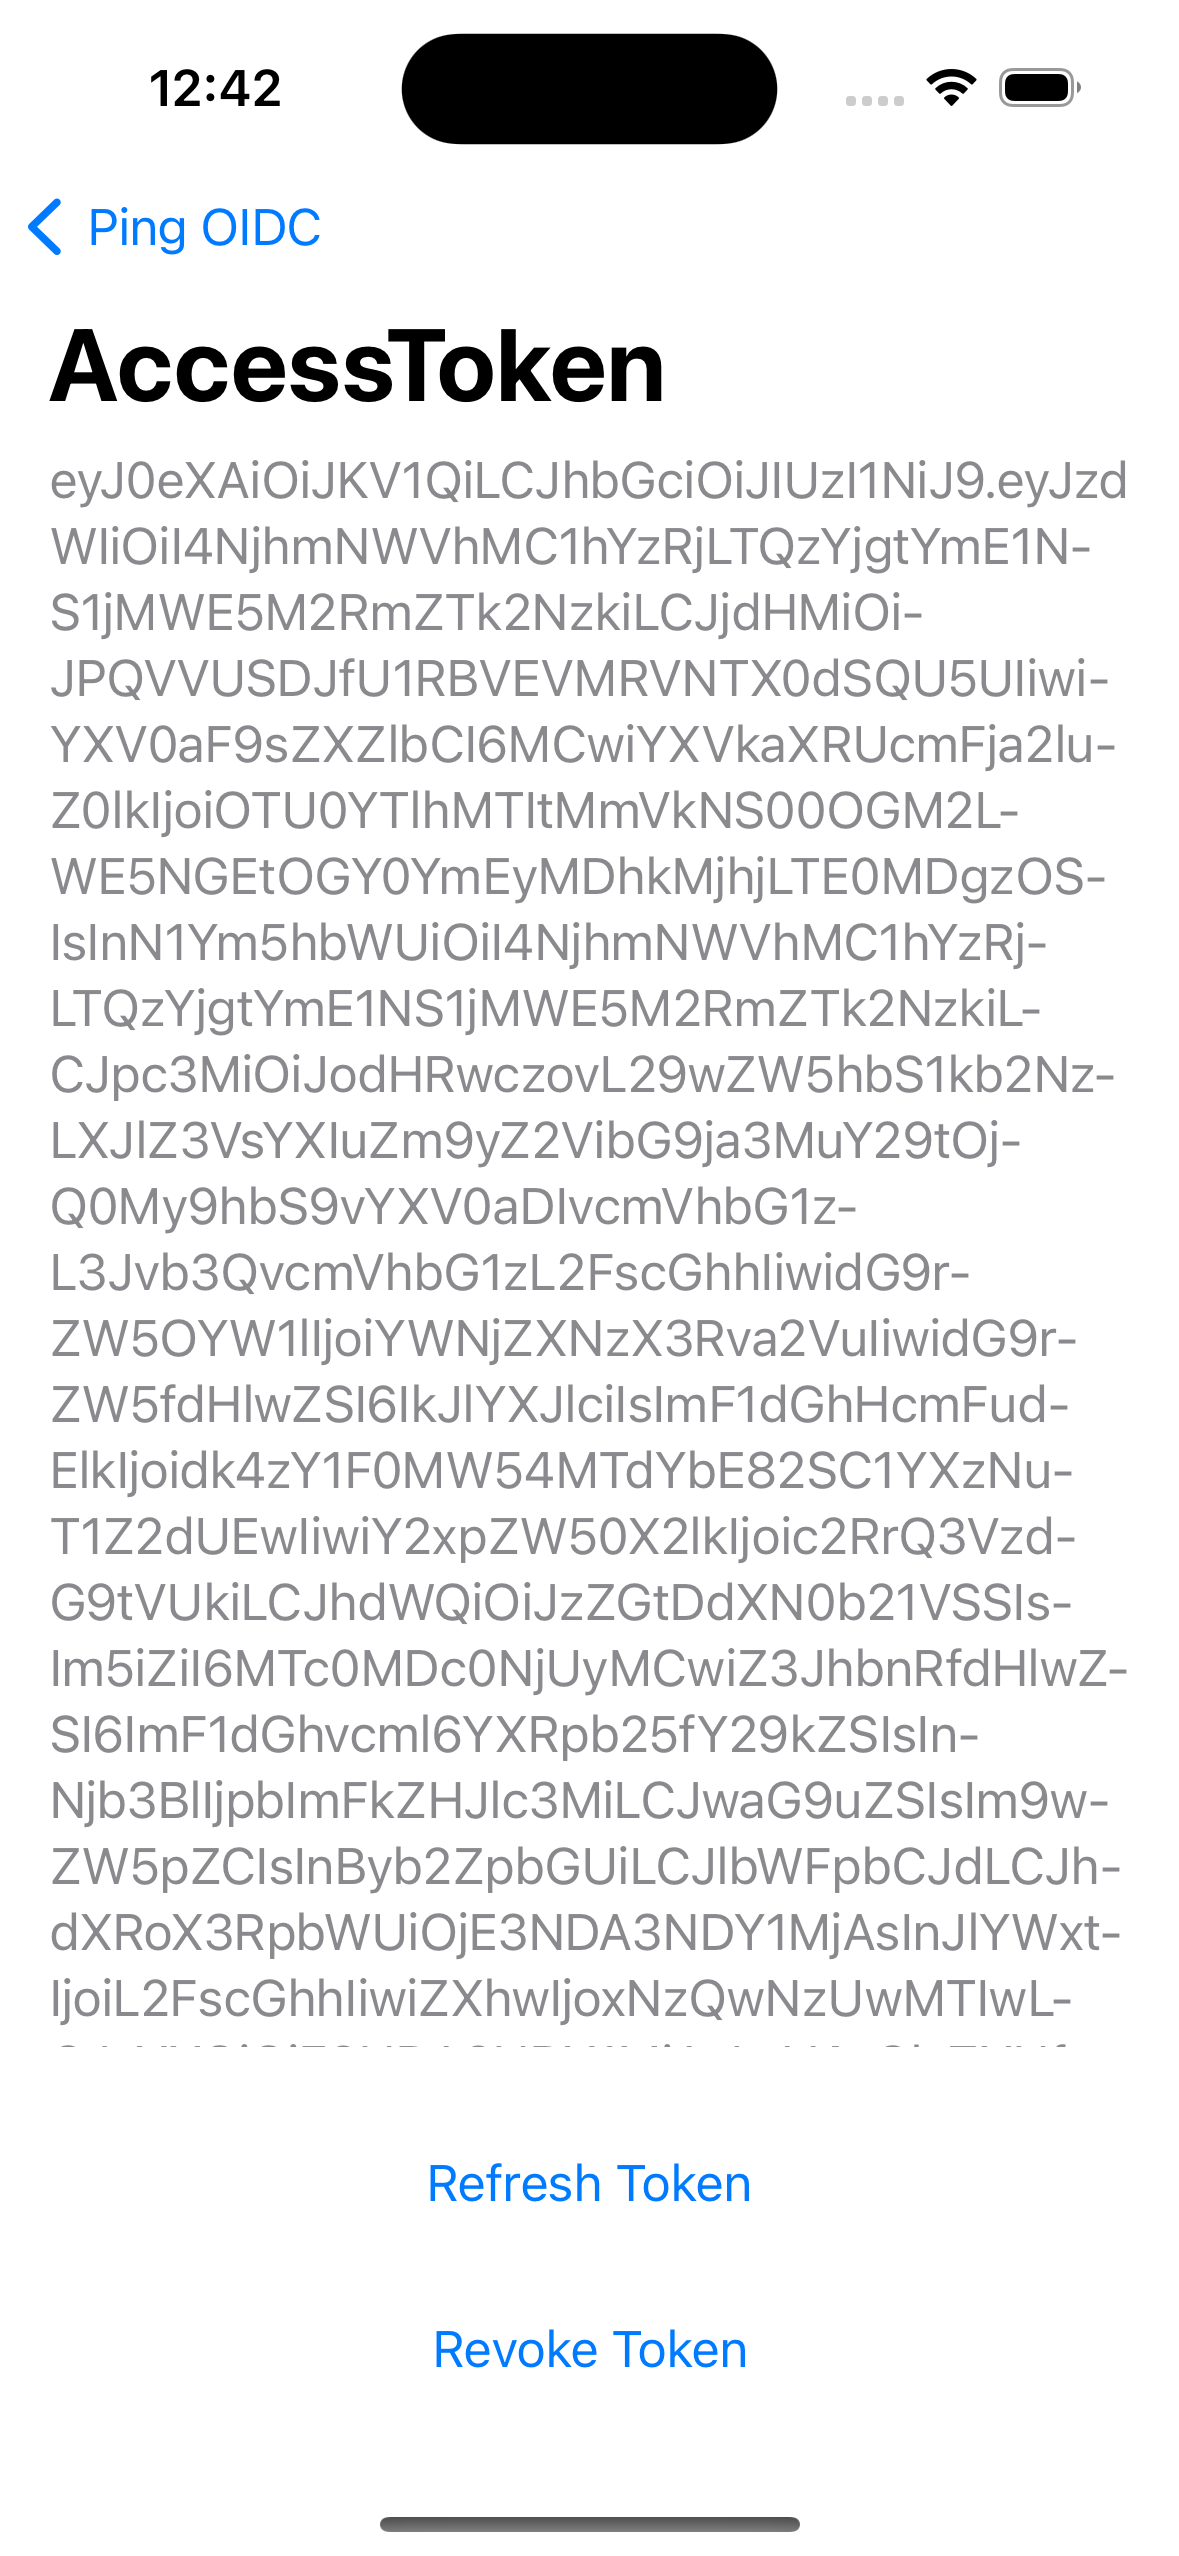 Figure 57. Access token after successful authentication
 -
-
Tap Ping OIDC to go back to the main menu, and then tap User Info.
The app displays the information relating to the access token:
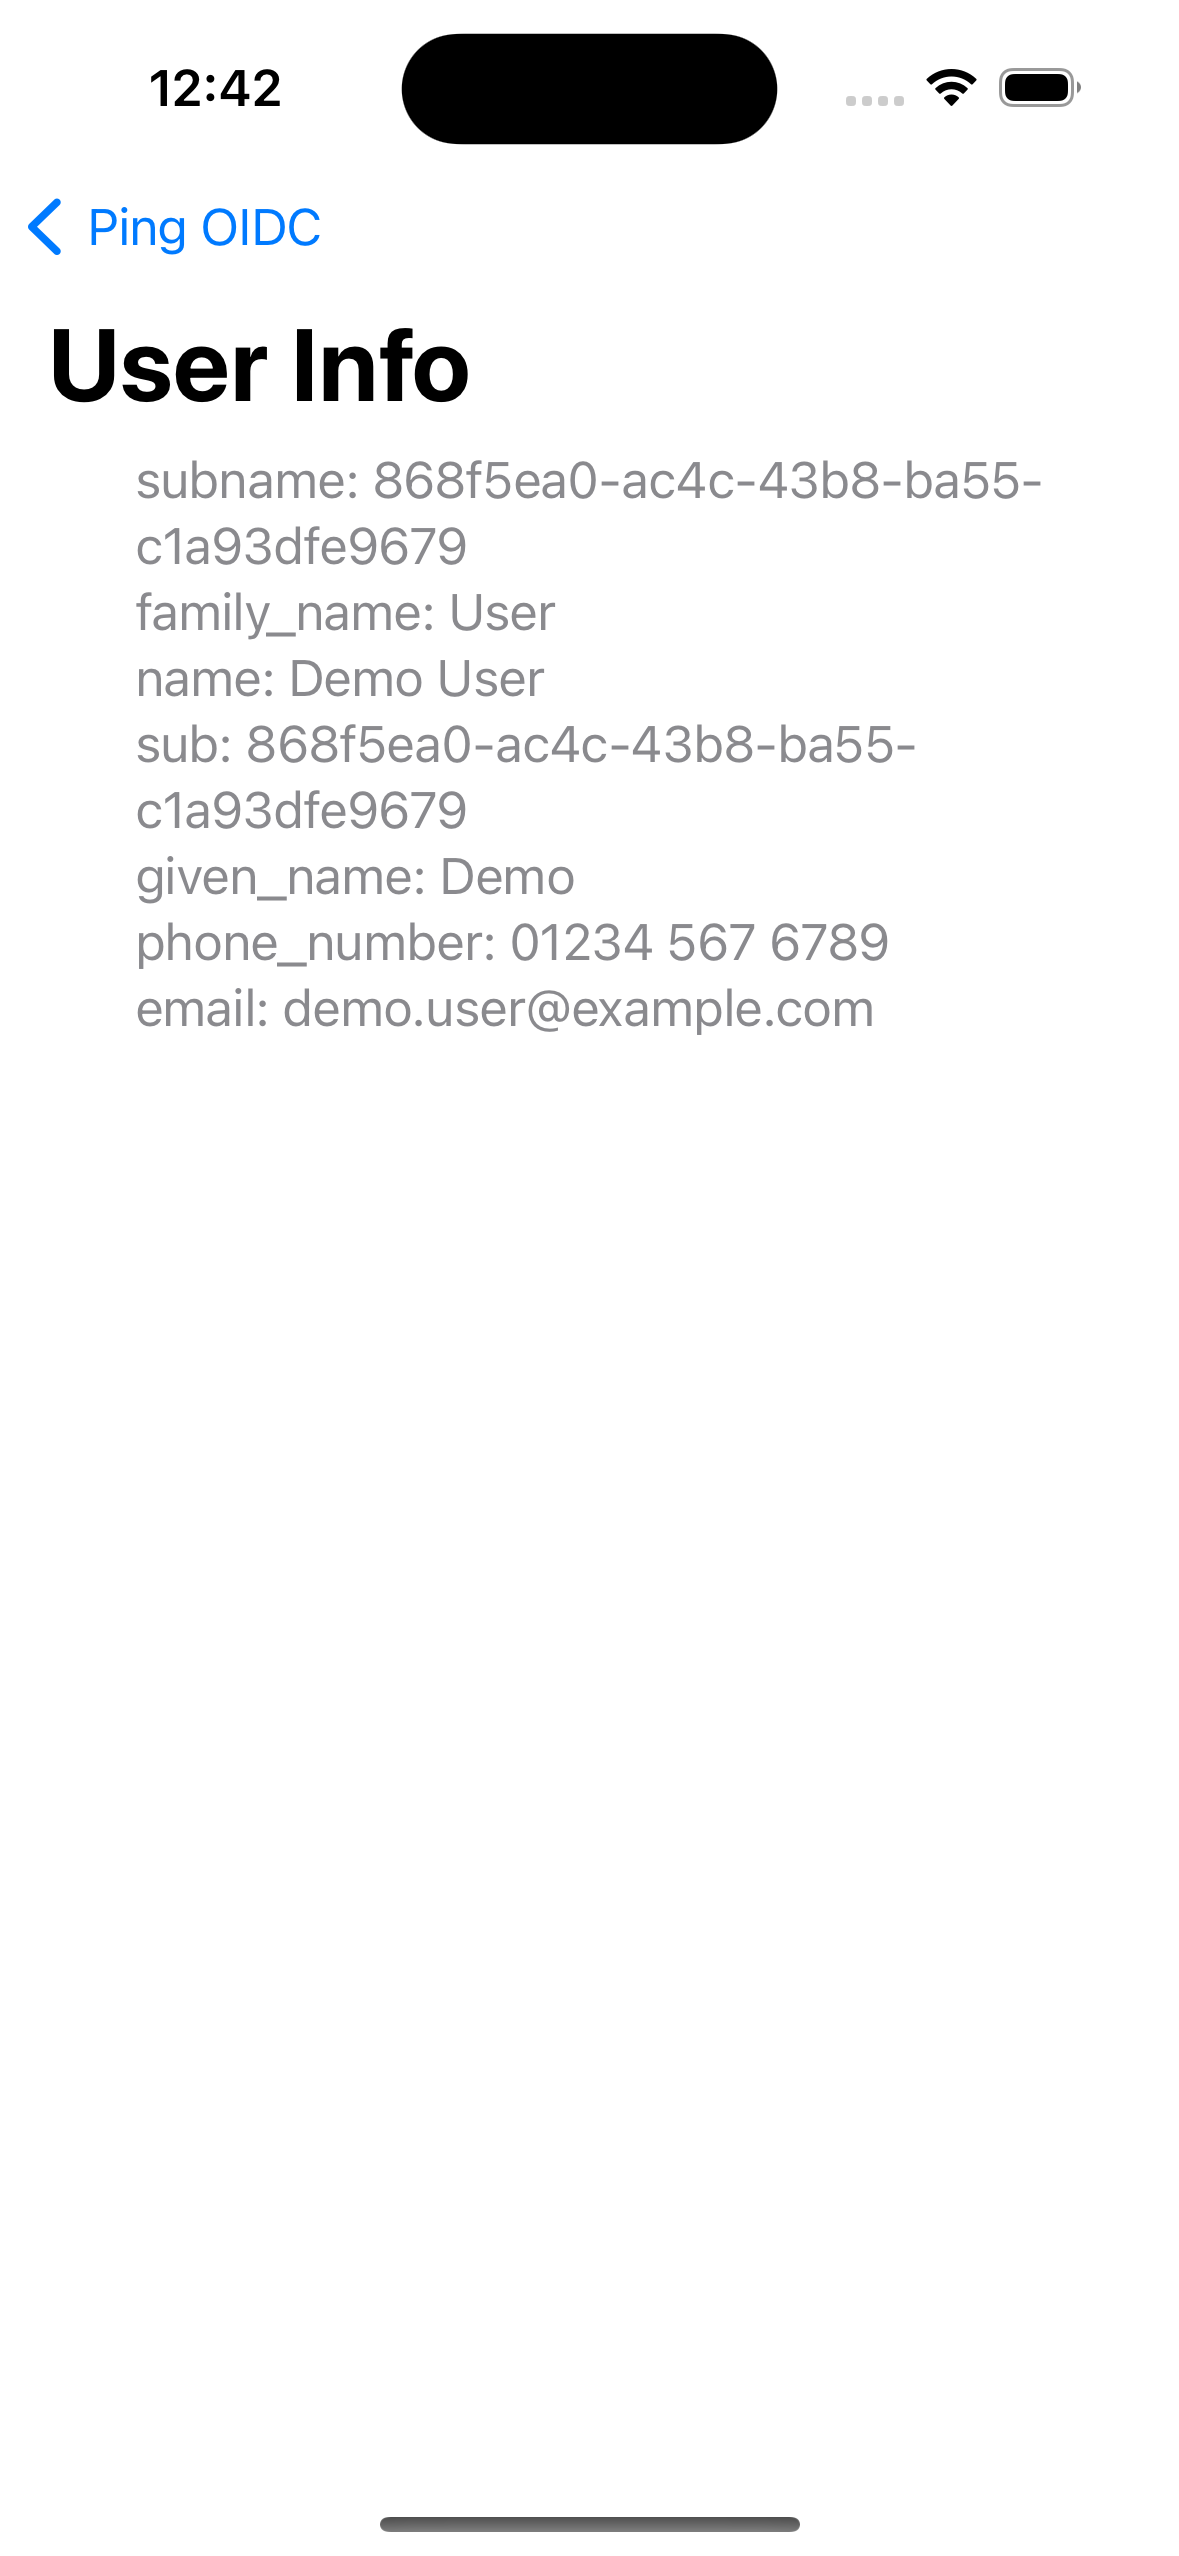 Figure 58. User info relating to the access token
 -
Tap Ping OIDC to go back to the main menu, and then tap Logout.
The app logs the user out of the authorization server and prints a message to the Xcode console:
[FRCore][4.7.0] [🌐 - Network] Response | [✅ 204] :
  https://openam.example.com:443/am/oauth2/connect/endSession?id_token_hint=eyJ0...sbrA&client_id=sdkPublicClient in 34 ms
[FRAuth][4.7.0] [FRUser.swift:211 : logout()] [Verbose]
  Invalidating OIDC Session successful