Merging branches
Merge branches to apply all of the changes made in the source branch to the target branch.
You can only merge committed branches.
|
If two branches each contain a Trust Framework or Test Suite definition that was created natively in that branch but has the same exact name and hierarchy in the other branch, the merge operation will not complete successfully. This happens because the duplicated items don’t come from the same source, making the branches ineligible for merge conflict resolution. Rename any such duplicated items in one branch before attempting to merge. |
Steps
-
In the Policy Editor, go to Branch Manager > Version Control.
-
Select the source branch.
You can select a root branches or a subbranch.
-
Click Set branch as Merge Source.
-
Go to the target branch and click Set branch as Merge Target.
When you select the source and target branch, the Merge Branches button becomes available.
-
Click Merge Branches.
The PingAuthorize Policy Editor checks for merge conflicts.
If no conflicts are found, the changes are merged from the source branch into the target branch. Your merge is complete, and you can skip the next step.
-
Resolve conflicts.
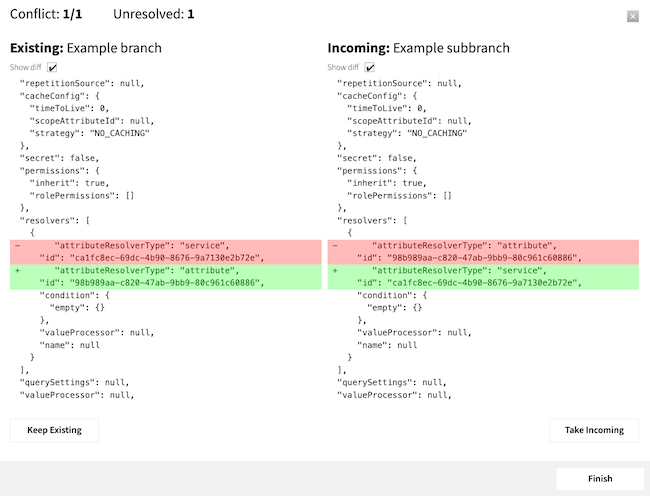
If an entity has changed in both the incoming (source) and existing (target) branches, the Policy Editor flags a conflict. For the merge to continue, you must resolve all conflicts listed in the Merge Conflicts table.
-
If you need all or almost all of the sections from one branch, click either Take All Incoming or Keep All Existing.
-
To examine conflicts individually, click Resolve Individual Conflicts.
-
Select the Show diff checkbox on the resulting screen to highlight the conflicting changes.
-
Decide which change to keep and click either Keep Existing or Take Incoming.
-
Click Finish.
-
-
-
Click Apply Merge.