Sign on (login) with self-service
Incorporate self-service into your Advanced Identity Cloud journeys to let end users create and manage their own accounts, while you control the available features.
The Ping Identity Integration Directory includes a prebuilt login with self-service journey. This sample journey lets end users sign on using a social identity provider (IdP), such as Google or Facebook, or the username and password of an account in the Advanced Identity Cloud datastore. If the end user doesn’t already have an account, they can create one using their social identity credentials.
The journey also includes progressive profiling. On their third successful sign-on attempt, end users are prompted to review their marketing preferences.
You can download the sample journey and import it into your Advanced Identity Cloud tenant. You can then modify the journey as needed to meet your requirements.
Example use case
A company wants to simplify sign-on and reduce friction by allowing end users to sign on with their Google or Facebook accounts. Additionally, they want to remind end users to review their preferences for receiving news and special offers, ensuring more personalized experiences while staying compliant with data protection regulations.
Before you begin
To implement the sample journey, you must have:
-
Tenant administrator access to your Advanced Identity Cloud development environment.
-
Social authentication configured in your Advanced Identity Cloud environment. Learn more in Social authentication.
The sample journey uses Google and Facebook for social sign-on, but you can configure and enable any of the supported social IdPs. -
A basic understanding of journeys.
-
A test end user in the
alpharealm. Learn more in Create test users and roles.
Tasks
Task 1: Download the sample journey
-
In the Ping Identity Integration Directory, go to Login with Self-Service Journey.
-
Click Download Integration to download the
Login with Self-Service Journey.jsonfile. This JSON file contains the journeys and scripts required for the authentication flow.
Task 2: Import the sample journey into Advanced Identity Cloud
-
In the Advanced Identity Cloud admin console, go to Journeys, and click Import.
-
Click either Download Backup or Skip Backup. Learn more in Import journeys.
-
On the Import Journeys page, browse to and select
Login with Self-Service Journey.json. -
Select Alpha realm - Users because the journey is configured for the Alpha realm.
-
In the Conflict Resolution section, choose how the system resolves import conflicts:
-
Overwrite all conflicts (default)
-
Manually pick conflict resolution
The progressive profile journey in the download matches the default journey included with Advanced Identity Cloud. If you’ve modified the default journey and want to retain your changes, select Manually pick conflict resolution and ensure it isn’t overwritten. -
-
Click Next.
-
Click Start Import.
-
On the Import Complete page, click Done.
-
On the left panel of the Journeys page, click Login to view the imported journeys:
-
Login with self-service journey (parent)
-
ProgressiveProfile (inner journey). Learn more about this journey in Progressive profile.
-
Login with self-service journey
The Login with self-service journey lets end users sign on using either a social IdP (such as Google or Facebook) or by entering their username and password. If they don’t already have an Advanced Identity Cloud account, end users can create one using their social identity credentials. During this process, they must create a local password and accept the current terms and conditions.
The journey includes an Inner Tree Evaluator node that links to a progressive profile journey. With this journey, end users are prompted to review and update their marketing preferences on their third successful login.
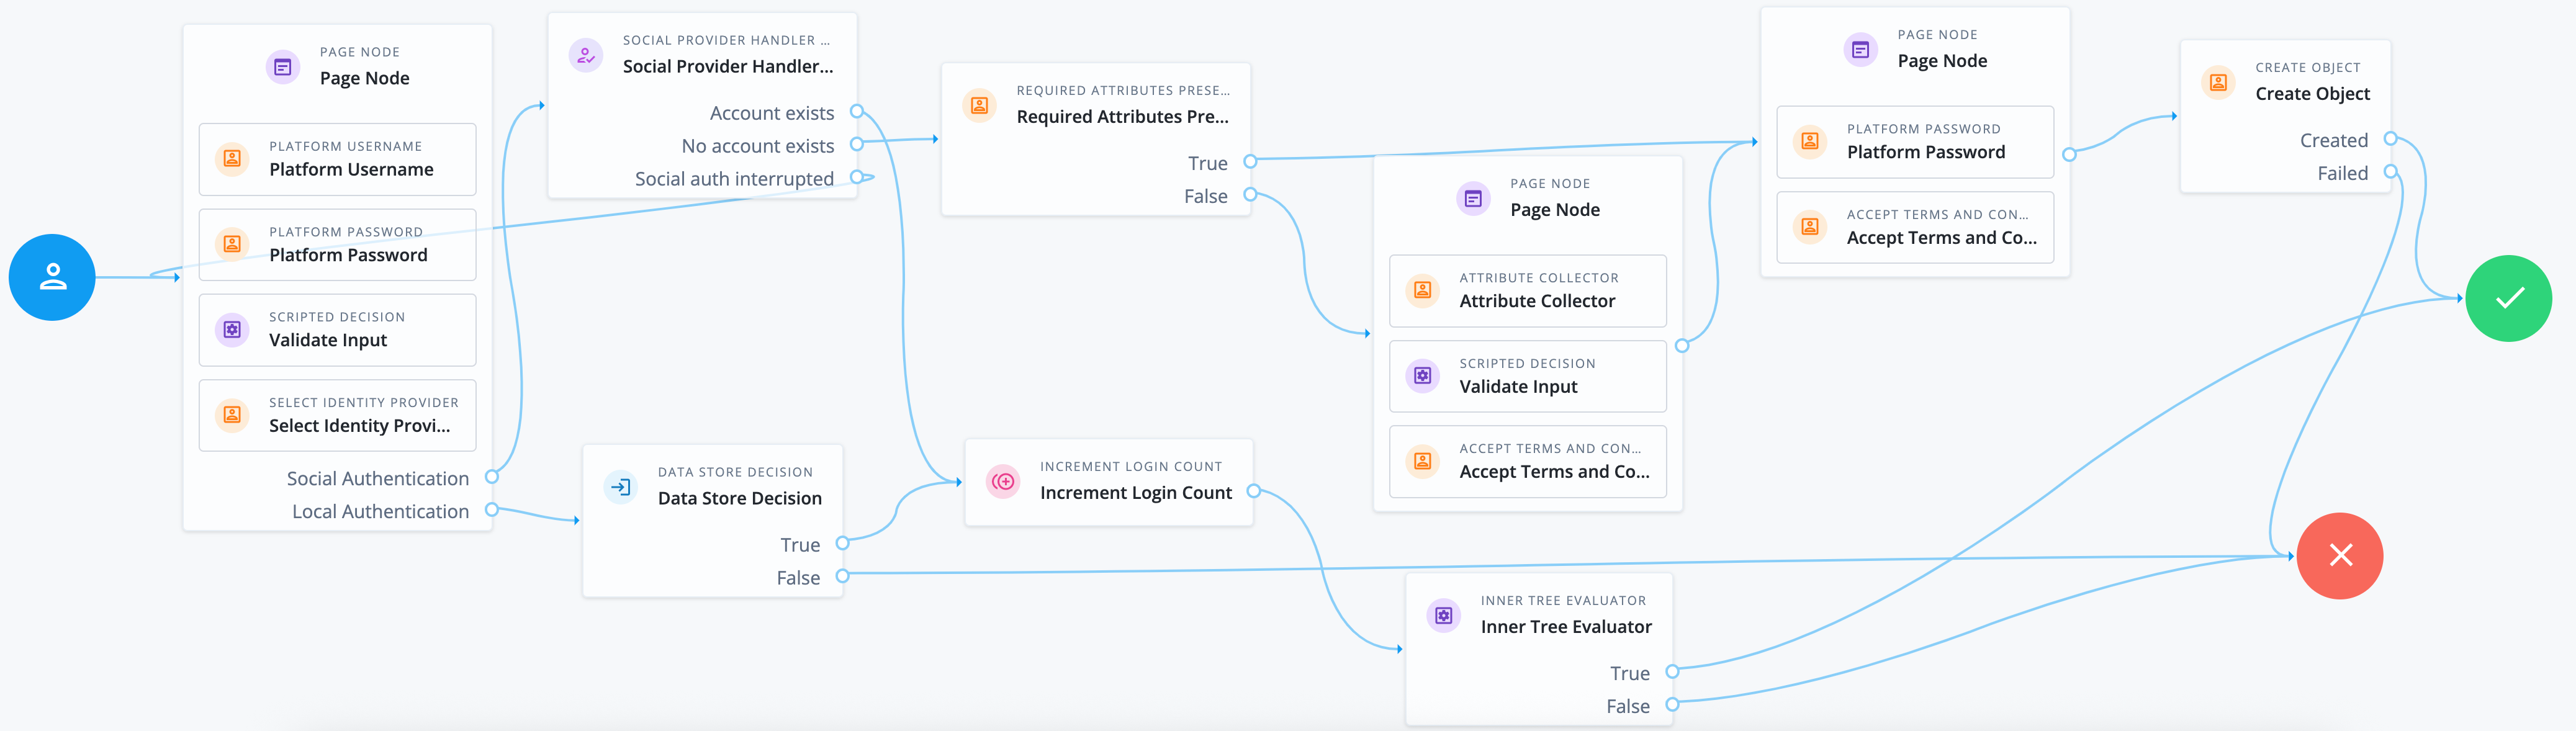
The Login with self-service journey uses the following nodes:
| Node | Description | ||
|---|---|---|---|
Combines the following nodes onto a single page for display to the user:
|
|||
Attempts to authenticate a user with an IdP they selected in the Select Identity Provider node. |
|||
Checks the specified identity resource in the underlying identity service and determines if all attributes required to create the specified object exist within the shared node state. |
|||
Combines the following nodes onto a single page for display to the user if they entered the required attributes:
|
|||
Combines the following nodes onto a single page for display to the user if they didn’t enter the required attributes:
|
|||
Checks that the credentials provided during local authentication match the ones stored in the realm datastore. |
|||
If an account already exists for the user, increments the successful sign-on count property. |
|||
Initiates the progressive profile inner journey. Learn more in Progressive profile. |
|||
Creates the user’s account. |
Validation
This validation step demonstrates multiple sign-ons by an end user using their Advanced Identity Cloud username and password. On the third sign-on attempt, the end user is prompted to review and confirm their marketing preferences.
Steps
-
In the Advanced Identity Cloud admin console, go to Journeys and click
Login with self-service. -
In the Preview URL field, click and paste the URL into an incognito window.
The Advanced Identity Cloud end-user UI displays the Sign On screen.
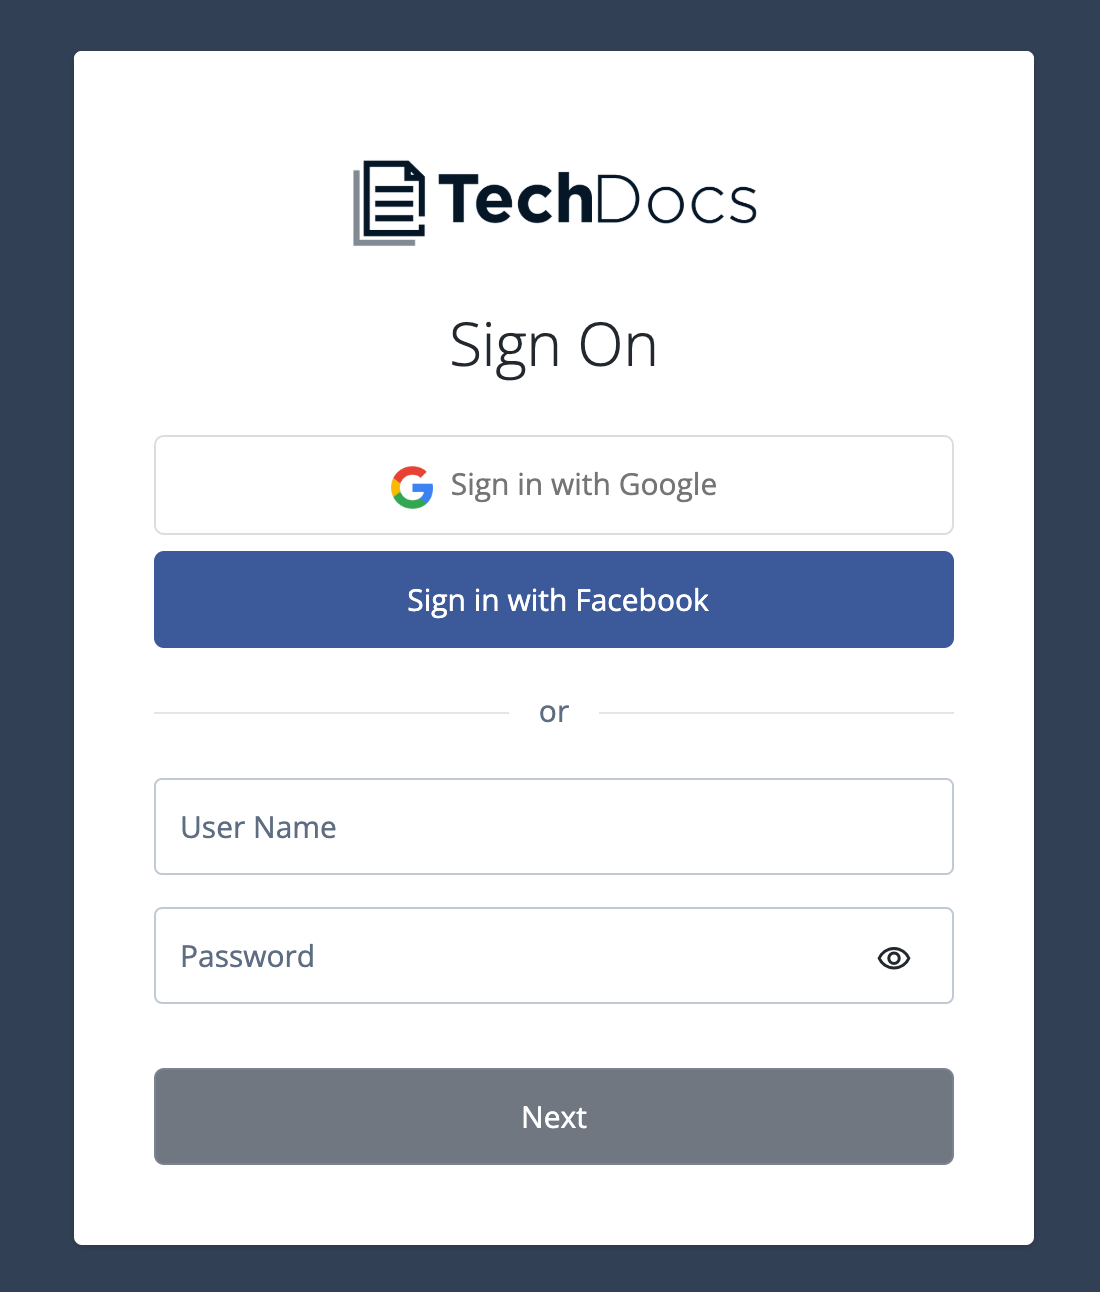
-
Enter the test end user’s username and password, and click Next.
You are signed on to the Advanced Identity Cloud end-user UI as the test end user.
-
Sign out of the Advanced Identity Cloud end-user UI:
-
Click the test end user’s name in the upper-right corner of the Advanced Identity Cloud end-user UI.
-
Select Sign Out.
The page you’re directed to when you sign out is the default journey in the realm, not the Login with self-service journey. Learn more in Journeys.
-
-
Repeat steps 1 - 4 to sign on and sign out a second time.
-
Repeat steps 1 - 3 to sign on a third time. On the third sign-on attempt, you’re presented with a page for selecting preferences for receiving news and special offers.
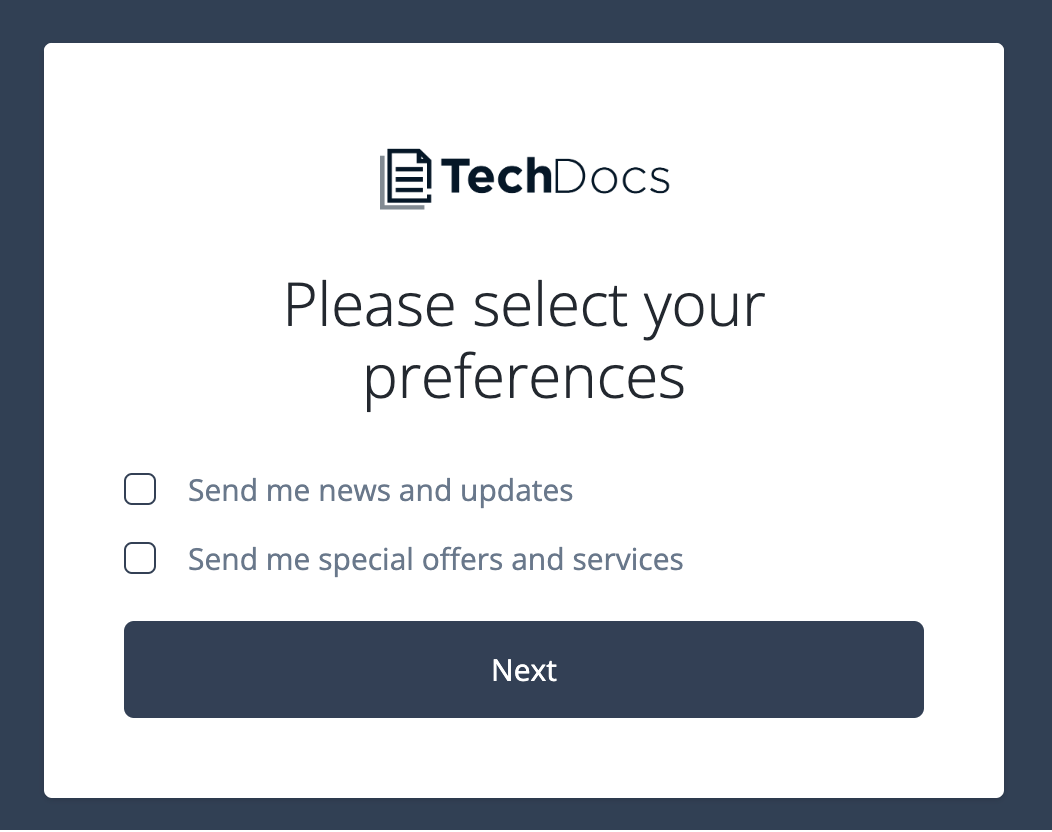
-
Select the test end user’s marketing preferences and click Next to sign on to the Advanced Identity Cloud end-user UI.
-
If the end user makes no selection, the reminder expires and isn’t displayed again.
-
If the end user selects one or more options, the preferences are set in the end user’s profile.
-