Starting an Authorize gateway instance
Follow these steps to deploy and start an Authorize gateway instance in your infrastructure.
Gateway instances evaluate policy versions published from PingOne in order to make authorization decisions. Gateway instances are distributed as containerized images, and they maintain a WebSocket connection with the PingOne platform.
|
Make sure you install gateway instances on a system that can reach PingOne and any information points that will be used for authorization decisions. |
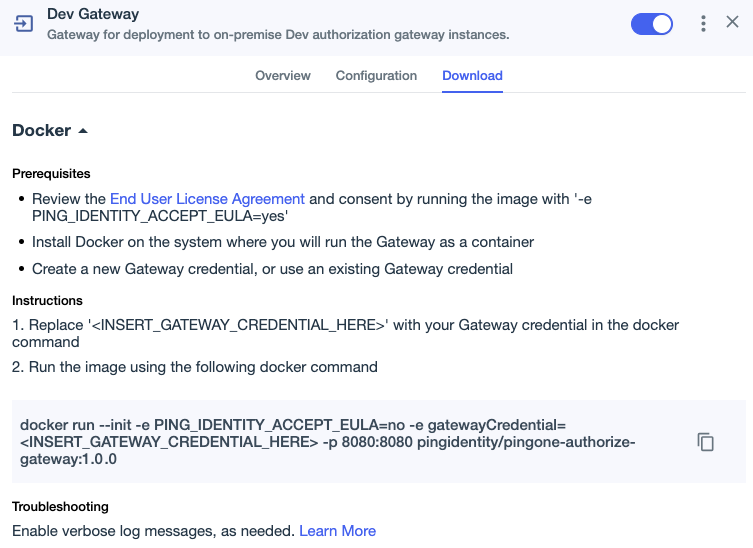
To start a gateway instance, you’ll use the Docker command that you copied earlier on the Authorize gateway Download tab.

Before you begin
-
Ensure that Docker is installed and the Docker Engine is running.
-
Review the end user license agreement at www.pingidentity.com/en/legal/subscription-agreement.html.
Steps
-
In the Docker command that you copied in step 7 of Adding an Authorize gateway, consent to the license agreement by changing
notoyes:-e PING_IDENTITY_ACCEPT_EULA=yes
-
Replace
<INSERT_GATEWAY_CREDENTIAL_HERE>with the gateway credential that you copied in step 6 of Adding an Authorize gateway.The command should look something like this (line breaks are included for readability and are not necessary in your command):
docker run --init \ -e PING_IDENTITY_ACCEPT_EULA=yes \ -e gatewayCredential=<your-gateway-credential> \ -p 8080:8080 pingidentity/pingone-authorize-gateway:1.0.0 -
Run the command.
The container starts and you have a connected gateway instance.

If the gateway instance can’t connect to PingOne, it won’t start.
Next steps
-
Start additional gateway instances in your infrastructure as needed for your organization’s use cases. You can use multiple gateway instances to help handle traffic spikes, ensure high availability by avoiding a single point of failure, and for geographical distribution.