Configuring a sign-on form
You can use forms created in User Experience > Forms to allow users to sign on with credentials, social login providers, or a magic link.
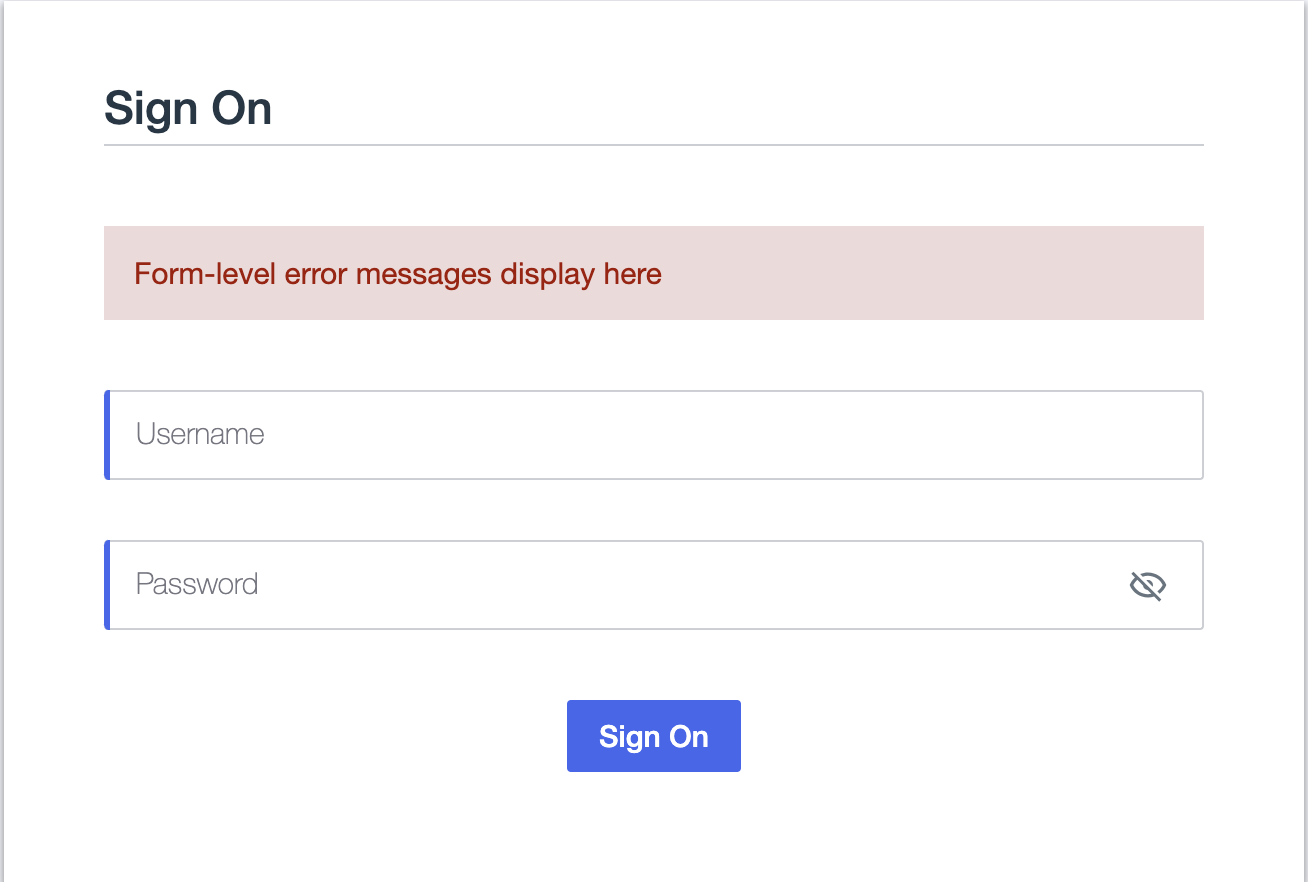
Creating a sign-on form with username and password
To configure a simple sign-on form to allow users to authenticate with their credentials:
Steps
-
In the PingOne admin console, go to User Experience > Forms.
-
Click the icon and select the Sign On template.
-
(Optional) Customize the templated form using the form builder. Learn more in Form configuration.
-
Click Save.
Result
You can now use the form in your DaVinci flow with the PingOne Forms connector.
Creating a sign-on form with social login
Before you begin
In the PingOne admin console, go to Integrations > External IdPs and configure social login providers. Learn more in Adding a vendor-specific identity provider in PingOne.
|
If you don’t have social login providers configured in your PingOne environment, the Social Login component won’t be available in the form builder. |
Steps
To configure a sign-on form with social login:
-
In the PingOne admin console, go to User Experience > Forms, click and select the Sign On template.
-
Add a Divider component and optionally add a centered label, such as
OR, to the divider. -
Add one or more Social Login components below the divider to allow the end user to authenticate with social login.
-
(Optional) You can further customize the templated form in the form builder. Learn more in Form configuration.
Result
You can now use the form in your DaVinci flow with the PingOne Forms connector.
Creating a sign-on form with a magic link
To configure a sign-on form with magic link:
Steps
-
Create an email prompt form:
-
In the PingOne admin console, go to User Experience > Forms.
-
Click and select Blank Form.
-
In the Form Name field, enter a title for the form, such as
Sign On. -
(Optional) Enter a Form Description.
-
In Fields > PingOne Attribute Fields > Contact, drag an Email field onto the form.
-
In the Form Toolbox, drag a Submit Button component onto the form.
-
-
Create a magic link prompt form:
-
In the PingOne admin console, go to User Experience > Forms.
-
Create a form with the Magic Link Prompt template.
-
(Optional) Customize the templated form using the form builder. Learn more in Form configuration.
-
-
Configure the DaVinci flow:
-
Add a Challenge connector node in your flow and create an out-of-band challenge flow pattern. Learn more about creating challenges in Challenge connector.
-
Add a PingOne Forms connector node and select the Show Form capability.
-
Toggle Enable Polling on and set it up to poll the challenge created earlier in the flow by the Challenge connector.
-
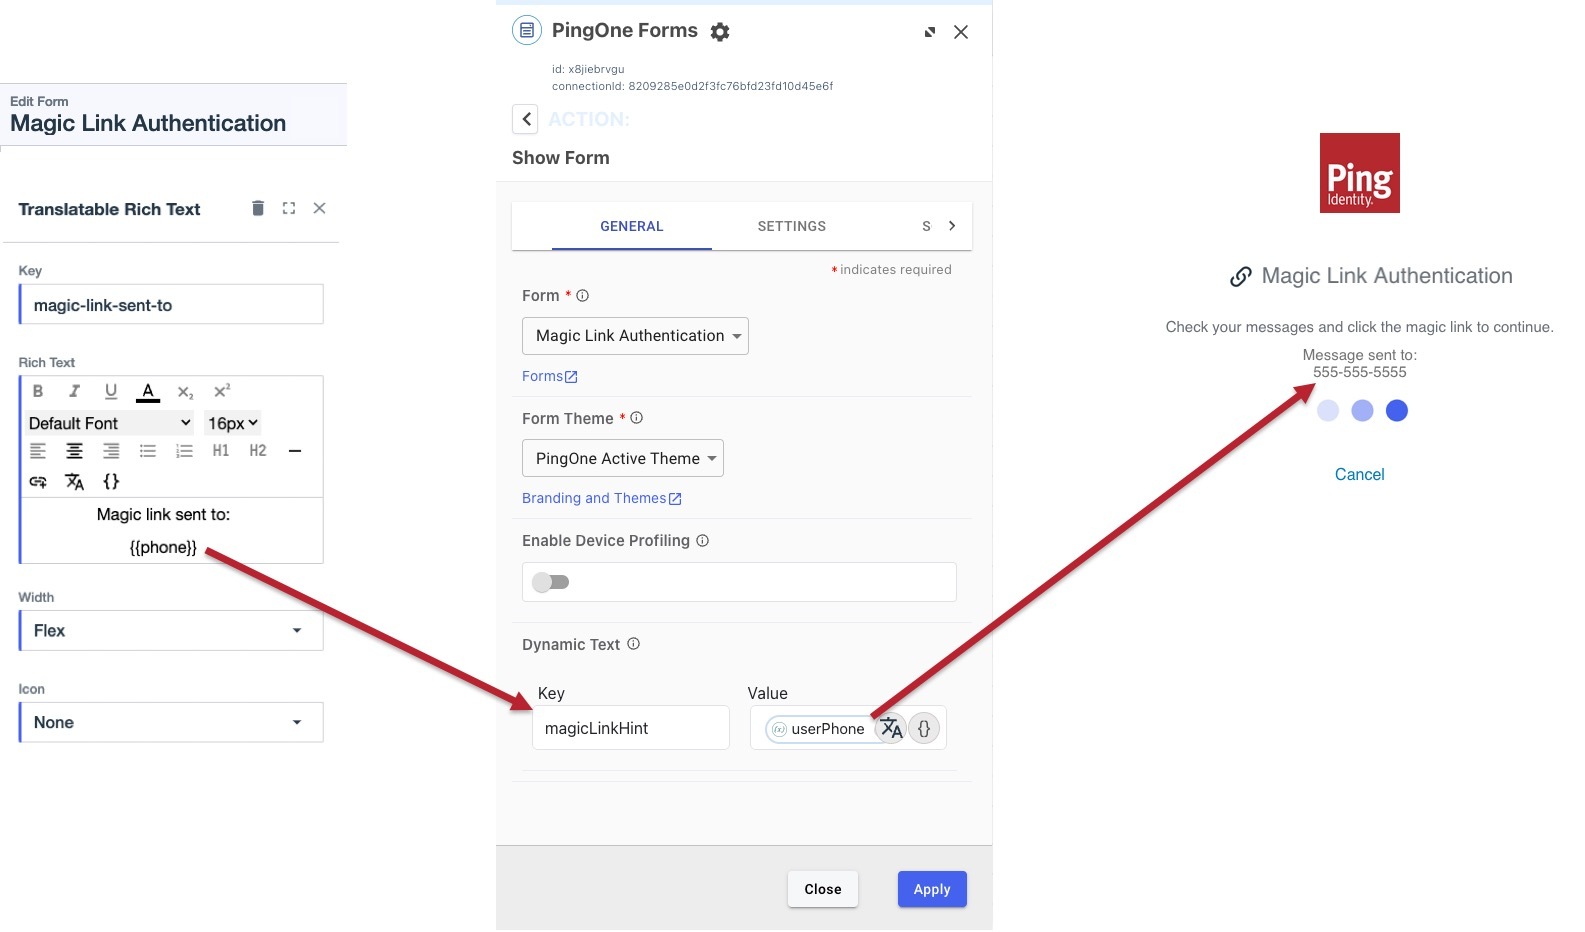
In the Dynamic Text table, map the user’s email address or phone number with the
magicLinkHintKey.
-